After the showers stopped I got out for a short walk through some local woods.

My coffee stop was noisier than normal – I had sat down on the field edge to make my coffee. A few minutes later a WI walking group of about twenty stopped along the path on the other side of the hedge. When they walked past they did comment that they must have made more noise than I did!
Sea to Summit Travel Day Pack
This bag has become my “go to” day pack, virtually since I got it. I like he simple design and with the addition of a dry sack or two it is very practical. It is large enough to hold a day load and although the shoulder straps have no padding, it has proved comfortable to carry (remembering that the weight if the load is limited by the small size).
Sea to Summit make a larger model, to which they have added an external compression/extra gear carrying system. Having somewhere to put a wet rain jacket or sling a layer when not in use is the one thing my Sea to Summit Travel Day Pack lacks. I have been thinking of adding some solution myself and this week I realised how I could make a mod that would not really add anything to the weight.
Finding the right material for the loops would be important. There is a top loop in the bag already and I was looking for some similar tape.
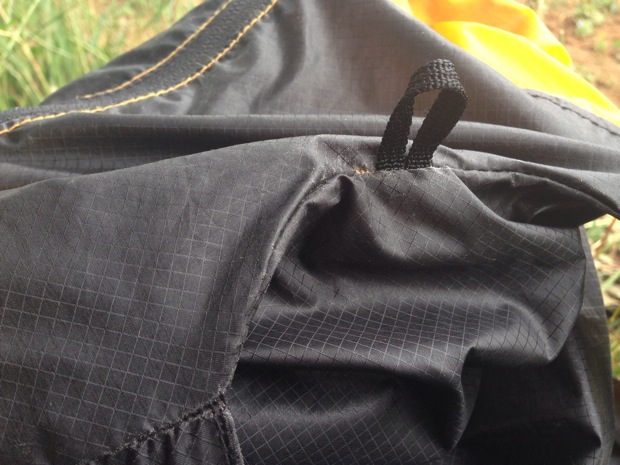
here is the loop between the shoulder straps sewn into the seam – I did not think I could copy this

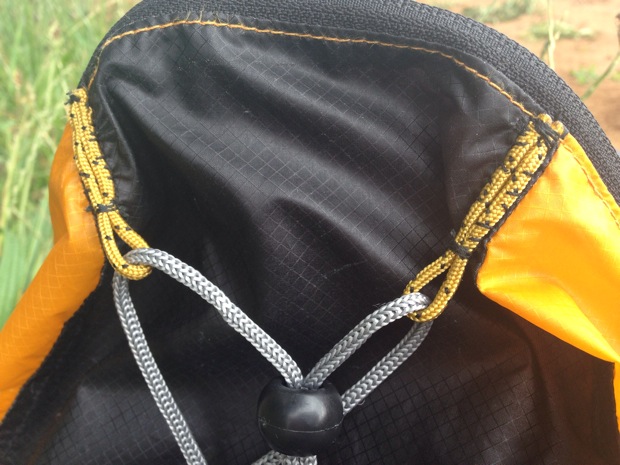
here is my Sea to Summit backpack showing the loops with a spare guy line and cord lock
One problem I thought about was where on the bag would be strong enough for any loops to be attached to? I had thought several times about opening the seams and trying to fit a loop in there but I considered that that would weaken the bag too much.
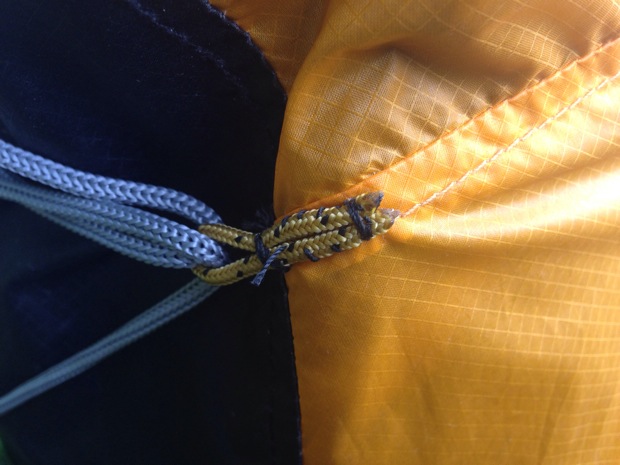
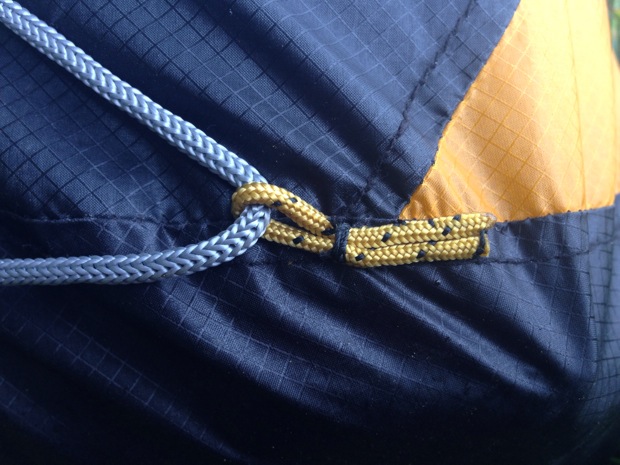
Here is my modification:
- I made the loops from the guy lines I removed from my MSR Hubba tent as it was strong light cord that I could sew.
- Having made the loops I hand stitched them onto the pack over the seams – as these were the strongest points which would take the strain when the cord was pulled tight holding something to the bag.
Here are three shots showing the different anchor points:
I have fitted a spare guy line through the loops, today, as I thought it might come in useful as spare cord, but I will replace it with some elastic cord as that will hold onto the gear, slung on the bag, much better.
More wear and tear
I have previously written about the wear and tear on the Sea to Summit backpack due to the regular use I make of it – see here. Whilst sewing these loops on I noticed some more substantial damage to the bottom of the bag. Being on the bottom, where if it fails I might loose some equipment I needed to make some repairs. I decided that a patch of Tenacious Tape would be a good fix – stuck on the inside of the bag over the heavy abrasion.
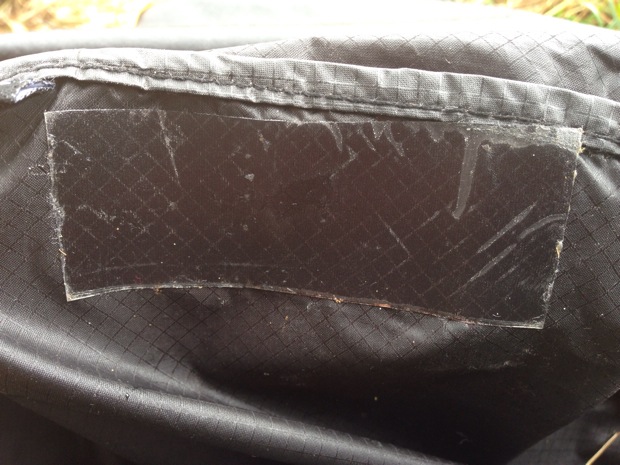
I made sure that I kept the thin nylon as flat as possible whilst I put the tape on. Watch this space to see how this works out. If (when) the bag fails I will not hesitate to buy another to replace it.
Today’s load
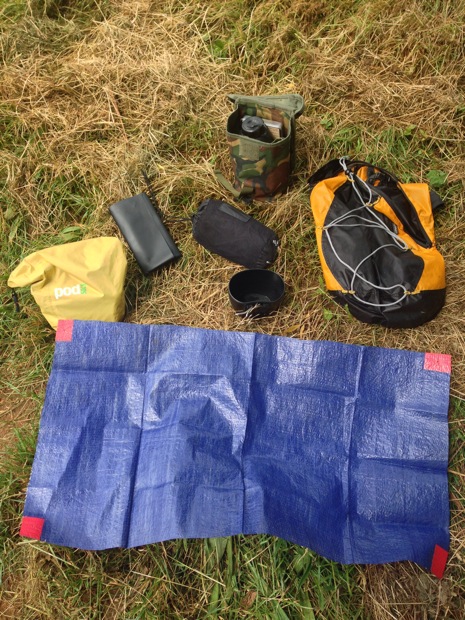
- 2l dray sack – small first aid kit, sun hat, brew kit etc.
- rain jacket
- sit mat and cut down tarp
- complete Crusader cook set including water in the 58 Pattern bottle
see the finished bag here