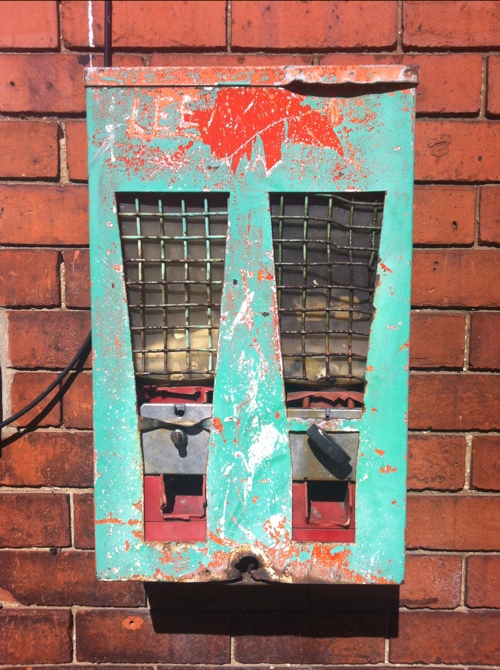
Clive

Owner and author of Clive's Blog.

Black and White Processing

20120406-171457.jpg


I took the original shot with the Pro HDR app, on my iPhone 4. I prefer the HDR (High Dynamic Range) results from this app over the Apple camera app, the results are more dramatic. However for the best results from Pro HDR two things have to be considered.

  • The camera must be held as still as possible – Pro HDR goes through a sequence of several seconds to detirmine the required exposures and then takes two shots with about a second between them. If you move too much the combined image will be ruined.
  • If there is a lot of movement in the subject you are photographing then the delay described above with spoil the results.

20120406-160911.jpg

Pro HDR

Once the picture is taken you can adjust several image qualities before saving the picture – I increased the colour saturation.

I then imported the image into Photogene2 for more editing – having tried a number of editing apps for my iPhone I particularly like Photogene2, it is easy to use, with a well thought out interface, based on “dial a function”, so you can find the effect or tool you want very quickly.

Photogene2

I cropped out a section of the original image – I included a large section of the clouds that I was interested in and less of the green field. I also cropped for the distinctive line of trees, loosing the hedge and the larger trees.

20120406-161012.jpg

I then applied the “simple black and white” effect.

Photogene2 simple black and white

To get the results I wanted, I increased the exposure and the contrast.

Photogene2 exposure and contrast

The final thing to do is to save the finished image to the Camera Roll and post it to my blog.

Note – during the process the save the intermediate images as I make changes, so if I am unhappy with any of the results I can back up and try again.

Black and White Processing Read More »

Stove Test

Jeremy and I have spent some time today experimenting with our Crusader Mug and stove using natural fuel.

20120405-140829.jpg

We have a pine tree in our garden and last week we gathered some of the fallen pine cones and dried them indoors. Today we broke one up and used it to boil about two mugs of water – to light it using the fire steel we had to add about a teaspoon of meths to the pine cone bits.

The metal lid for the Crusader Mug was essential, the plastic one that BCB sells would have been damaged by the high flames, it also kept ash that came off the fuel out of the water. (This lid was made for me by The Little Frog Group.)

For my latest lightweight cooking gear set up – click here.

Stove Test Read More »

Camping Trip pt2

It was a reasonably cold night – which was a good test for my new sleeping bag. It kept me warm but I was glad I brought my long sleeved under shirt and long johns with me to sleep in.

When I woke up it was bright and clear – and ideal for having tea in bed.

20120401-090600.jpg

20120401-090650.jpg

Preparing breakfast, with my titanium mug with lid and the coffee maker – it is a plastic tea strainer from Asda into which I pack the ground coffee and then pour hot water through. I have to take some care not to pour the water in too quickly compared to a commercial unit. However this coffee maker weighs only grams and cost me less than 20p.

I left the campsite at about 10.30am – but due to work commitments I can only walk for about 3 hours today, so the plan is to get to Southrey via the Viking Way.

20120401-105939.jpg

This image is for those people who are asking why I use Pro HDR so much? It is an unprocessed shot taken with Camera+.

20120401-110540.jpg

20120401-112454.jpg

20120401-112748.jpg

20120401-133108.jpg

lunch – small brew kit and titanium mug with lid

Camping Trip pt2 Read More »