Outdoor Gear

MSR Hubba Tent – test

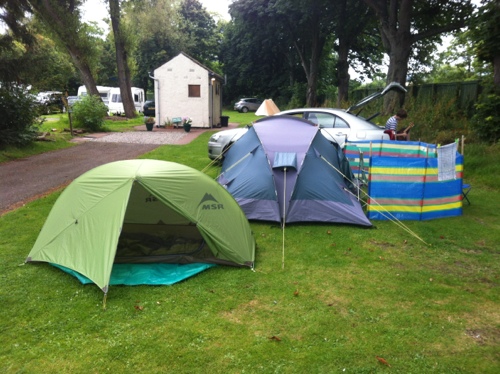
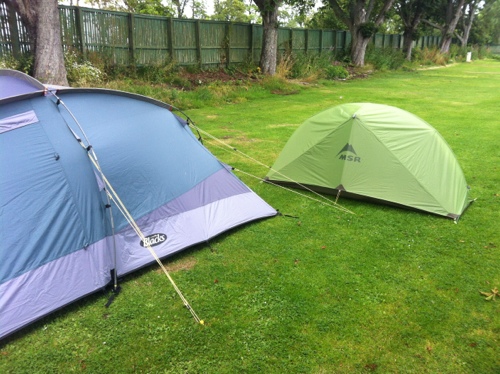
I put the Hubba tent up again last night – and slept in it to try it out. That left Jeremy on his own in the other tent, which he thought was alright, and as I could hear him texting with Sakira late into the night, he must have been pleased to get rid of me.

20120824-073938.jpg

20120824-074012.jpg

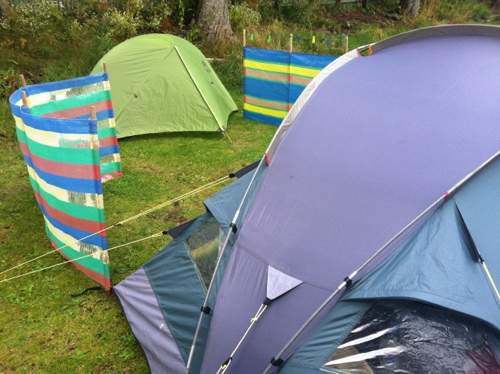
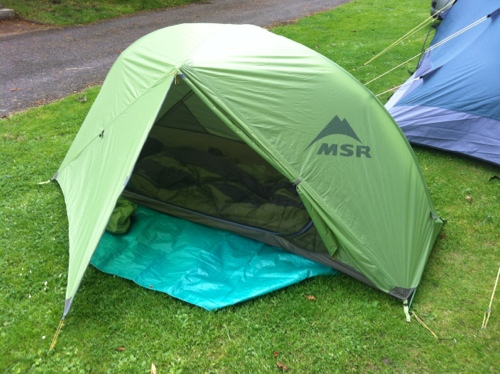
The above shot shows the profile of the tent, with the back pulled out, the large porch and the sleeping area. I added the high visibility guy at the back so I will have somewhere to hang my tea towel etc to dry. It is attached using a lightweight plastic carabiner, so it can be removed.

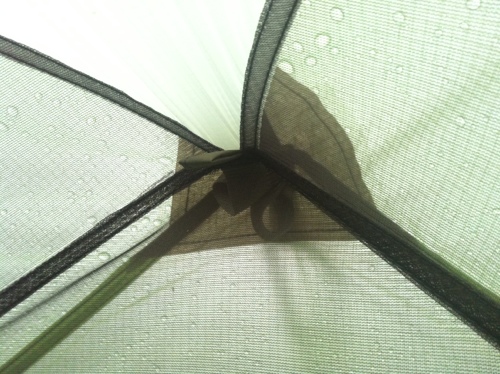
The inner tent is made of netting so you get a good view of the inside of the flysheet. The rear of the flysheet is lifted higher than you would expect to aid with ventilation. To keep the weather out the ground sheet comes up much higher at the back.

20120824-075536.jpg

looking out the rear of the tent – the ground sheet edge is higher than my three season sleeping bag

As with nearly all one man tents the condensation overnight is quite high. The the inside of the flysheet was very wet when I got up but the inner tent was dry.

There is a two-way zip on the flysheet door to help with ventilation – and I left the top unzipped by about 20 cm, but the gap this left was small, so I am not sure if it helped much,

Inside, for a small tent, there is plenty of room for one person and some equipment – on a backpacking trip the main pack will have to stay in the porch. I could comfortably sit up and move around inside the tent, easily reaching my kit stored at either end. When backpacking I carry a small tarp (1m square) this will be useful to have in the porch to extend the living space. I will probably cut the tarp to fit the porch space.

20120824-081347.jpg

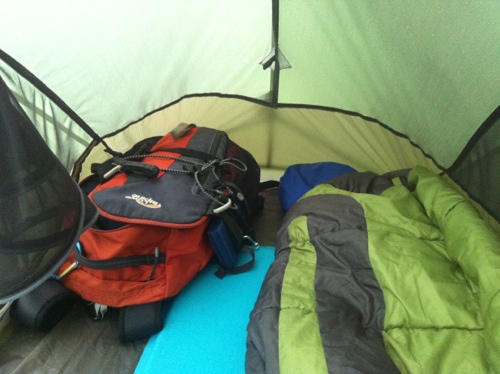
my 22l daypack at the foot of my bed – the full length sleeping mat is well clear of the end of the tent giving plenty of room for tall people or equipment

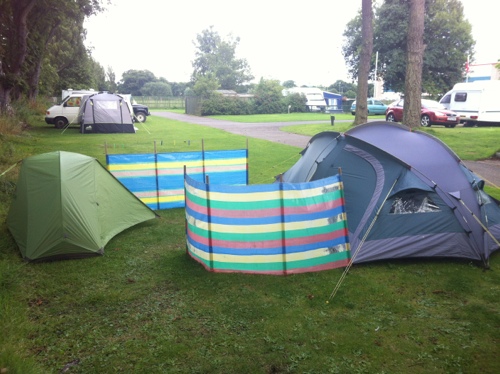
The above shot may give the impression there is room for two people in the Hubba – there is not, it is one person wide.

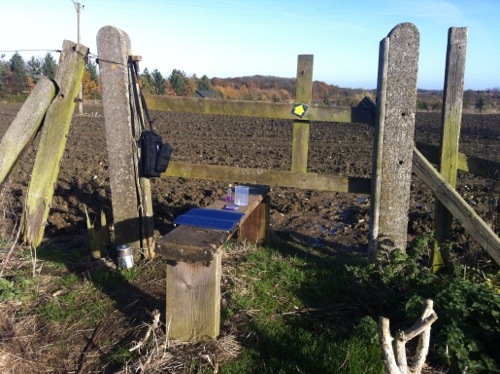
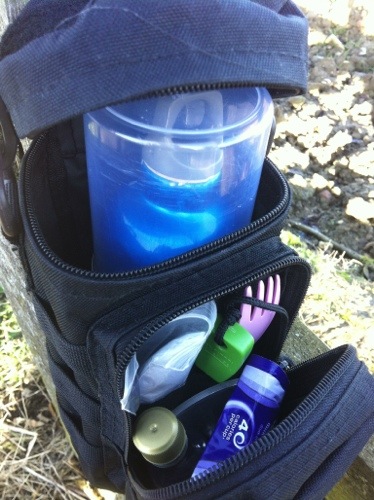
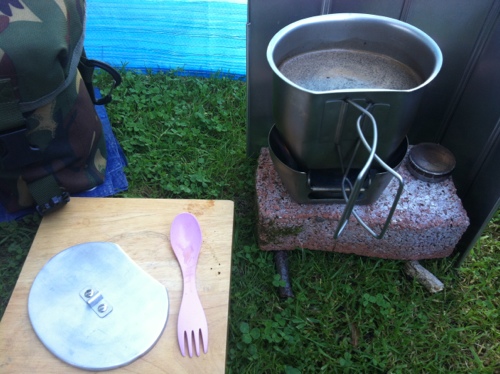
The porch is very deep making it a long reach to close the door zip right to the bottom, but giving plenty of useable storage and living room. I brewed my early morning coffee in the tent, taking care to light the stove on its lowest gas setting and with the mug already on the stove.

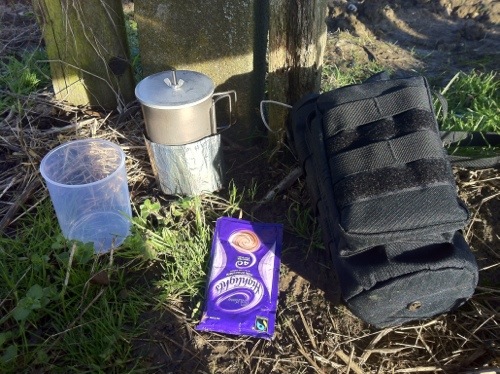
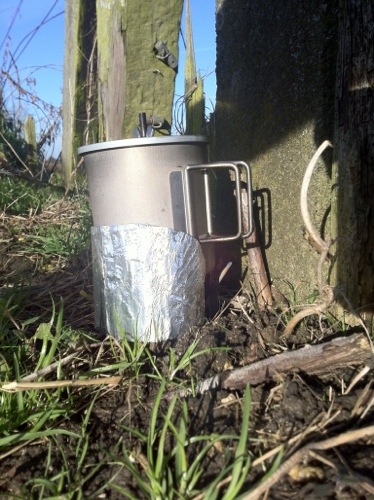
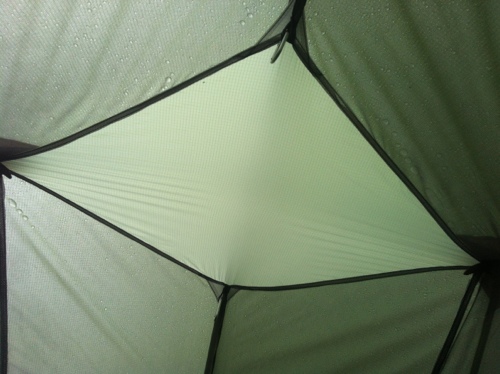
These shots show the amount of headroom in the porch, allowing for cooking inside, if the right equipment and care is used. I fitted my MSR Pocket Rocket stove to a 100g gas bottle to lower the height and set it back into the highest part of the tent without getting too near to the inner tent. The inner tent door was securely fastened back whilst using the stove and the area around the stove kept clear.

20120824-082601.jpg

20120824-082645.jpg

20120824-082719.jpg

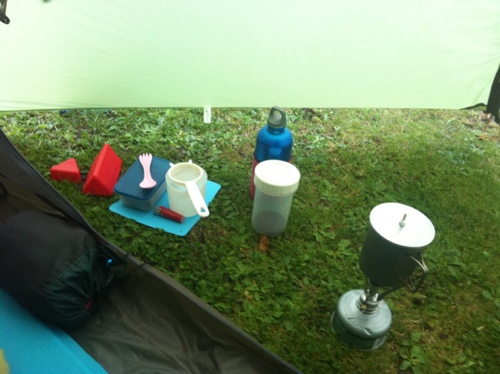
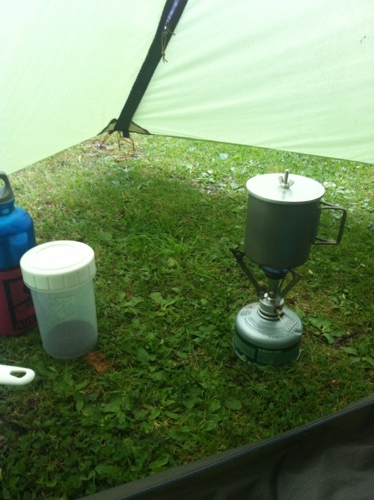
the above shots show the room in the porch and my MSR stove set up using my MSR titanium mug with kid

I would not use my meths stove inside the closed porch

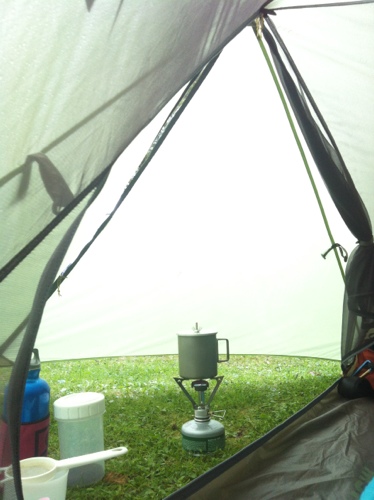
It had been raining for most of the night and was still raining whilst I made the coffee and the Hubba kept me and everything inside dry. I was unable to conveniently use a stove in my old backpacking tent due to its wedge shape – the domed, high headroom of this tent addresses that problem for when I am backpacking in bad weather.

I unzipped the double door zip to give extra ventilation whist making the coffee.

20120824-083336.jpg

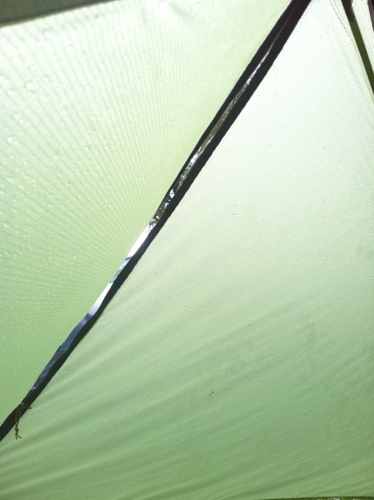
The tent is made to the highest standards, I could not find any seam stitching faults. All the strain points are well reinforced without adding to the weight too much.

20120824-083630.jpg

20120824-083706.jpg

The light green colour is discreet for wild camping but still allows for plenty of natural light to get in.

20120824-084102.jpg

you cannot miss that this is an MSR product

So after one night (in the rain) I am very pleased with the MSR Hubba, I had a comfortable dry night in it – and it addresses the issues with my old backpacking tent:

  • small packed size and light weight
  • a porch suitable for using a stove in
  • bad weather design
  • enough living space
  • good headroom to sit up and move around in

The down side with all small tents is the condensation – I will have to see how this works out when I am backpacking and having to pack the flysheet away wet in by rucksack for the day.

MSR Hubba Tent – test Read More »

New Backpacking Tent – MSR Hubba

Just before coming away I bought a new tent – a lightweight, one person MSR Hubba. Because the tent can be erected without pegs, I had put it up in our living room and in a friend’s conservatory but today was the first chance to put it up outdoors and pegging it out.

20120819-202304.jpg

20120819-202339.jpg

20120819-202359.jpg

It came with six light alloy stakes but I have replaced these with eight titanium hooked pegs. It takes just six pegs to put the tent up, the extras are, a second peg for the door and one for a rear guy line. This guy was not supplied with the tent but I am going to add one for stability in windy conditions and also to use as a line for drying equipment on.

Here are the weights in grams – total is 1374g.

20120819-205558.jpg

This is much lighter than my previous backpacking tent (a Coleman Bedrock II) and it packs much smaller. This packed size was the most important reason for changing my tent as it now gives me more useable volume in my Golite Jam backpack, for food and equipment on multi-day trips.

Compared to the wedge shaped Coleman tent it has more useable space as the porch is larger, although the floor area in the inner tent is smaller. However with the arched shape I can comfortably sit up in the centre of the tent and safely use my MSR Pocket Rocket stove, on a 100g gas bottle, in the shelter of one on the doors – and if the wind changes direction (as it did a few weeks back when I was camping at Dunbar) I can use the other door.

The tent is simple to put up – but I was doing it in no wind – on a windy mountain it would be a bit more “flappy”!

I was going to sleep in it tonight but after getting the tent up there were a number of strong rumbles of thunder, so rather than have a wet tent to deal with in the morning, I packed it away and will use it overnight, later on this holiday.

There was a little light rain, not a storm, just enough to make things damp but it stopped after twenty minutes, so I could have used the new tent.

New Backpacking Tent – MSR Hubba Read More »

New Equipment

When I was in Wales the other week I bought a drinking tube kit for my roll up, 1l Platypus bottle. I have a Camelbak water bladder but I have had trouble with it going mouldy between trips – even though I have a Camelbak cleaning kit and hanger, which I use and I take care when drying it out. I now store the Camelbak with water in it and the air squeezed out. On the other hand I I have had no trouble with the roll up Platypus bottle – again I take care to dry it out before storing it away. The drinking tube kit will convert any Platypus roll up bottle into a bladder system – I can use it as a drinking system whilst on the trail and easily use it as a water bottle at the campsite.

20120812-101626.jpg

Next month I am planning a wild camping trip to The Old Man of Coniston – when I will need to carry the water I will need for overnight – so I have bought another Platypus, a 2l version for extra water storage.

20120812-102622.jpg

Here it is stored in my GoLite Jam backpack.

20120812-102859.jpgl

New Equipment Read More »

Walk to Potterhanworth Wood

I went for a short walk across the fields to Potterhanworth Woods – taking a short break there for some coffee before heading home and beating the thunder storm.

It was a chance to photograph the last of the poppies as they fade away and the fields before they are harvested.

20120805-151426.jpg

20120805-151756.jpg

click on the above image for a larger version

20120805-152109.jpg

20120805-152229.jpg

20120805-152614.jpg

click on the above image for a larger version

20120805-152855.jpg

20120805-153627.jpg

20120805-154137.jpg

20120805-155227.jpg

St Andrew’s Church Potterhanworth

20120805-155401.jpg

click on the above image for a larger version

No backpack or stove today – I took a flask and instant coffee in a Molle water bottle case on a shoulder strap and carried the essential waterproof jacket in the back pocket on my Rohan vest. I had plastic sheet to sit on, which when rolled up slipped into the Molle loops.

Brew Kit

I tried some Kenco Millicano coffee today – in individual sachets – and it was OK, even Richard who is “particular” about his coffee thought it was alright.

Walk to Potterhanworth Wood Read More »

Brecon Beacons 4

It was a wet start to the day so I made my early morning tea inside the tent using the MSR gas stove.

20120624-173858.jpg

Before lighting the stove I checked it was placed where it would not wobble and I opened and tied back the inner tent door. I lit the stove with the valve open only just enough the give a very low gas flow, so it did not flare and only turned it up enough for the flame to be under my mug and not raging up the sides. Even on this low flame it took just over two minutes to boil a mug of water.

Rhandirmwyn Campsite

By the time we got out of our tents and had breakfast, which included fresh brewed coffee, the rain had stopped and the day promised to get brighter.

20120624-174744.jpg

20120624-175009.jpg

Towy Valley

20120624-175549.jpg

Llyn Brianne Hydropower Station, Dam and Reservoir

20120624-175850.jpg

20120624-180007.jpg

20120624-180041.jpg

20120624-180141.jpg

20120624-180332.jpg

20120624-180432.jpg

Brecon

20120624-181253.jpg

20120624-181335.jpg

20120624-181404.jpg

On the journey down we had terrible coffee at a motorway service station – so on the way home we stopped in a layby and brewed fresh coffee for ourselves.

20120624-181637.jpg

And then we went home.

Brecon Beacons 4 Read More »

Brecon Beacons 3

Rhandirmwyn Campsite

There is no mobile coverage at all at this campsite – so no overnight blogging.

We got the tents up and sleeping gear laid out before the light rain set in. I cooked my meal on my titanium meths stove using my titanium mug with lid, to keep the rain drops out. I put the burner just outside the tent door, where it got some shelter but did endanger the tent.

20120624-131923.jpg

20120624-132331.jpg

Sausage mash and onion gravy

20120624-132754.jpg

gone!

The Richard’s cooked on gas under the shelter of some trees.

Here is RAP’s fajitas.

20120624-145132.jpg

20120624-145231.jpg

20120624-145414.jpg

RKW had chilli sausage with cous cous – with burnt bits as he had the gas up to high and did not stir the sauce enough – but it tasted fine.

20120624-145642.jpg

This was followed, for all of us, by chocolate and bottled beer by the river.

We had some dry weather but by 8.30pm the rain was heavy enough that we retired to the tents.

20120624-150910.jpg

20120624-160112.jpg


10Ah Power Bank Charger

This was a new item of equipment for this trip – this battery pack should give me about 4 to 5 charges for my iPhone, allowing me to use it for extended periods away from mains electricity.

It is about the size of a small external hard drive – I am storing it in a light padded case that used to hold such a drive – and weighs about 250g, so it is convenient for carrying on lightweight backpacking trips. For extra protection I plan to use a Aquapac 100% waterproof case.

20120624-162423.jpg

20120624-162526.jpg

The Power Bank is easy to use – I charged it, overnight, using a charger I had in the office that came with an HTC phone I no longer use. The Power Bank does not come with a charger. The Power Bank has overcharge and shortcircuit protection. If you press the power button four LEDs light up indicating how much charge remains in the unit.

To use plug your your device in using one of the supplied plugs and USB cable or just plug in your own device USB cable – I used an extendable iPhone/iPod cable.

I have used my iPhone all weekend and have charged it using the Power Bank – as I am writing this I have it plugged in charging/powering the iPhone – and about 50% of the power remains.

20120624-165727.jpg

The phone usage was much higher than on a backpacking trip as I was online, reading from and playing music via the Bluetooth and car audio system for much of the car journey – and I used the iPhone in the tent last night again to read an ebook, play “Pocket Planes” and listen to an audio book for a longer time than normally because of the rain.

With normal backpacking use and careful power management on the iPhone this charger should allow me to be away from mains power for four of five days, including charging my iPod. To get a better estimate of the charging capacity I will test it when at home.

20120624-170426.jpg

Brecon Beacons 3 Read More »