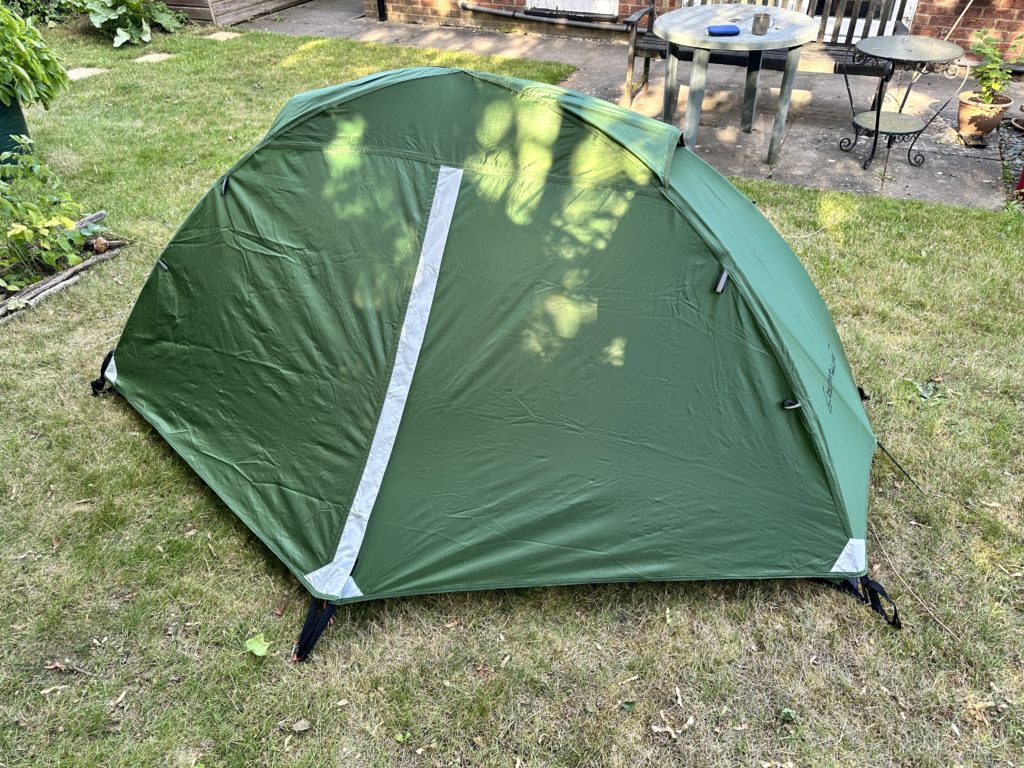
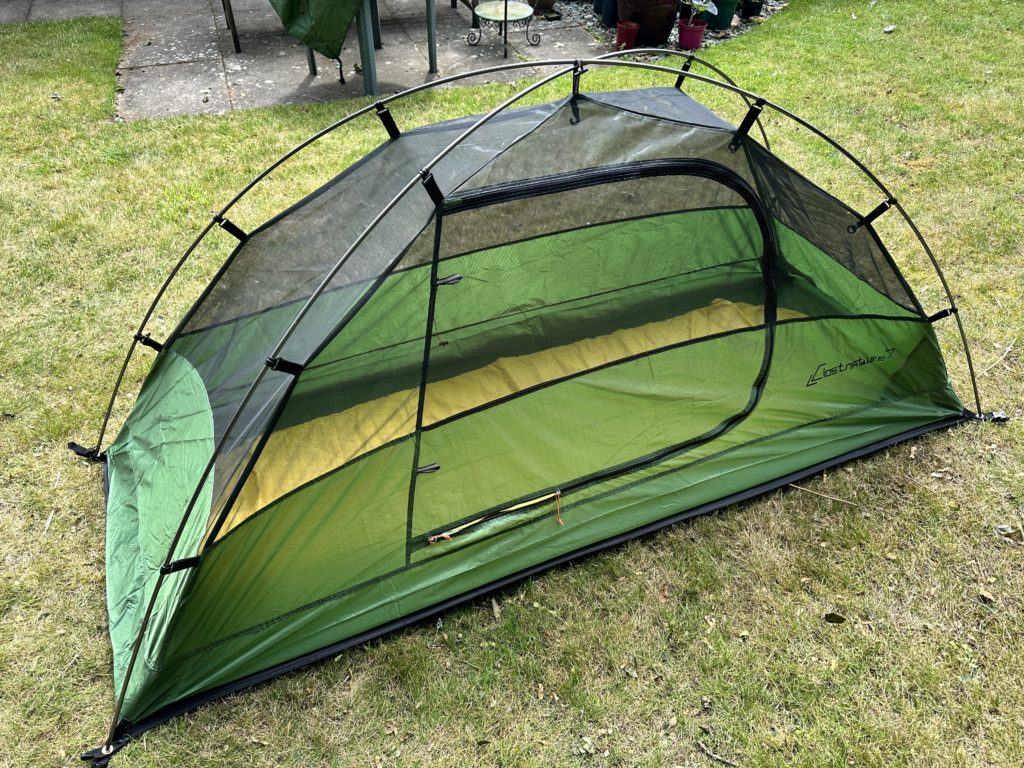
The new tent is a Lost Nature one man tent from an Amazon shop – where they named it “Clostnature”, because of the logo printed on the tent!
Not as hi-tech as my MSR but as the seam sealing tape has failed completely on that – and MSR could not help – the new tent is waterproof which makes it far more useful.
Including the footprint I got change out of £90.
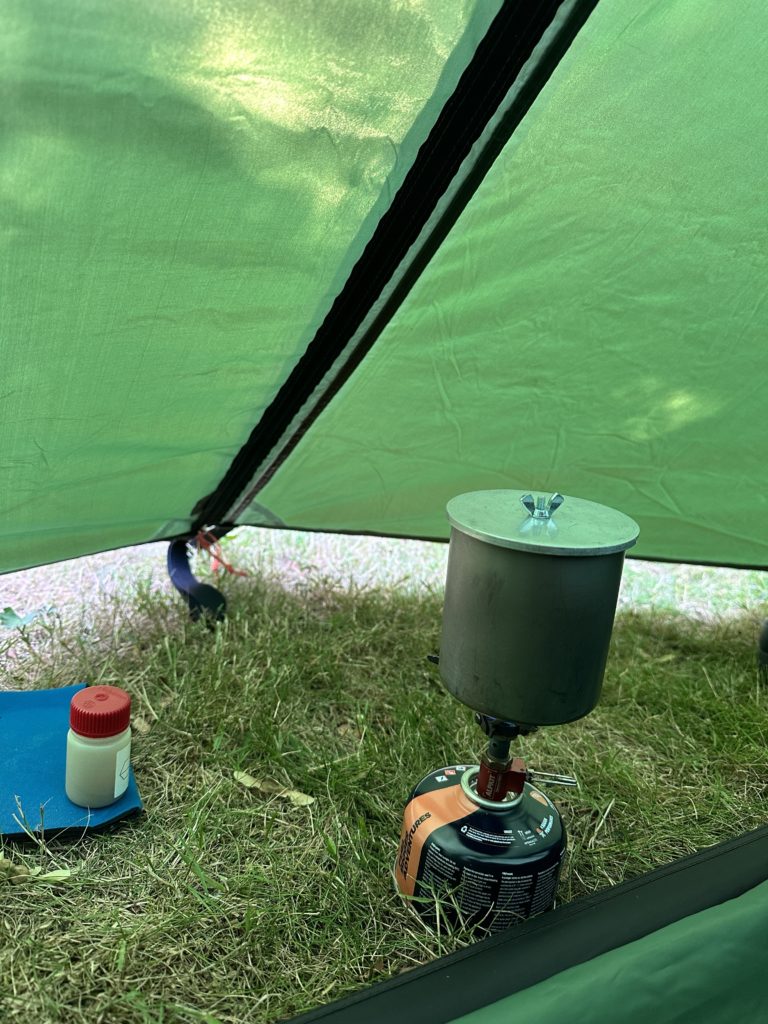
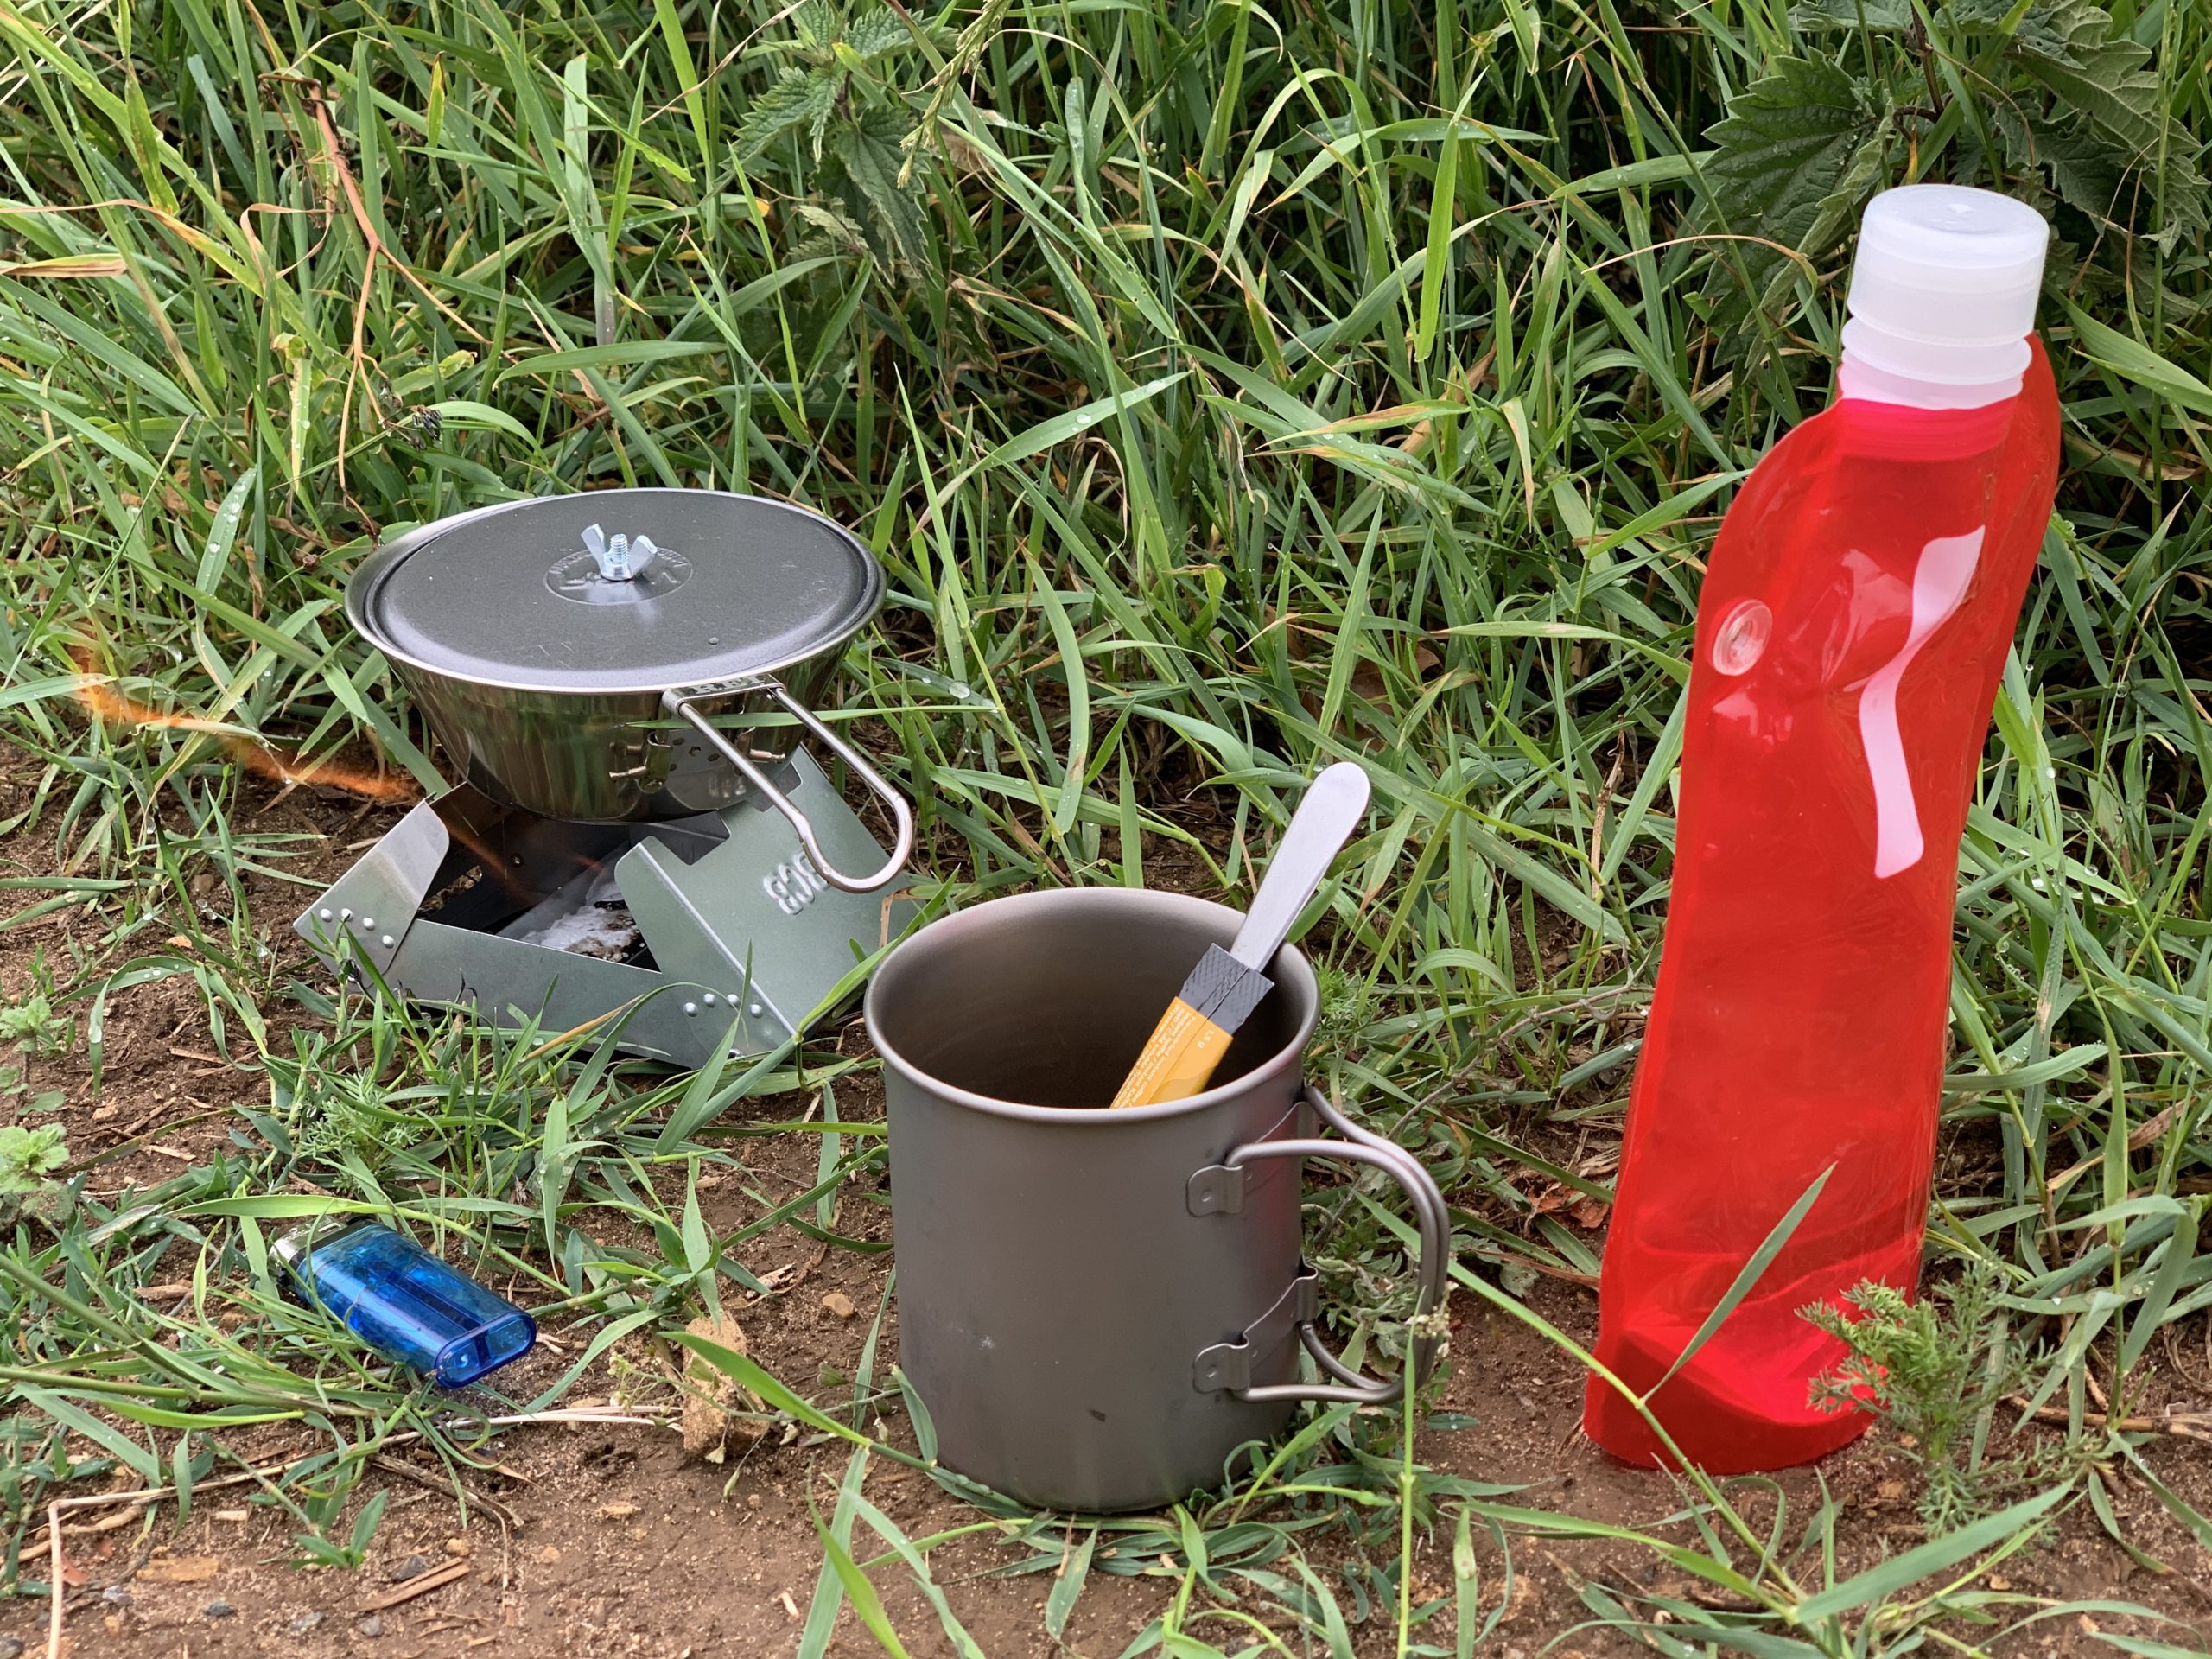
With care and using my Alpkit Kraku stove, a titanium mug and just enough flame I can brew an early morning coffee or boil water for a dehydrated meal in the rain.
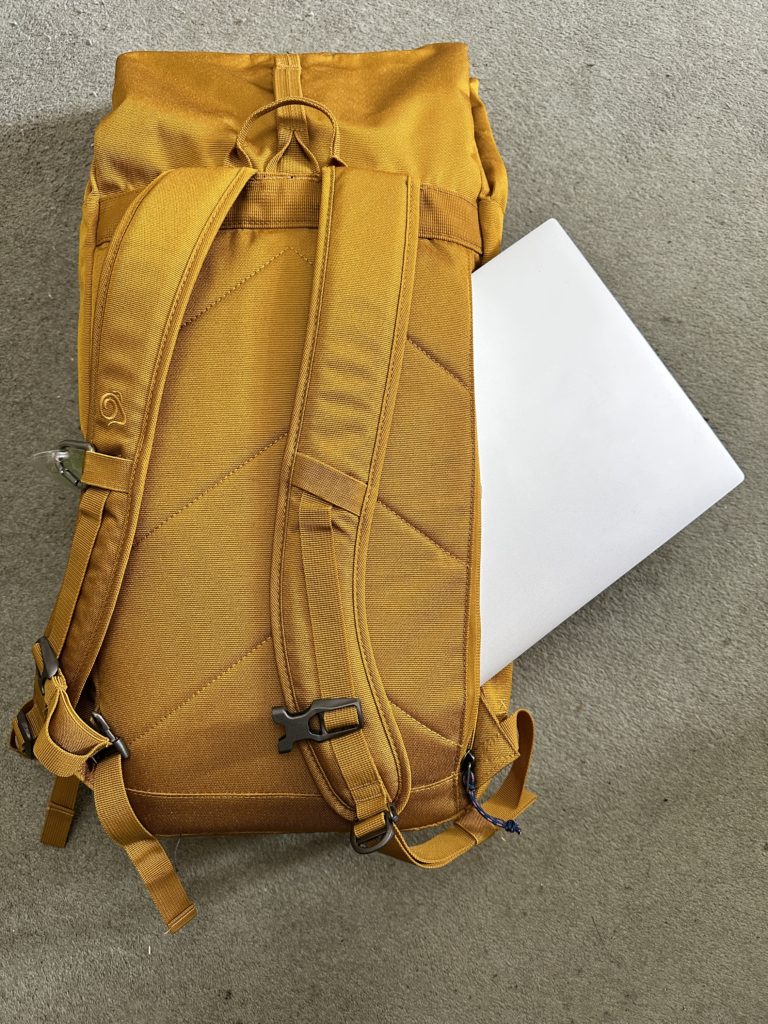
I have a new Craghoppers 20L Kiwi Classic Rolltop Backpack, primarily for using as hiking day pack. I chose this pack as it could also be used for travelling and work.
Craghoppers 20L Kiwi Classic Rolltop Backpack
It is a Craghoppers 20L Kiwi Classic Rolltop Backpack in dark butterscotch. It has a good sized pocket for a water bottle and another for small gear. There is an external rear laptop pocket and an external front slip pocket which can be fastened with a small carabiner for security. Inside there is a long slip pocket with a key keeper and a small zippered pocket for valuables.
The main pack has a roll top lid with a hook fastening – the strap is long enough to use the whole of the bag with a small roll over. This could prove useful when hiking for carrying a jacket when not in use or extra gear when going away. One of the shoulder straps has a security buckle so it can be fastened to a chair when you are having a coffee, so the pack cannot be stolen. There is a gear rack under the front zipper rain flap and other sturdy loops that gear could be fastened to.
The material looks hard wearing, that includes the straps and buckles.
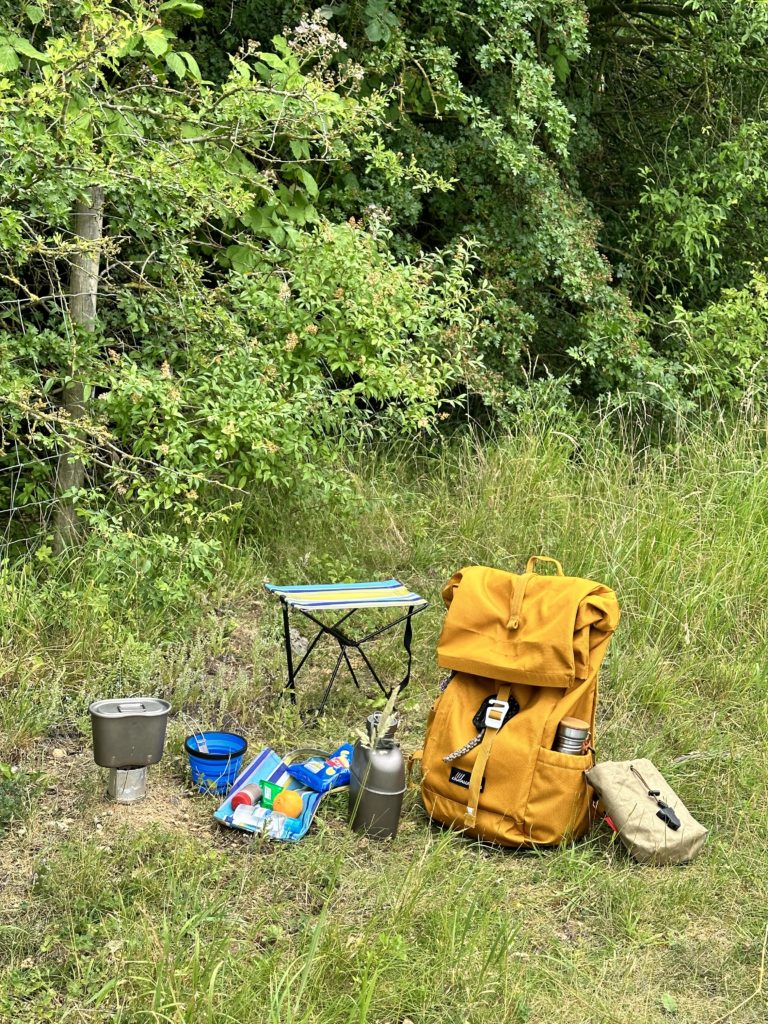
I went for a walk
I slung my 1.1l titanium canteen in its Molle carrier onto the righthand shoulder strap, where it was not in my way. I put another 500ml water bottle in the water bottle pouch. I then packed gear for a day’s walk including a picnic stool.
I did not go far and then stopped for tea – see the photo above. The rucksack carried well, the inside is really just a long tube so the equipment had to be packed carefully. Even so the padding on the back stopped any bits sticking in my back. The back ventilation worked OK. The shoulder straps were comfortable with enough adjustment and a chest strap to keep them in place.
A success as a day pack.
Work though…
There is a problem, My Dell XPS 15 laptop, probably one of the smallest 15inch laptops on the market, will no way fit in the laptop sleeve. The laptop sleeve is advertised to hold a 16inch laptop. So May be not so useful for work if I need my laptop.
I am a bit annoyed the laptop does not fit but for everything else I wanted it for I am pleased.
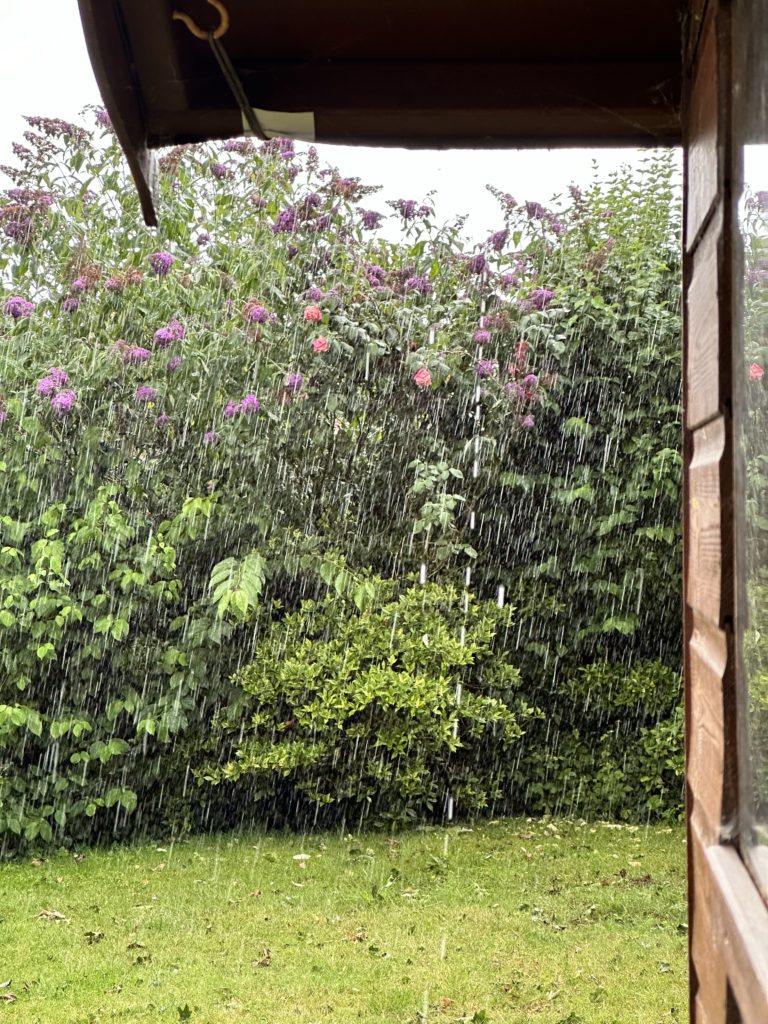
I was planning to go out for a lunch time walk and brew some camping coffee but the weather had other ideas – too much rain.
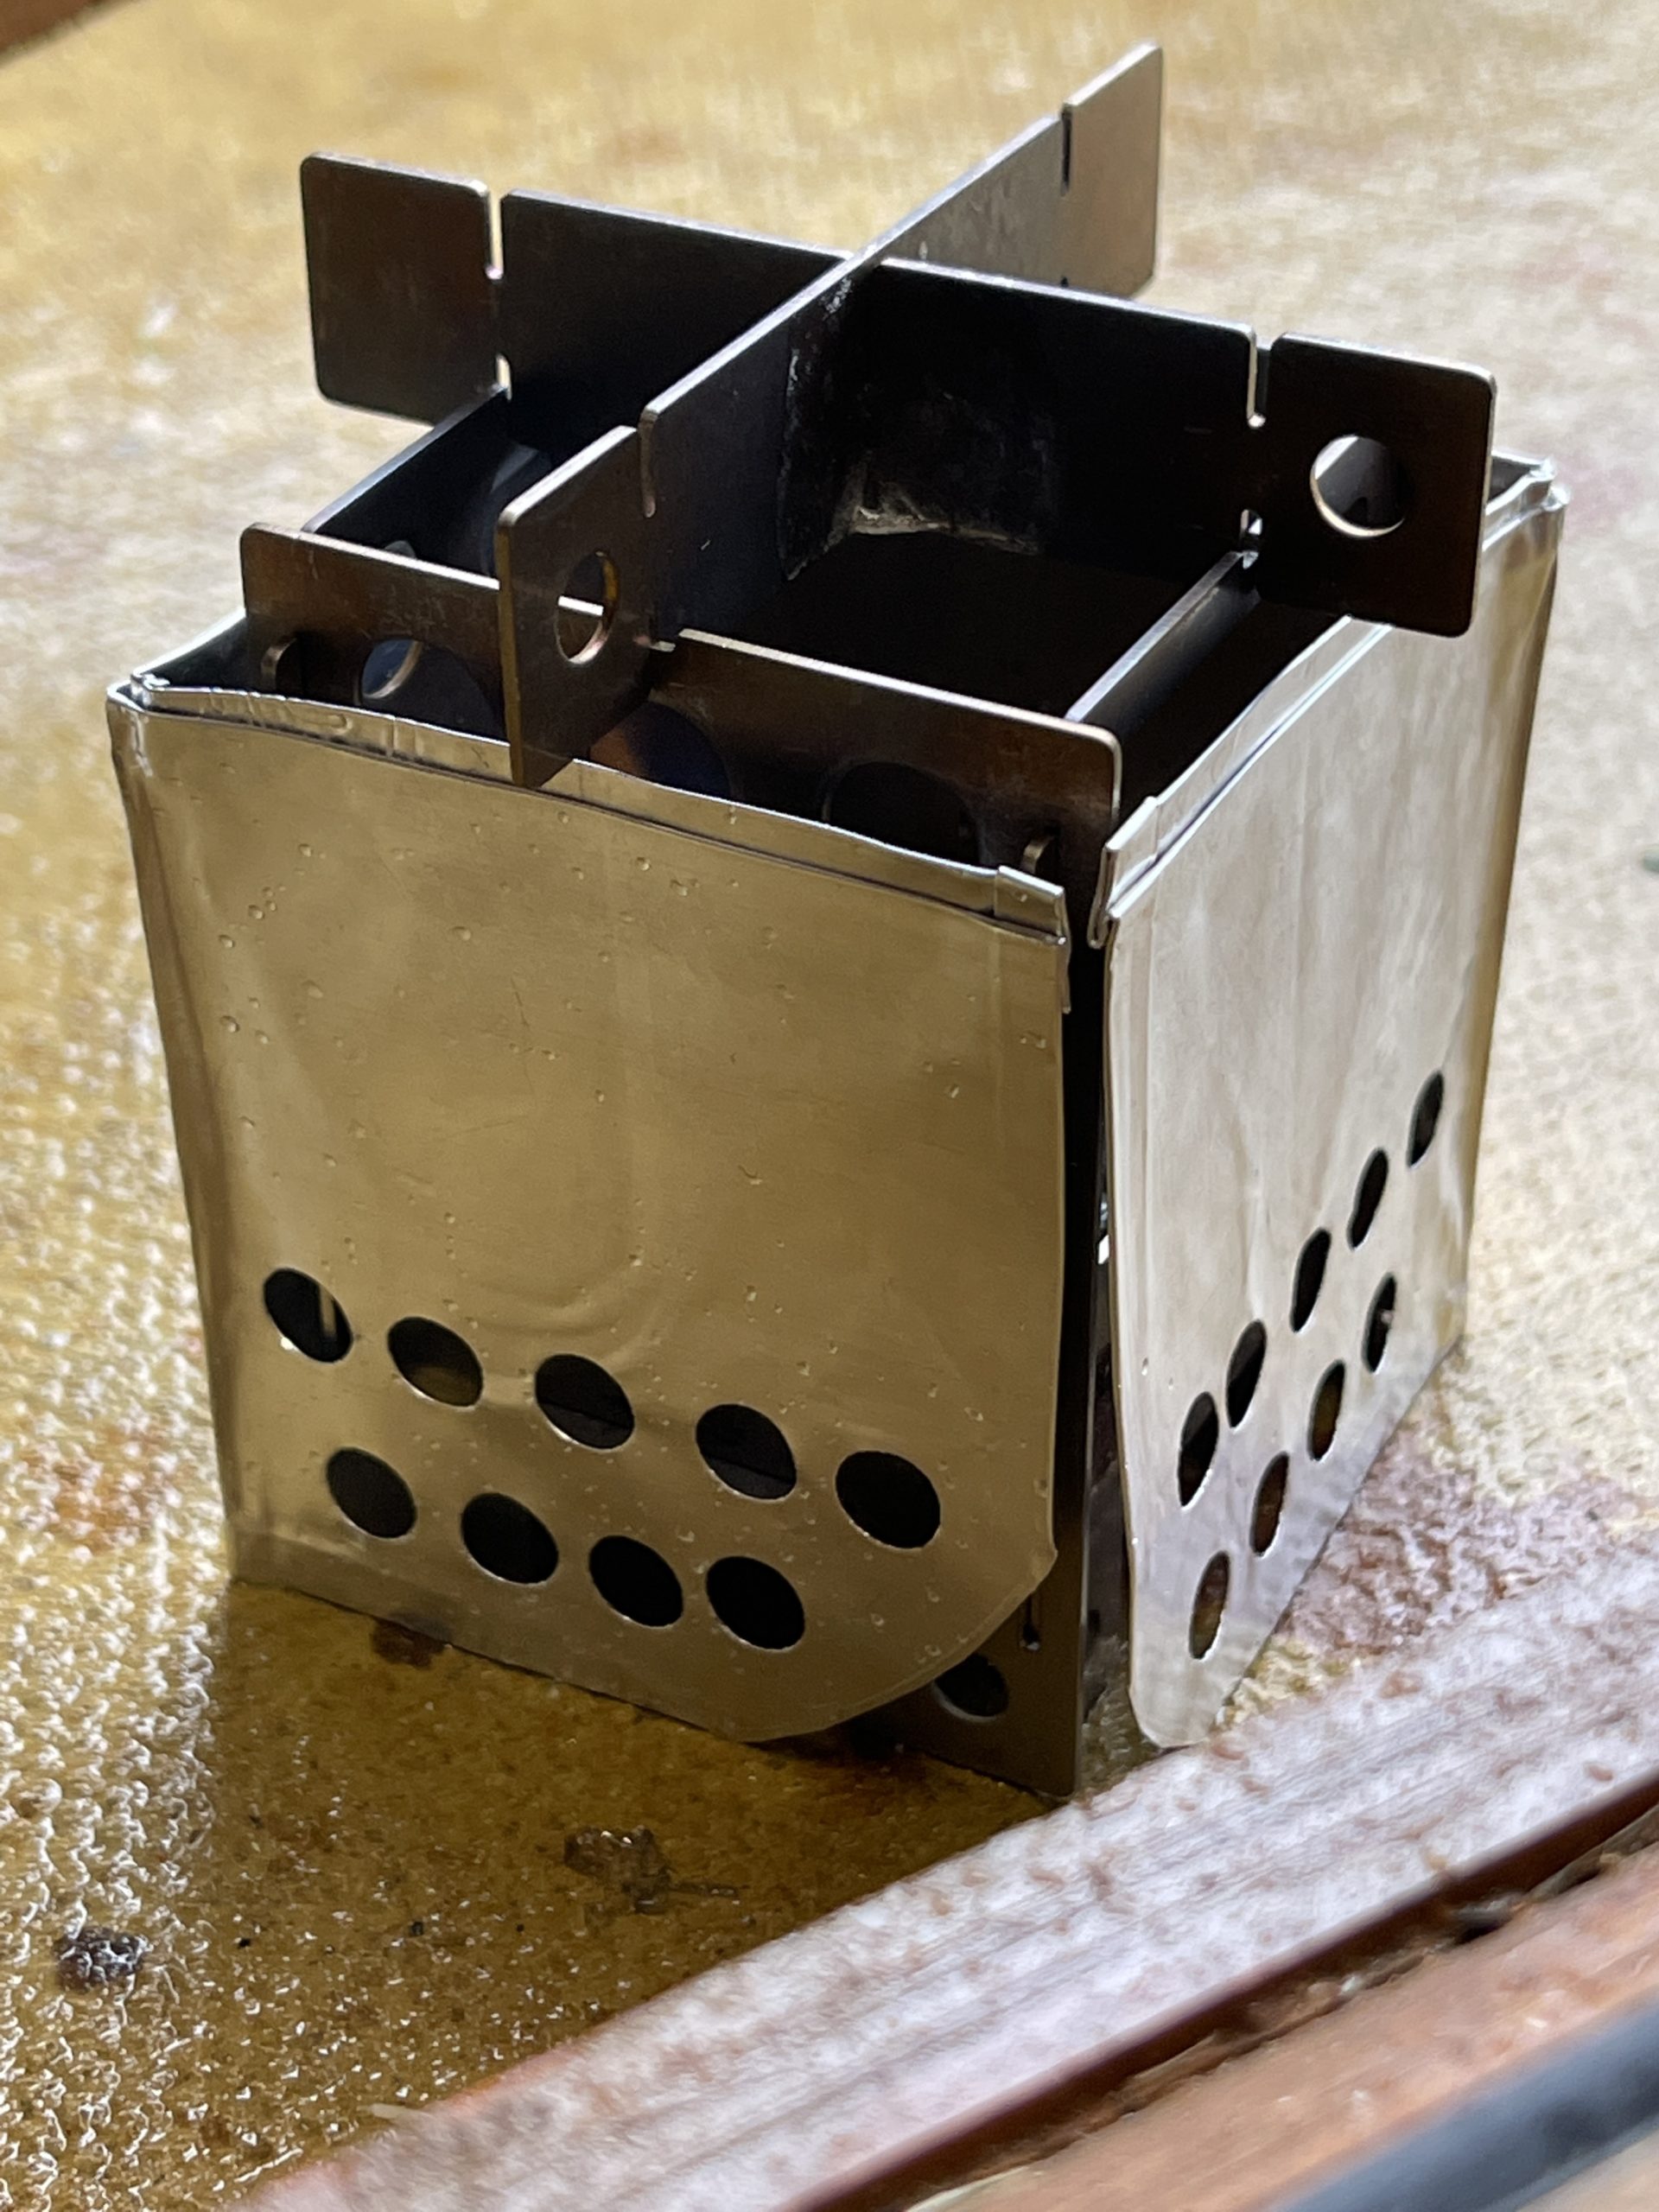
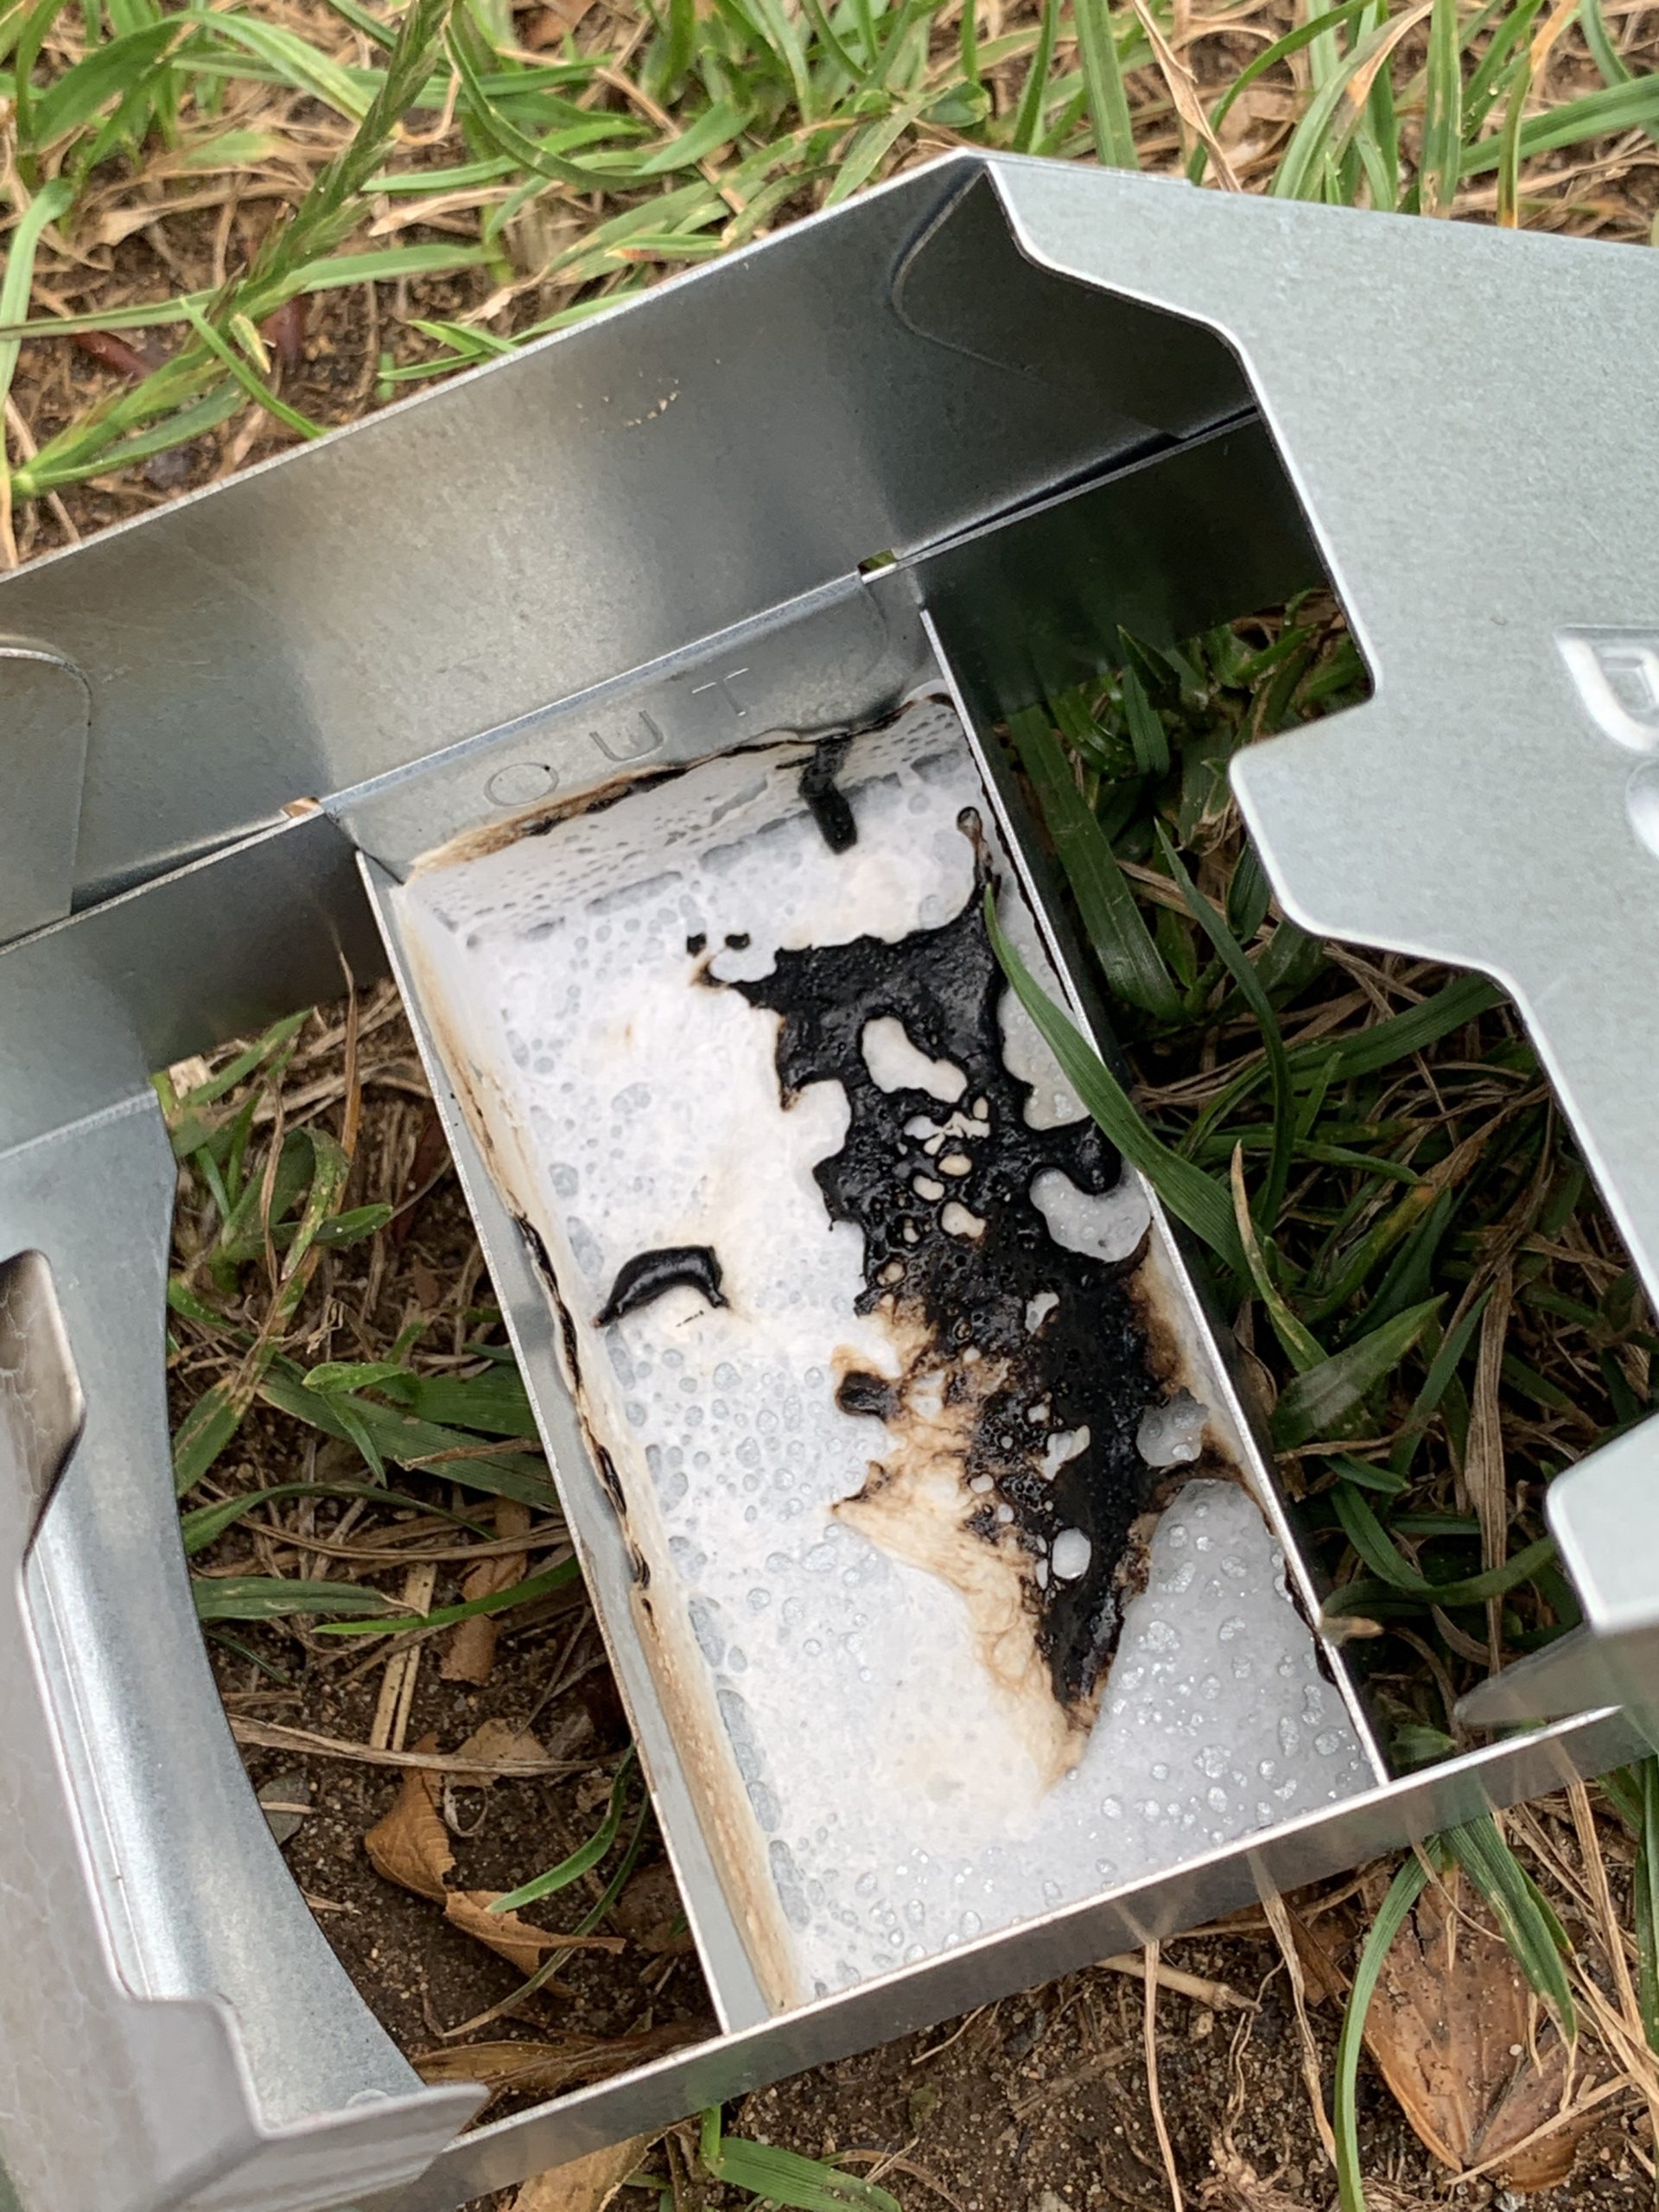
On a recent walk the wind shield I used was not effective so I was going to test out a new one I made from a used food tray. I moved the test to the doorway of the summer house office.
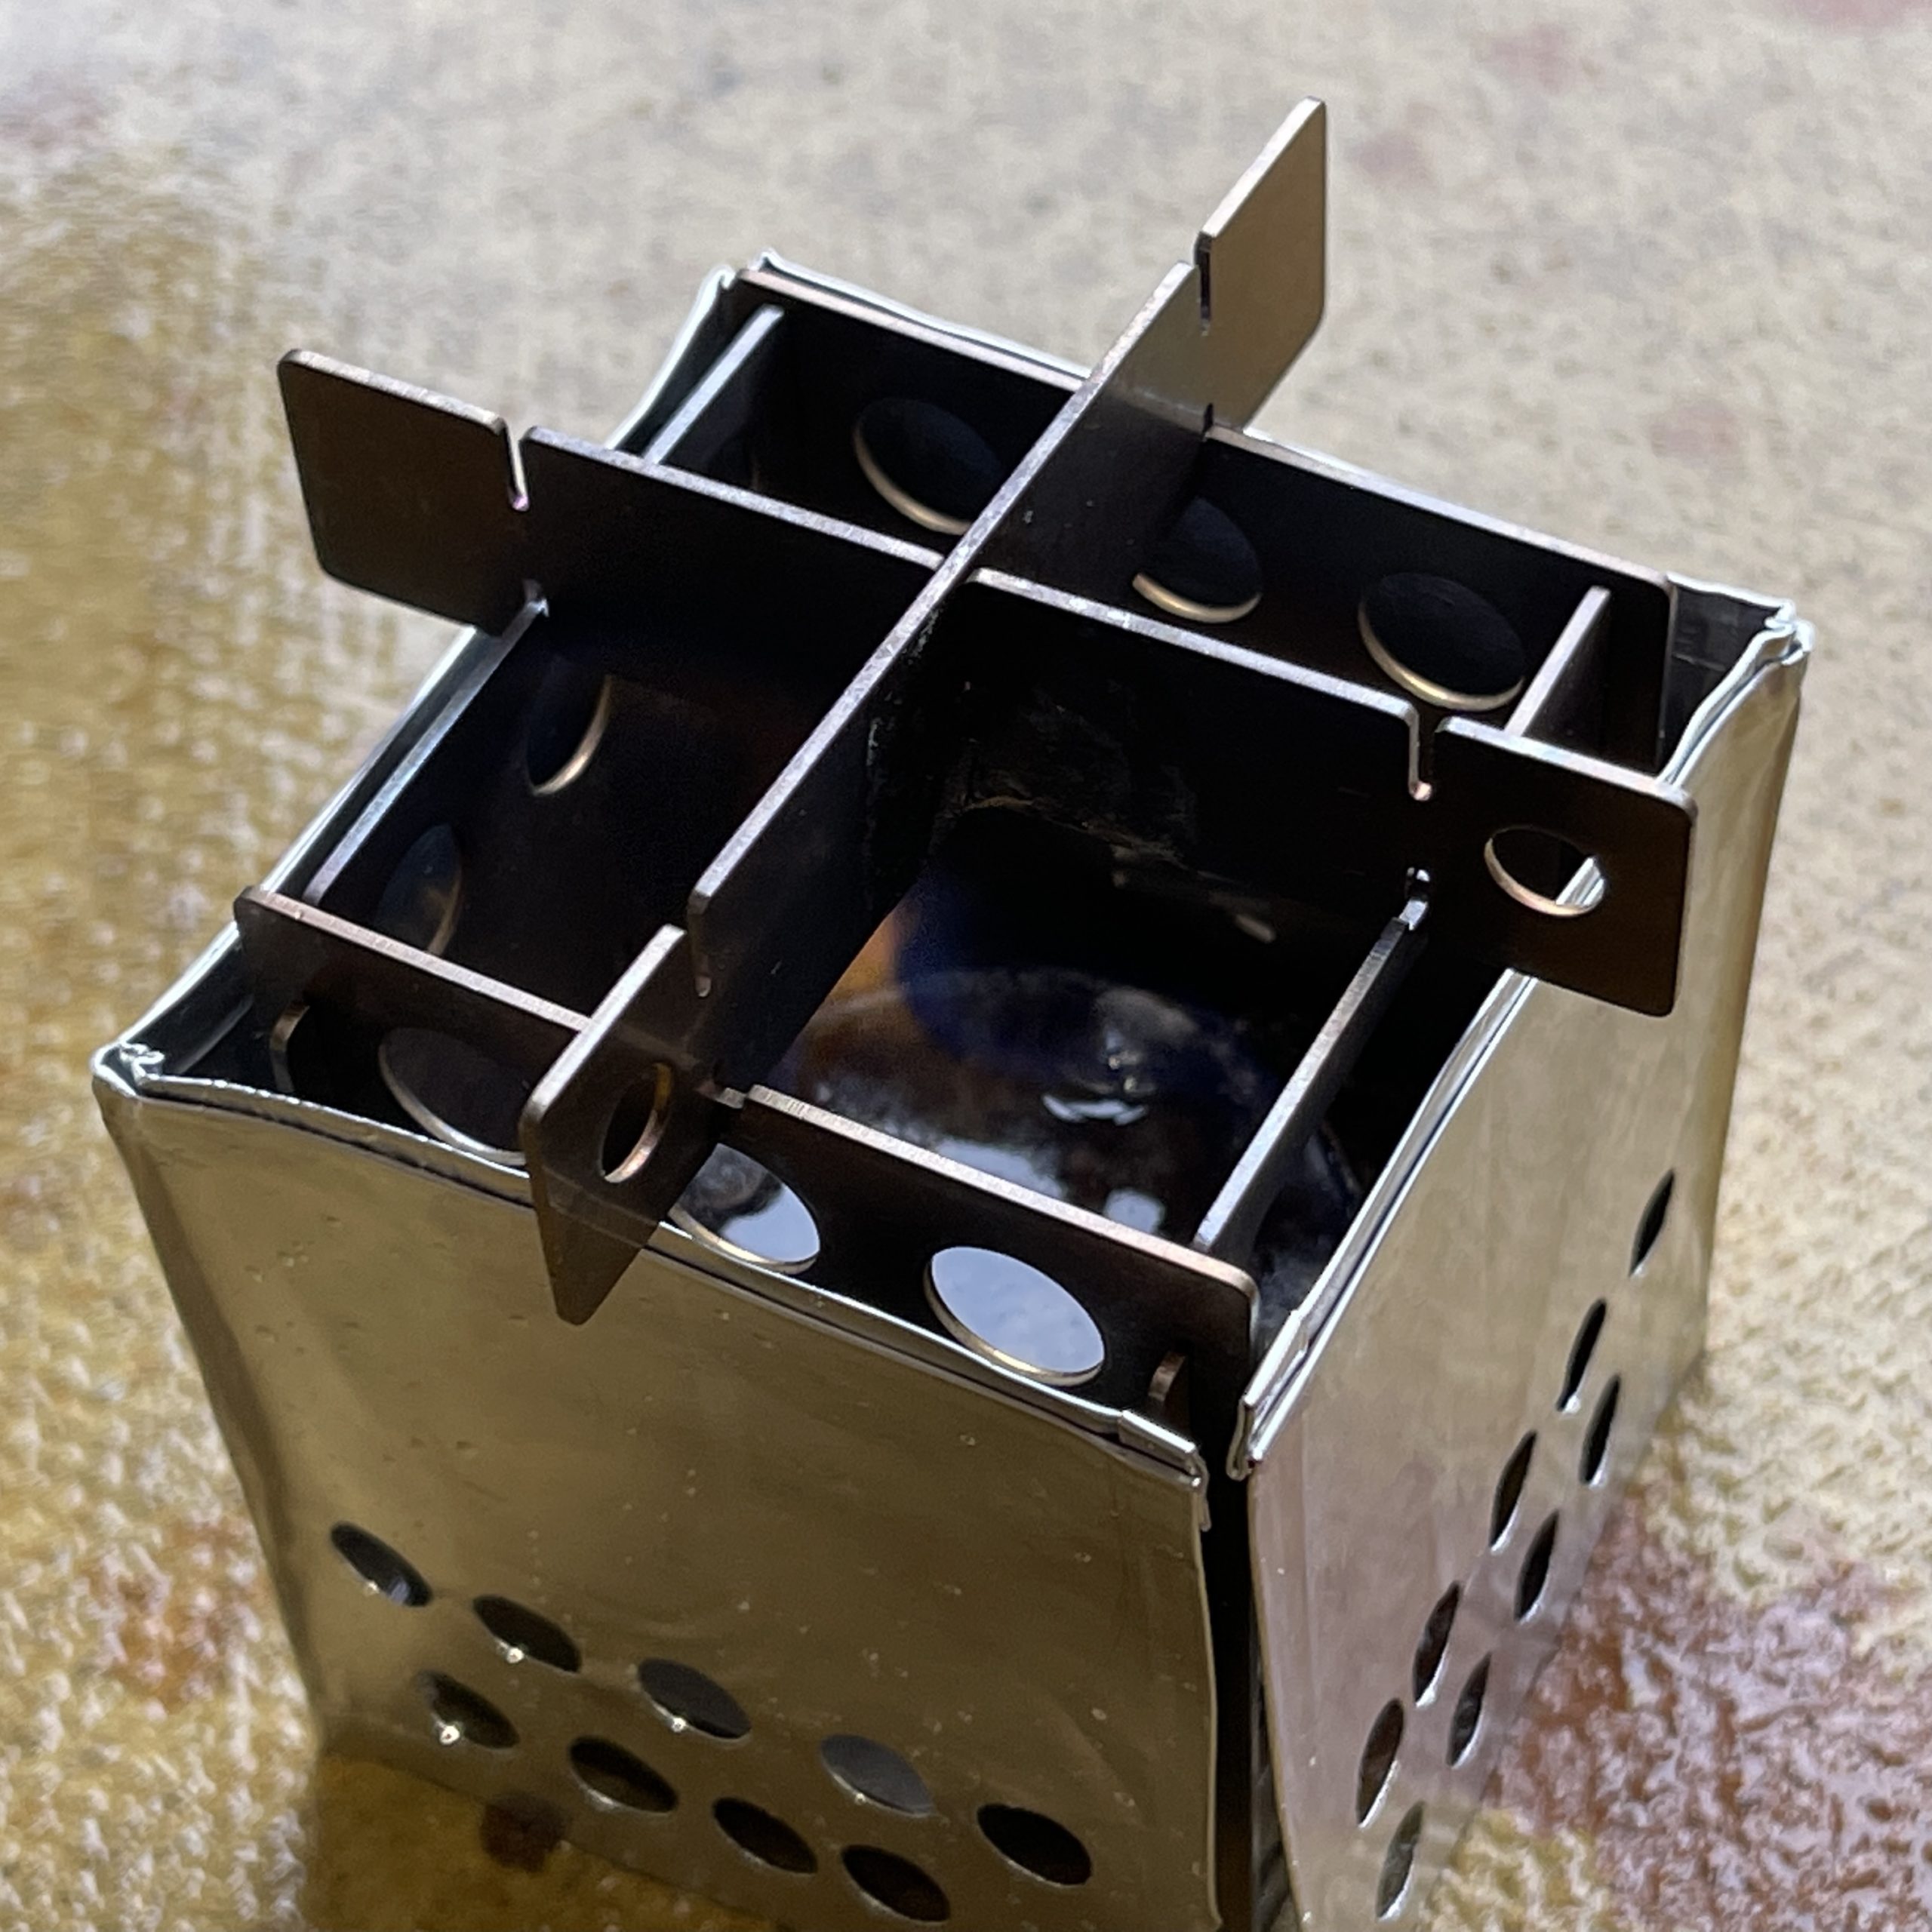
The wind break was cut to fit tightly around a Bushcraft Essentials mini twig stove when using an up-cycled Burt’s Bees tin as a gel fuel burner. As the fit was close I punched some air holes low down and on two sides for air flow.
Outdoor Pocket Micro Stove EDCBox with homemade wind shield
The idea of this stove is for me to have the makings for camping coffee or soup in my lightweight cookset bag. There is a very small gas burner in the cookset but no gas – the gel fuel for the Bushcraft Essentials stove is carried an up-cycled hand sanitiser bottle in the cookset stuff sack.
The Burt’s Bees tin for the gel fuel – alight!
To test the stove wind break I made coffee.
Making Camping Coffee
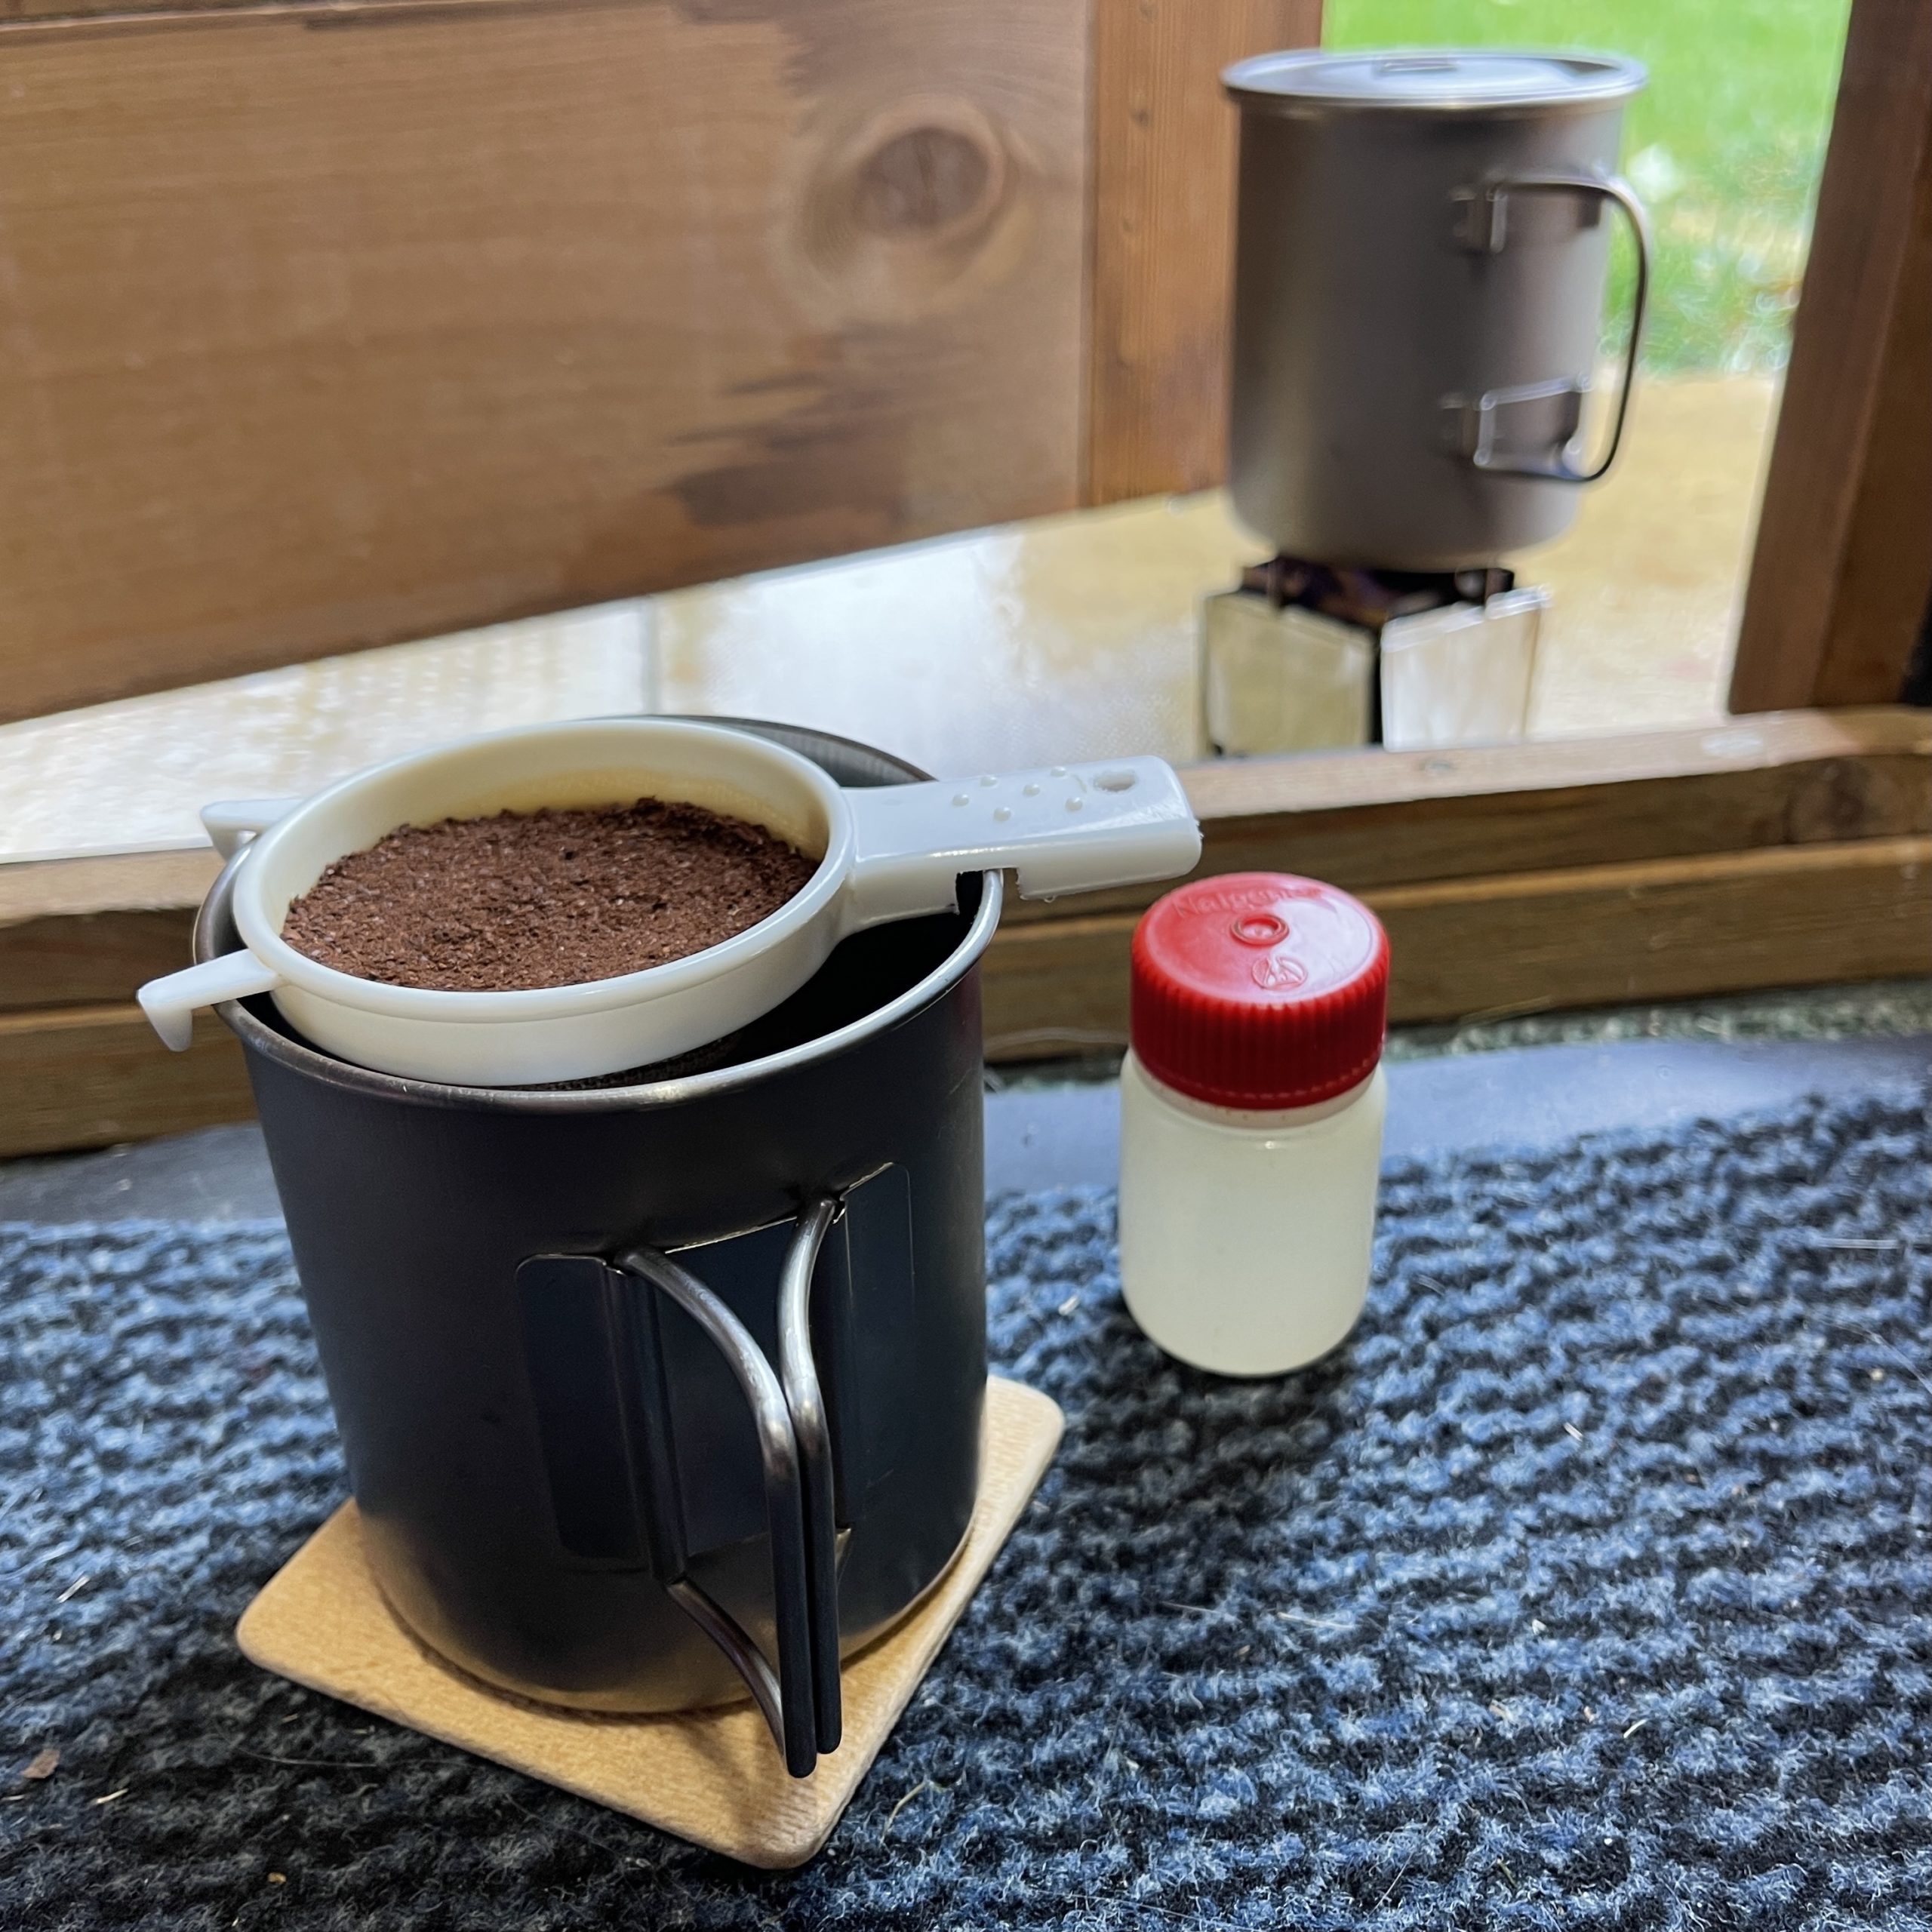
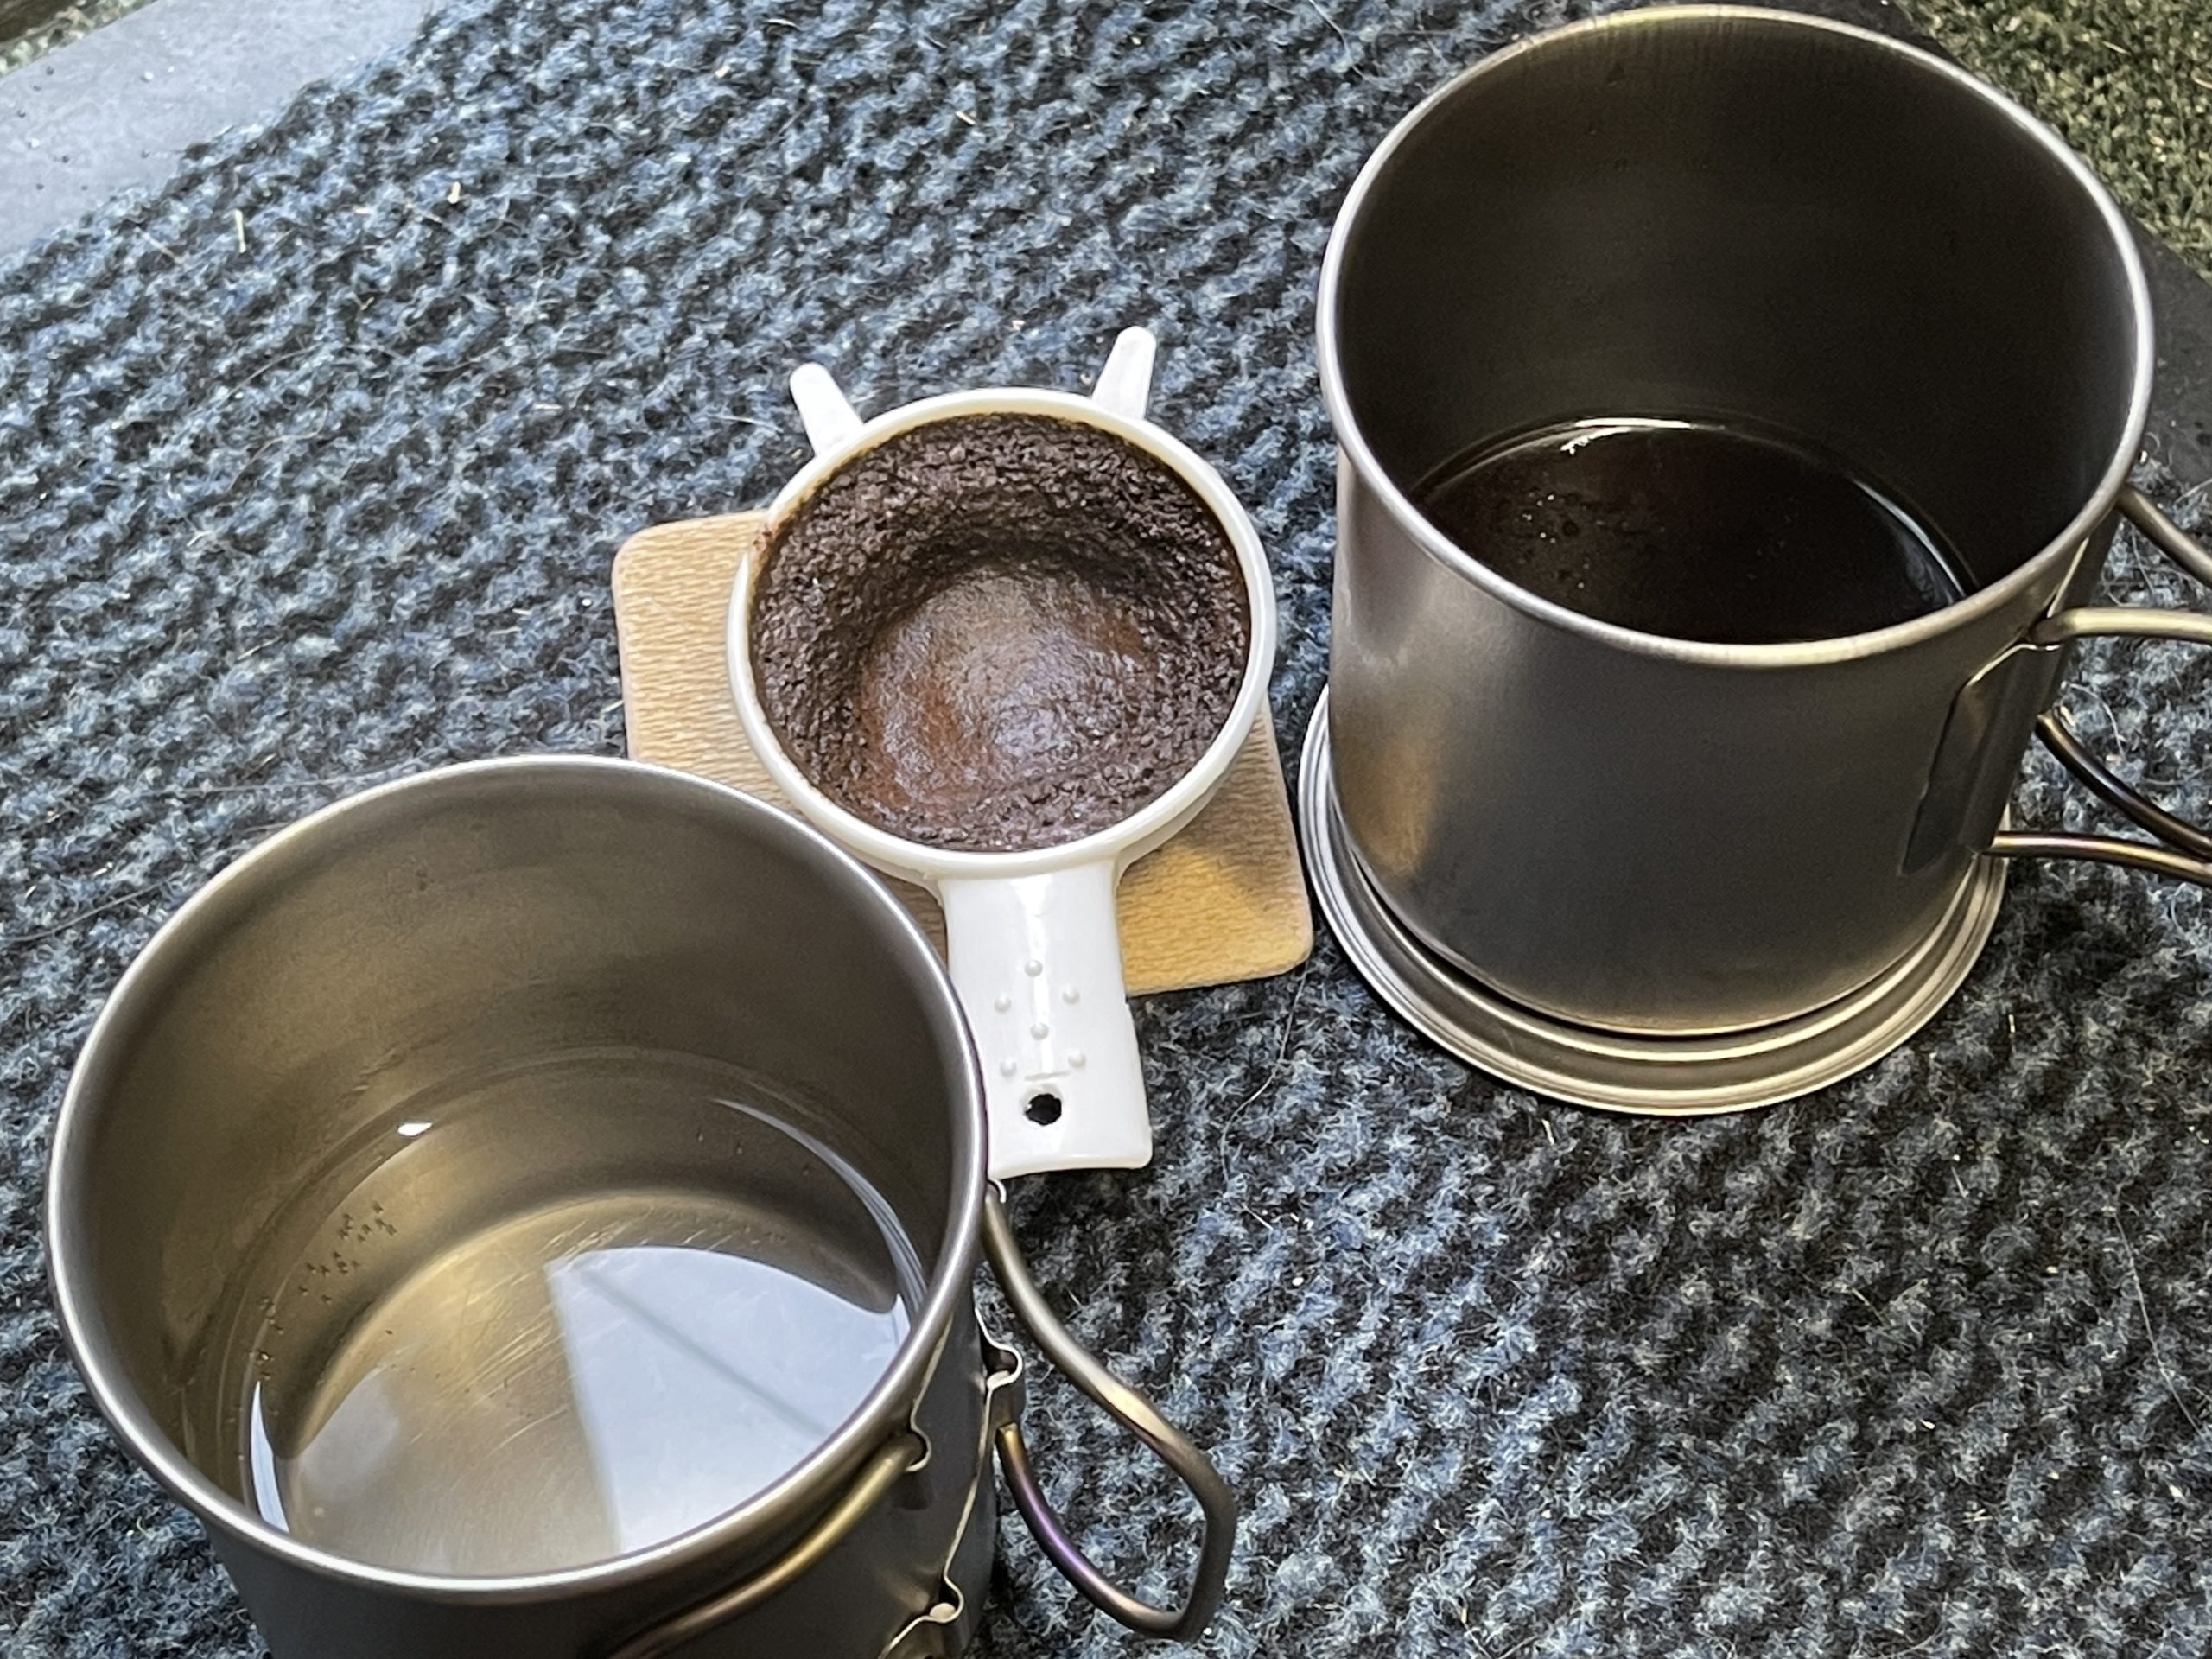
There are many gadgets on the market for making coffee when camping – I have a 750ml titanium bush pot/cafetiere for when I am car camping – but when backpacking and walking I like this lightweight solution.
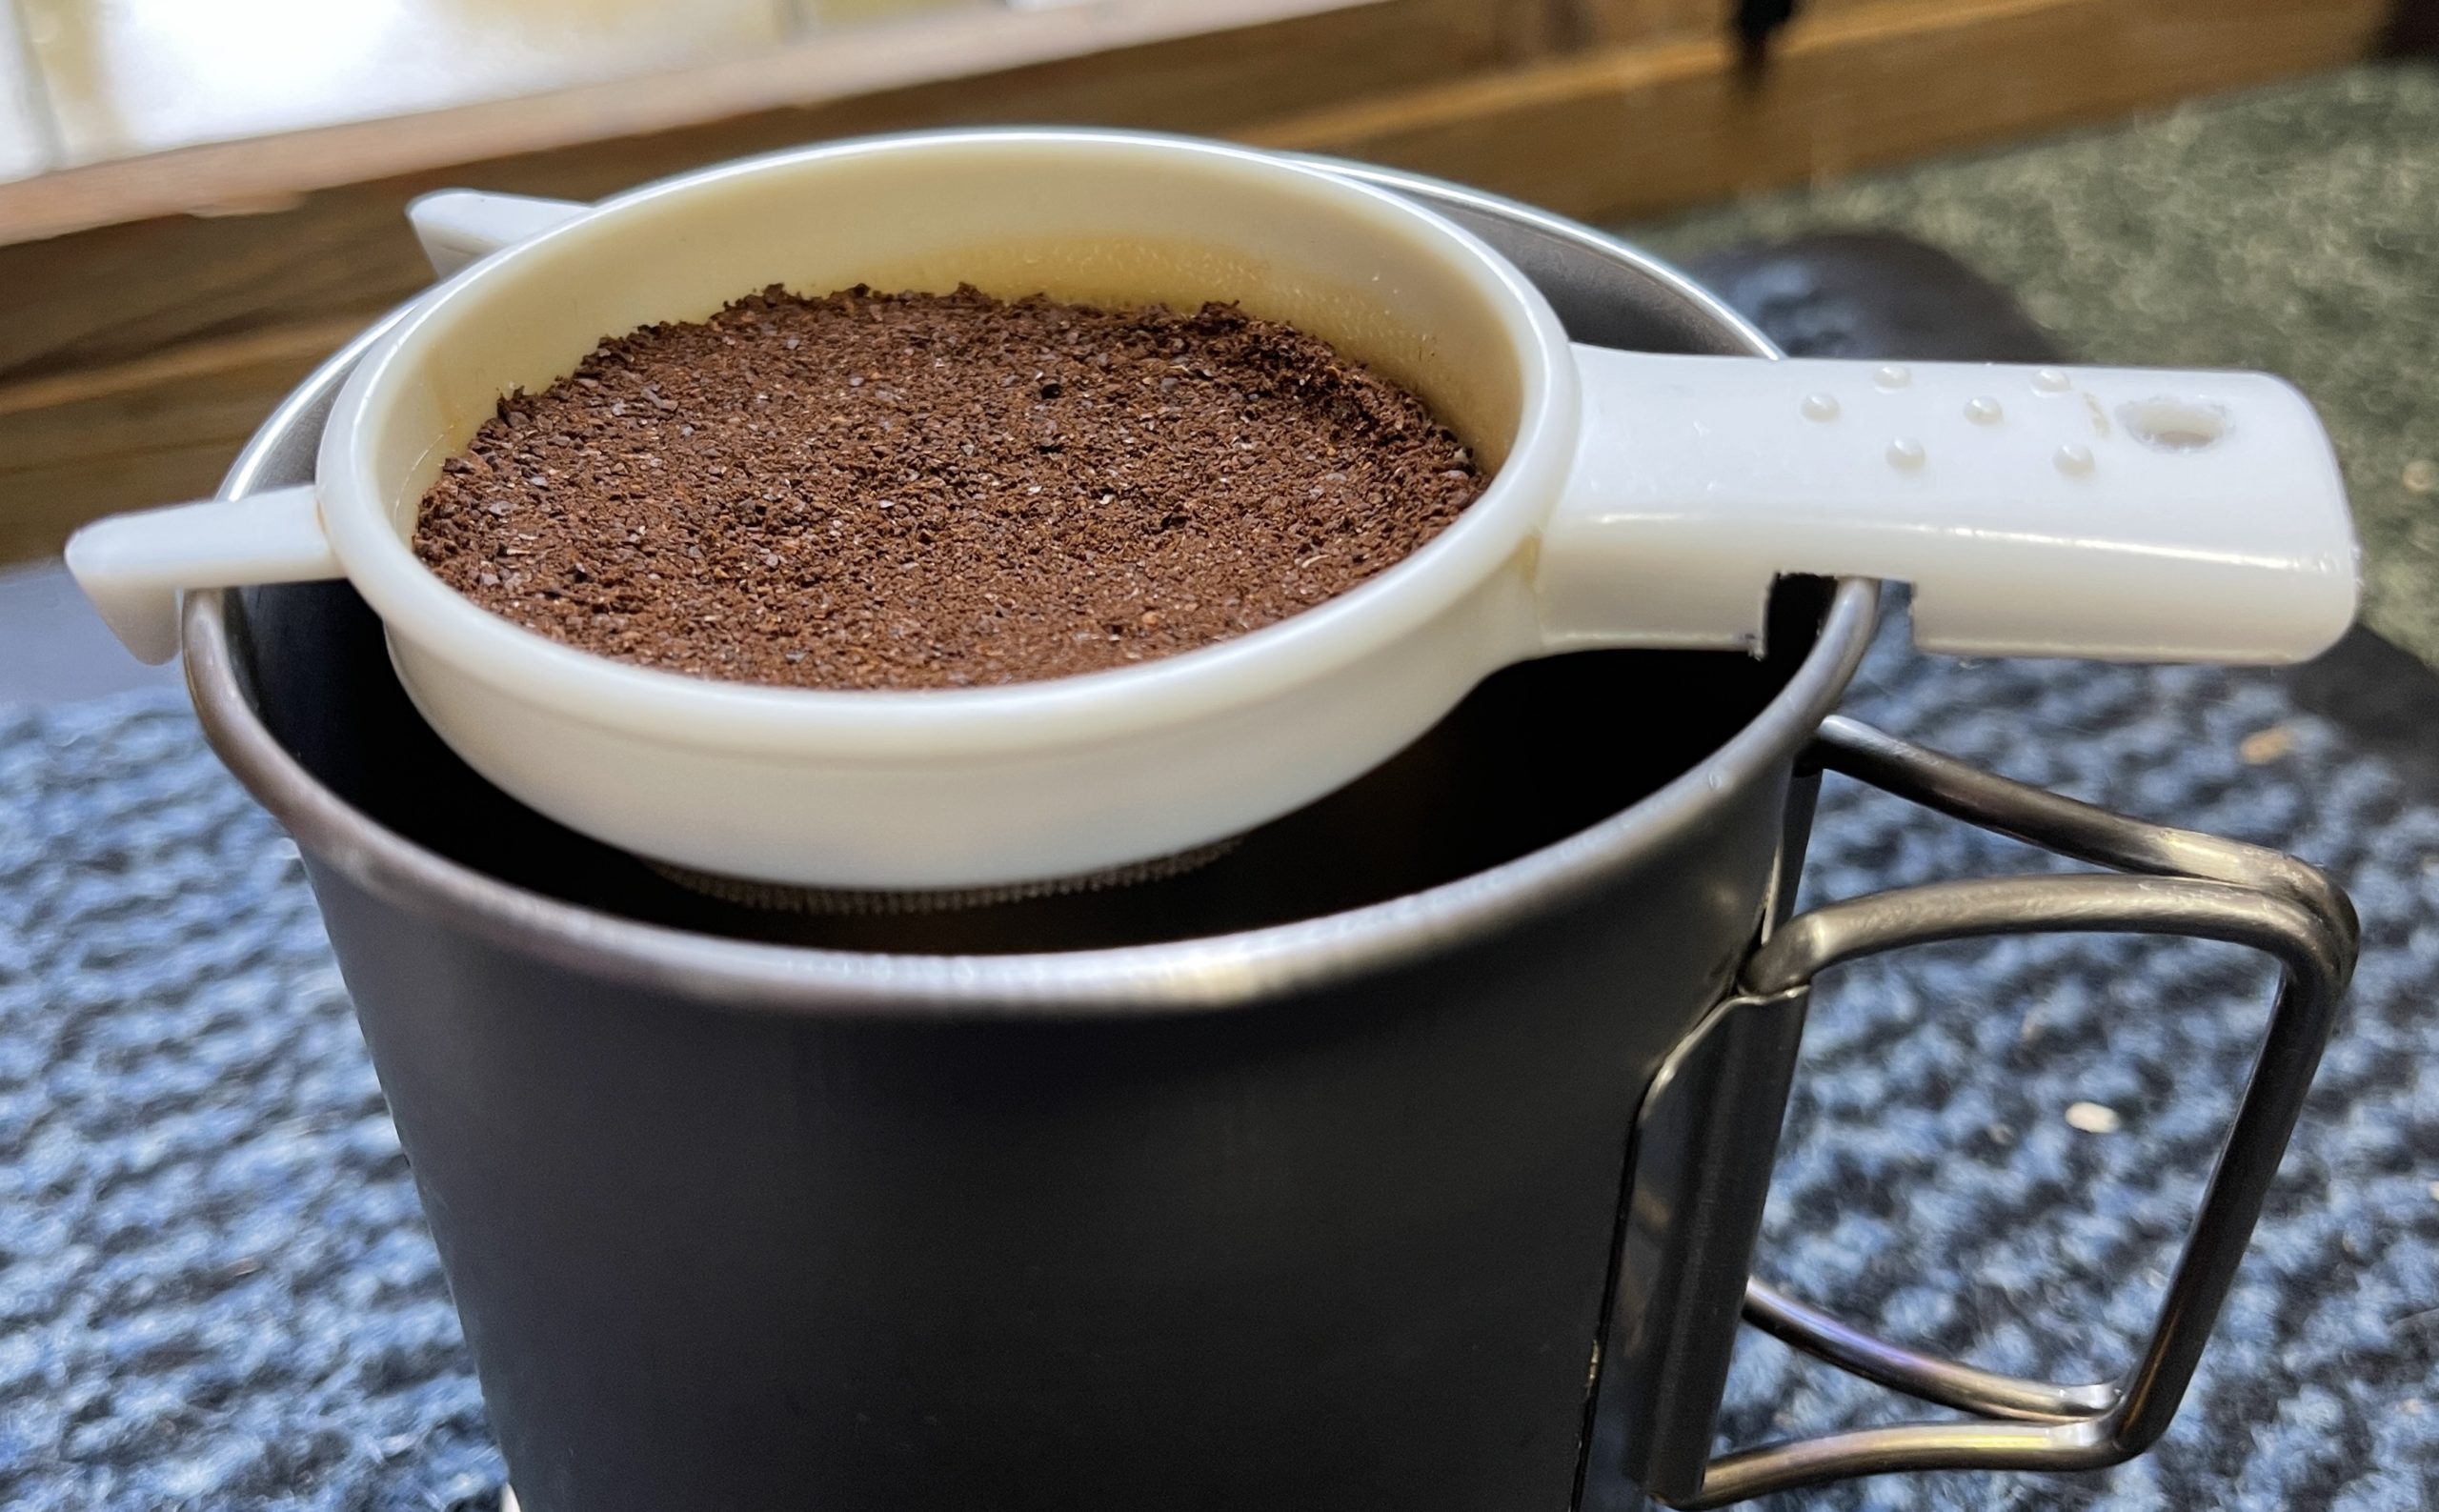
For a while now I have been using a plastic tea strainer as a reusable coffee filter (see my camping coffee page). Since I wrote that page I have cut down the handle and made some cut-outs so the filter sits level.
The notches keep the filter level
The process I use is:
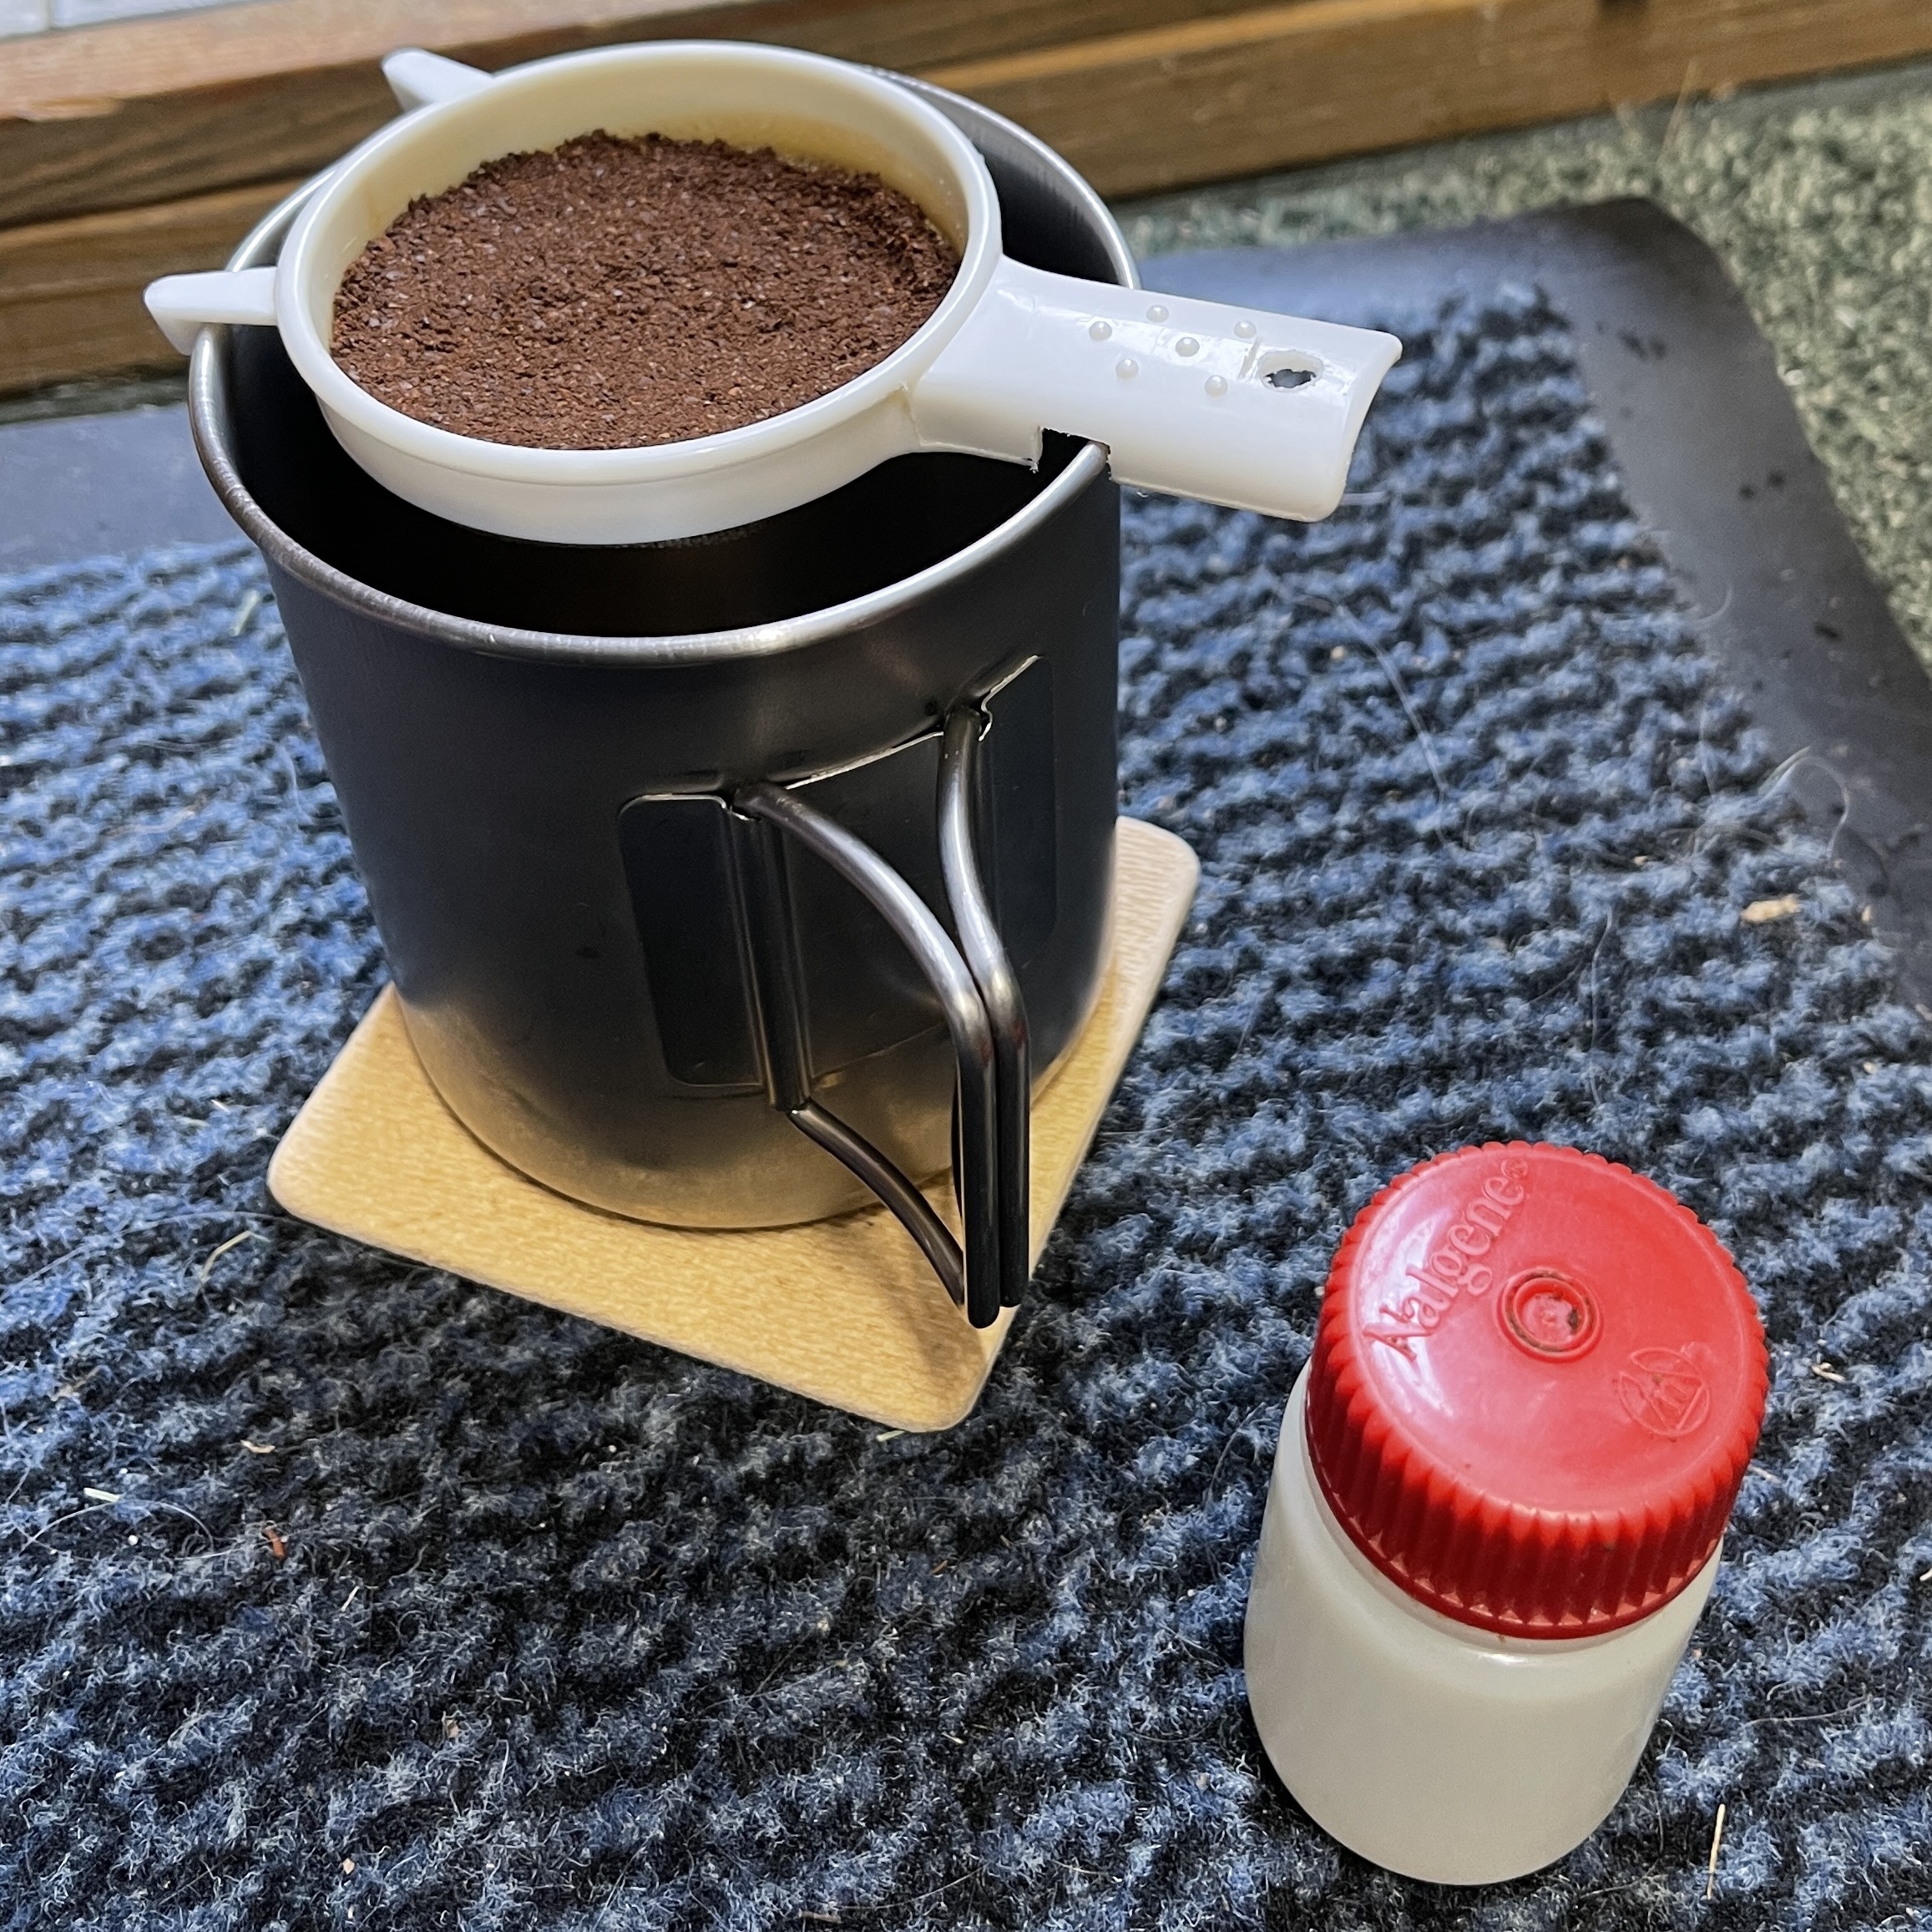
1 I fill the strainer mesh with ground coffee until it just covers the the plastic rim.
2 Wet the coffee grounds and then wait a minute or so.
For the best results the coffee grounds need a little hot water and a rest!
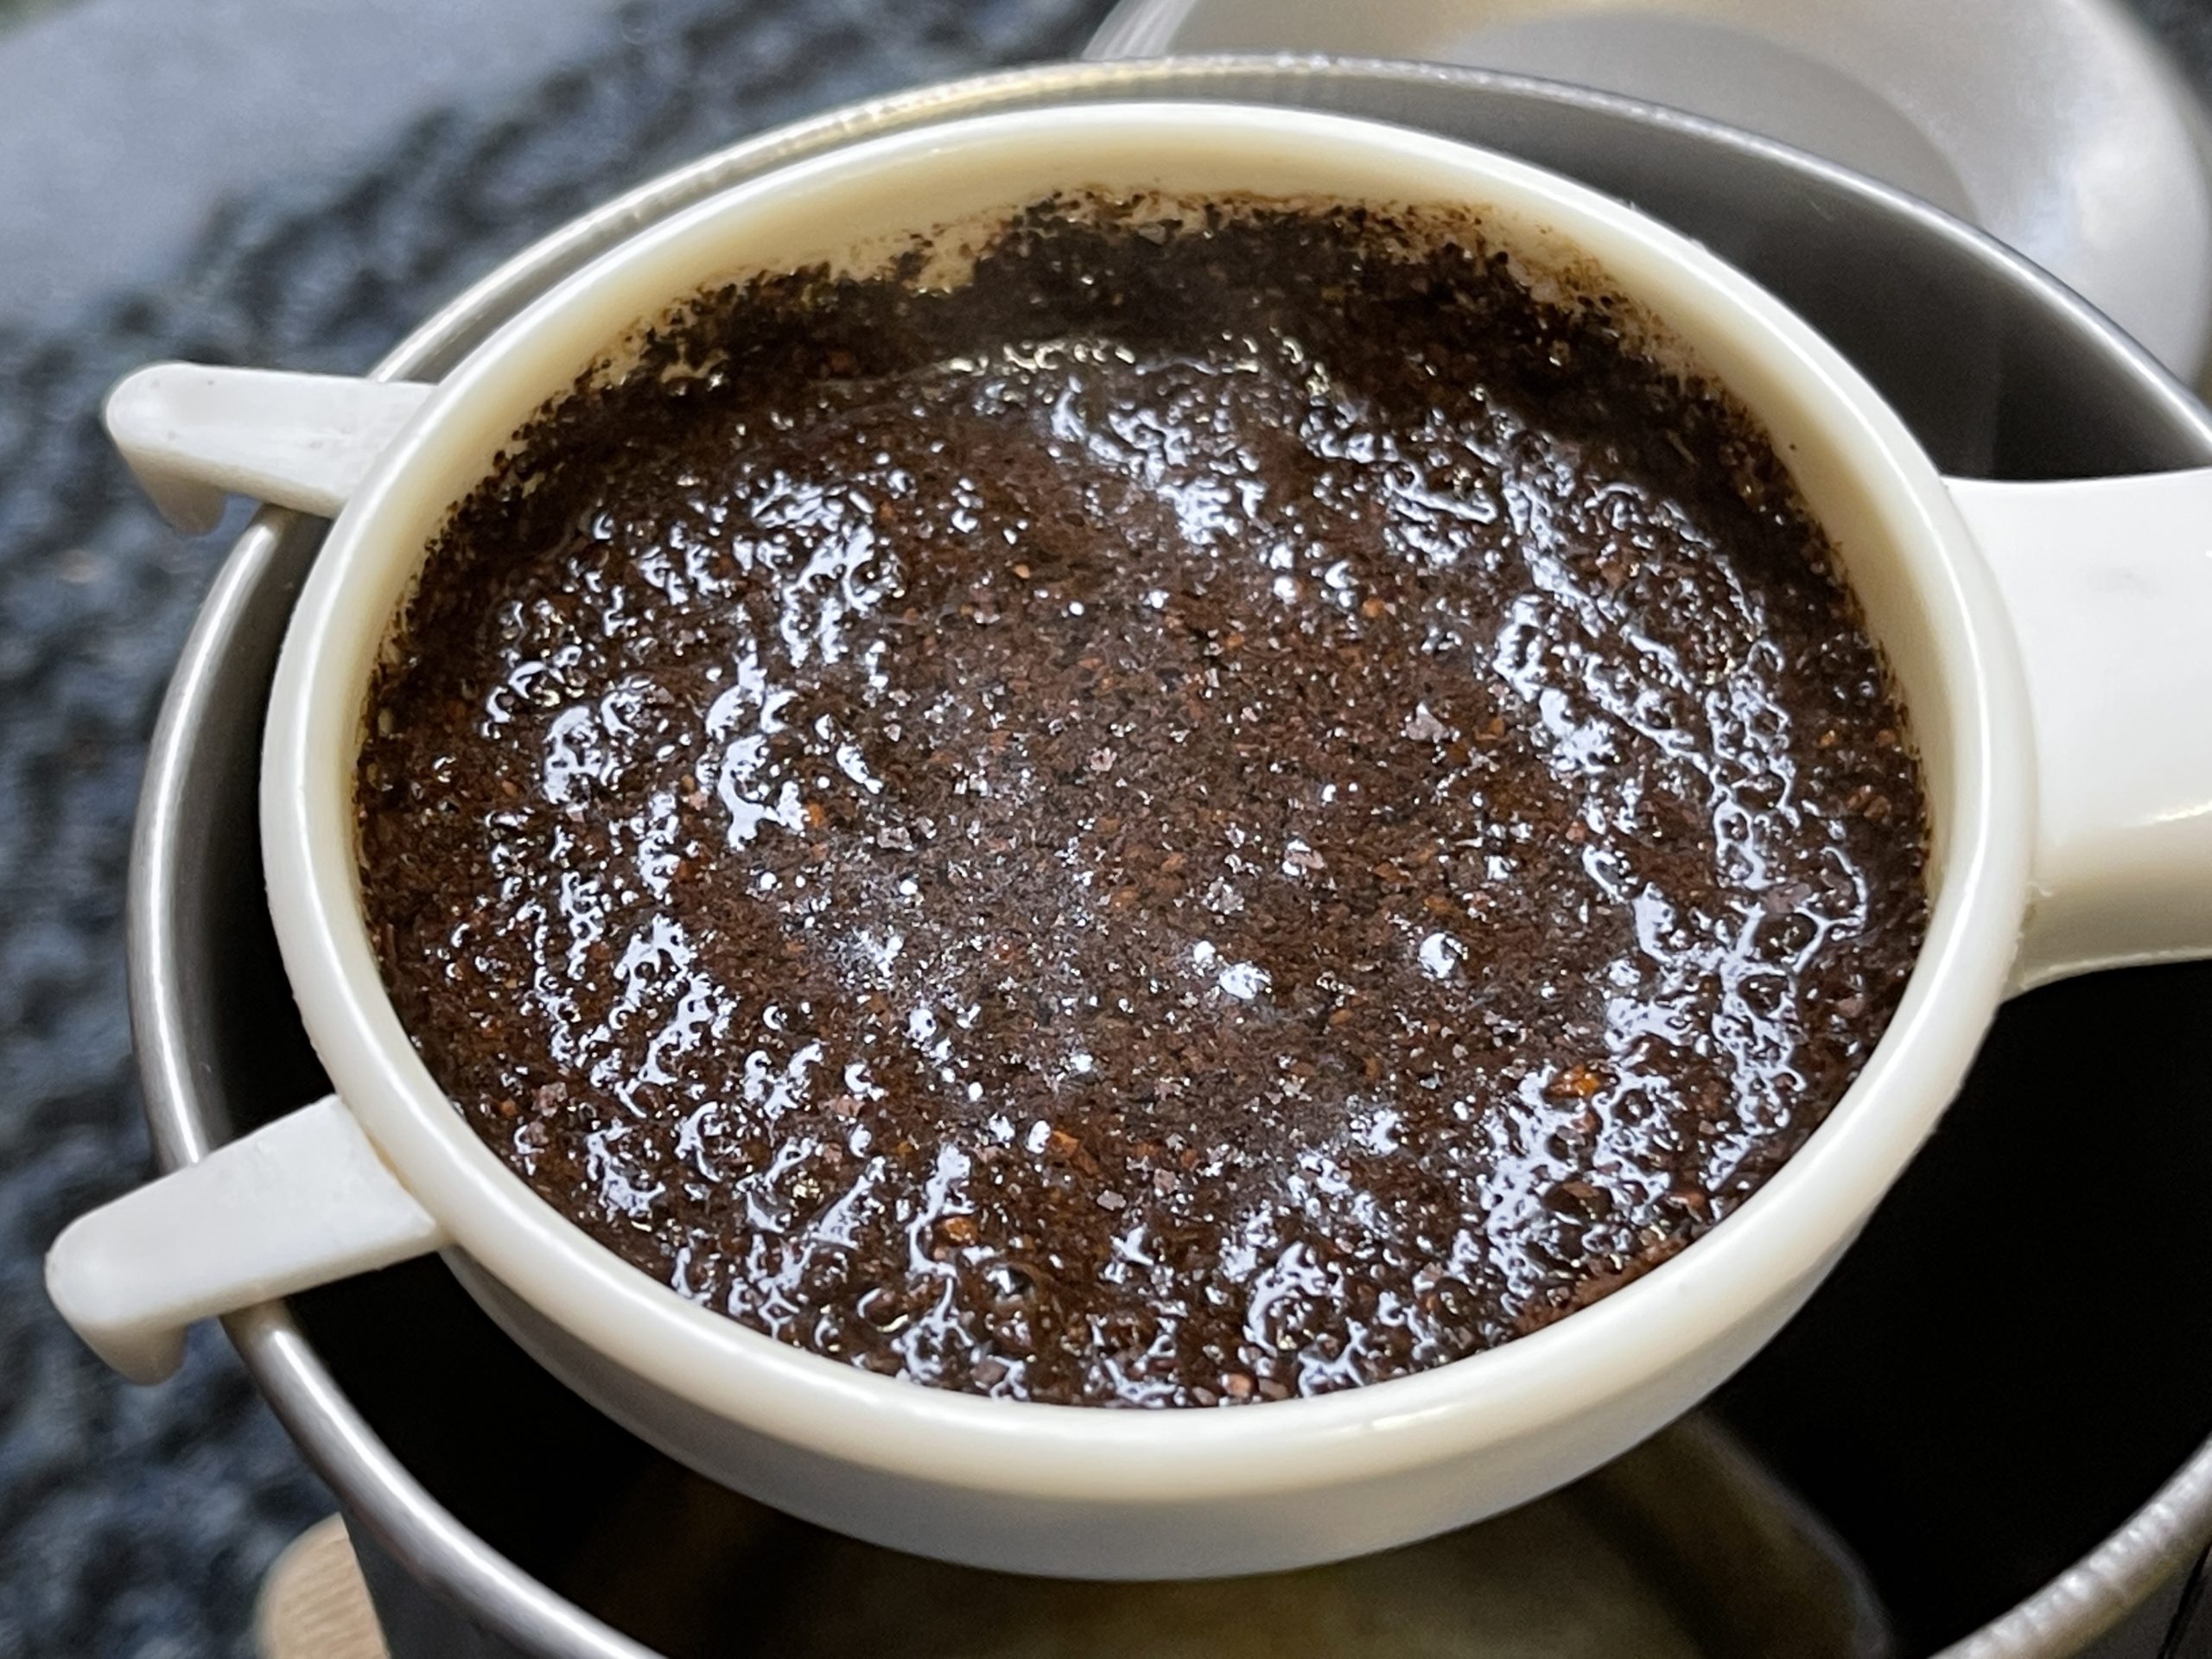
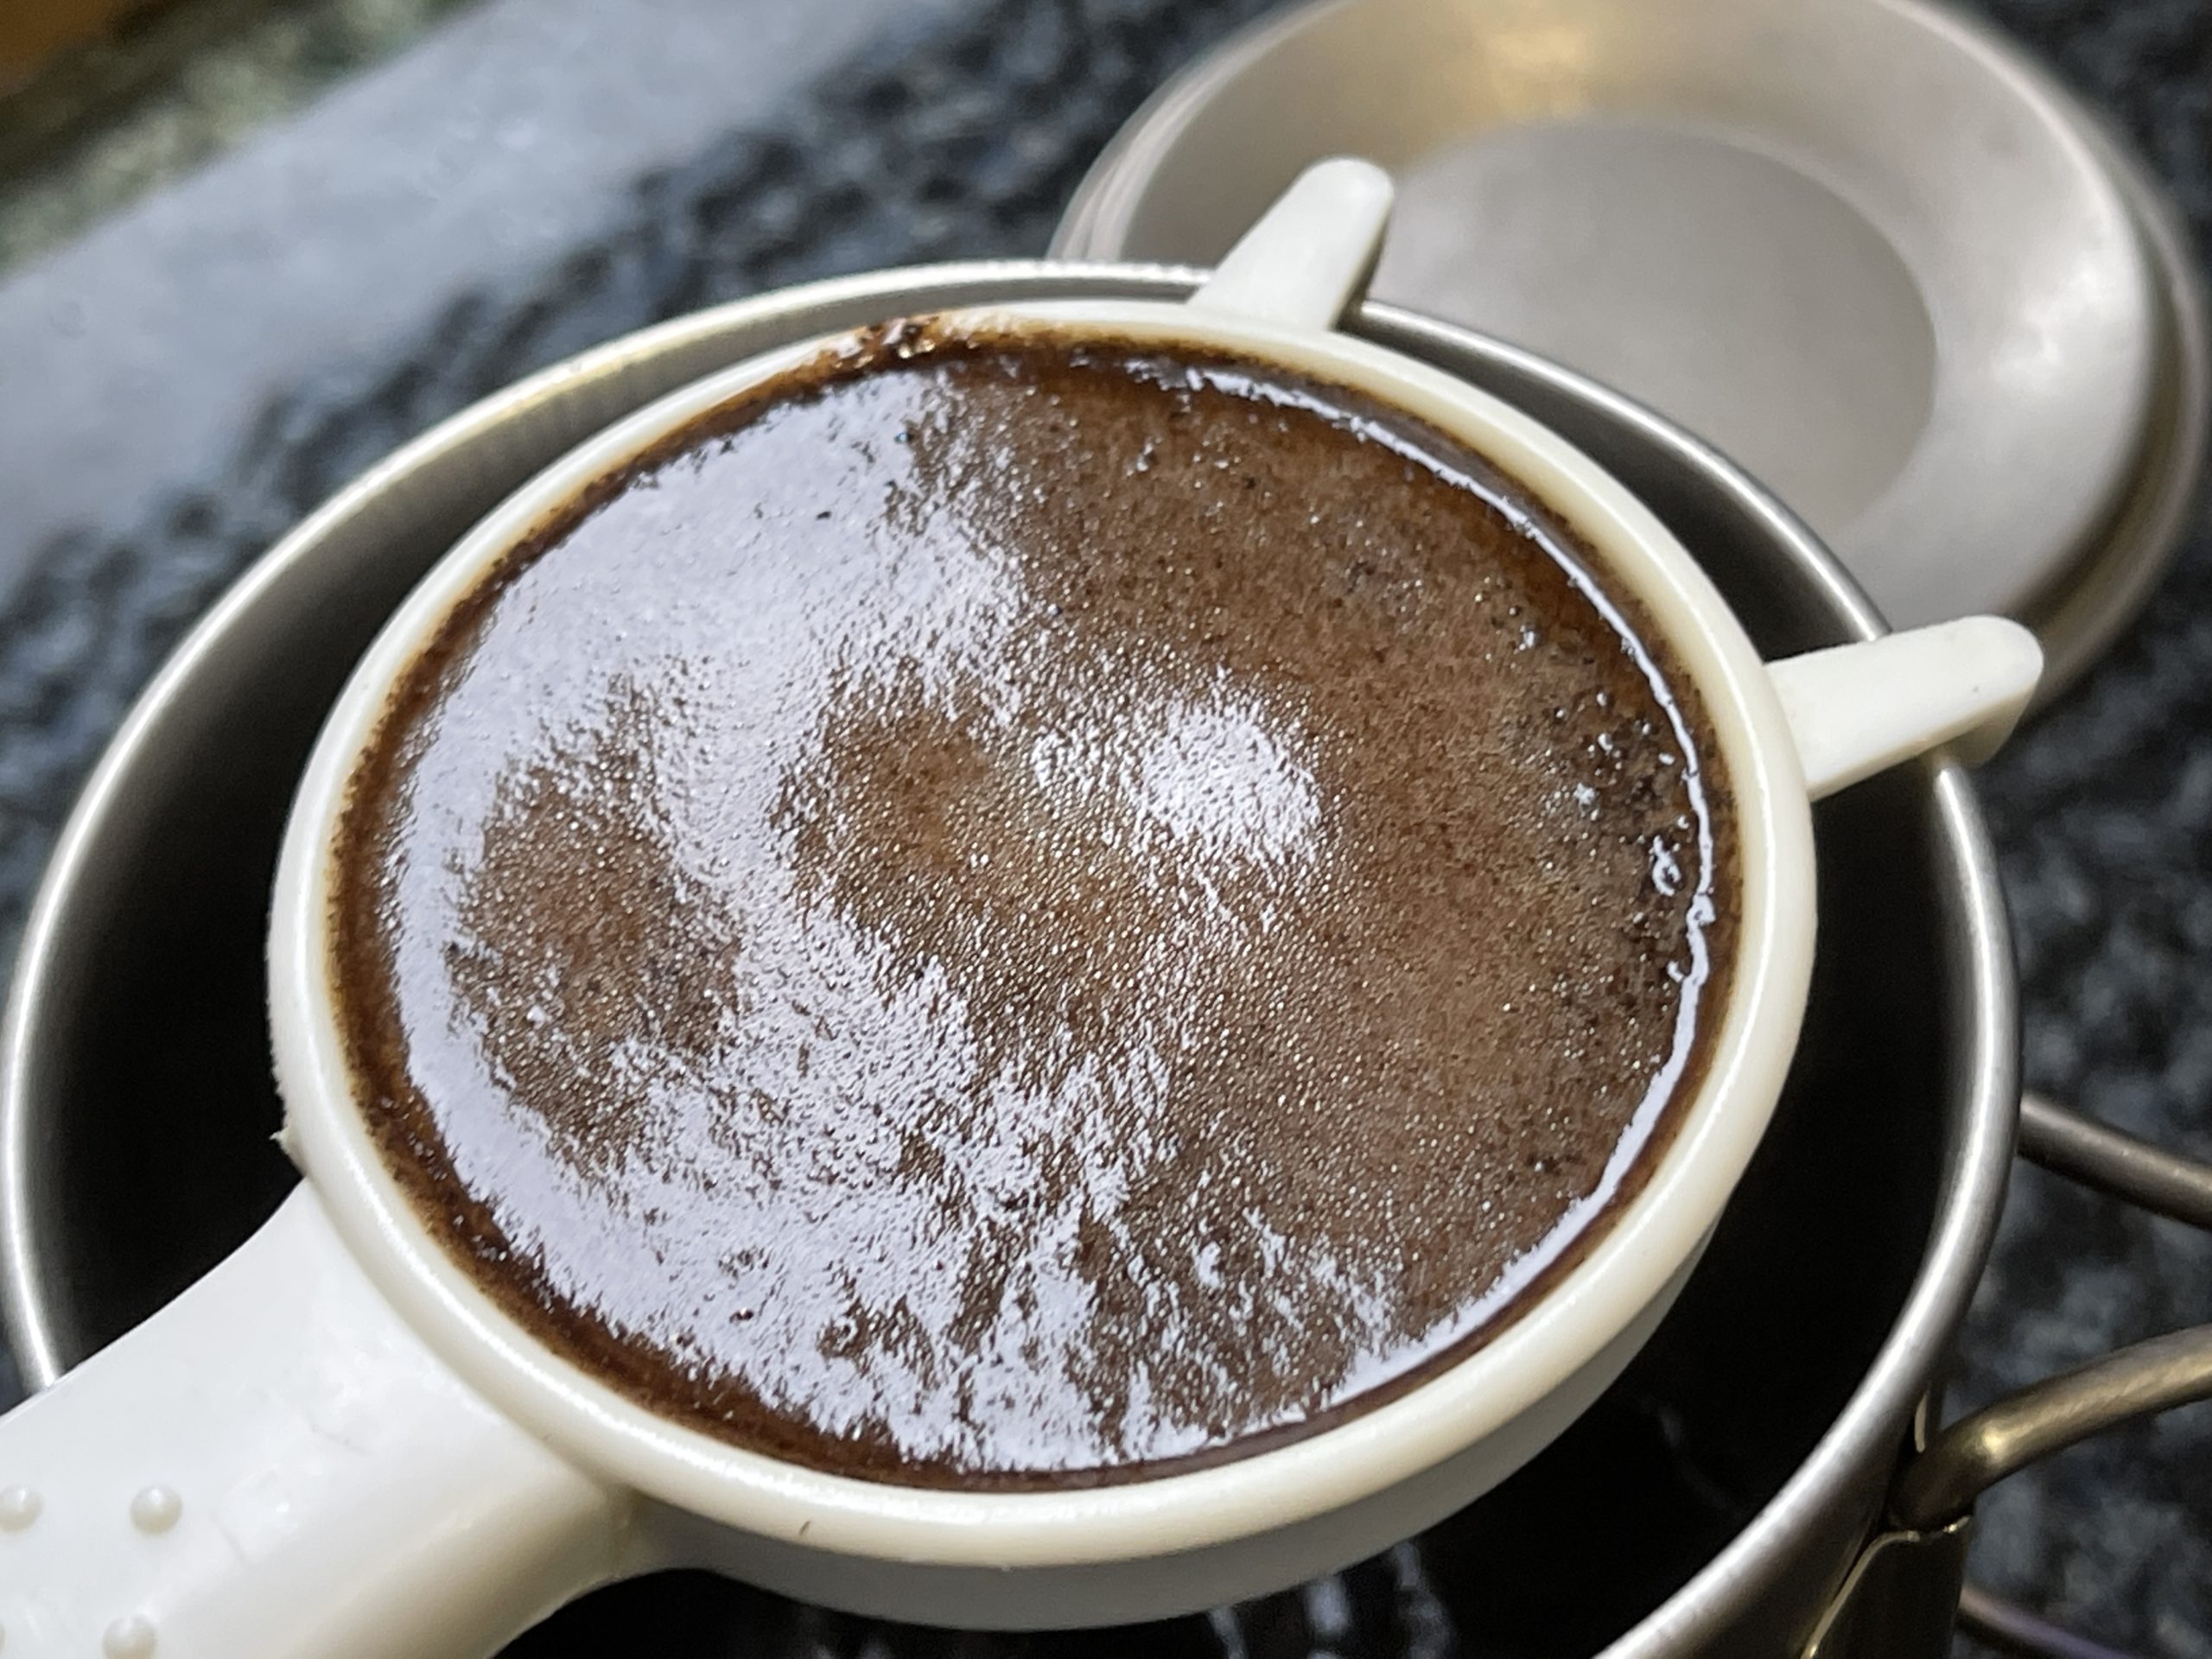
3 I then carefully add water to the brim of the strainer and let it drain through.
Care is needed when filling the strainer so it does not overflow
4 It takes about 100ml to 150ml of water to make a strong brew. I top up with hot water.
I never drip all the water through as it is not necessary
5 I take mine black and no sugar when camping – but I do carry coffee creamer and brown sugar for caffeine and energy boost.
This gadget and method only generates used coffee grounds to dispose of, no paper filters and there is no comparison when it comes to the weight or price of this coffee maker when compared to other backpacking/camping coffee gadgets. And it can be used as a strainer as well!
This is an excellent coffee making kit for my haversack gear
The 30ml Nalgene bottle shown in the photo when “tap” filled (start to fill the bottle and tap it to settle the coffee grounds and repeat until no more settling happens) can hold two measures of ground coffee.
The Wind Shield
It worked better than its predecessor, keeping the heat on the mug. It will also fold up small enough to store in the stove slip case with the stove and the Burt’s Bees tin.
The next test will be later in the week when I can get out for a walk.
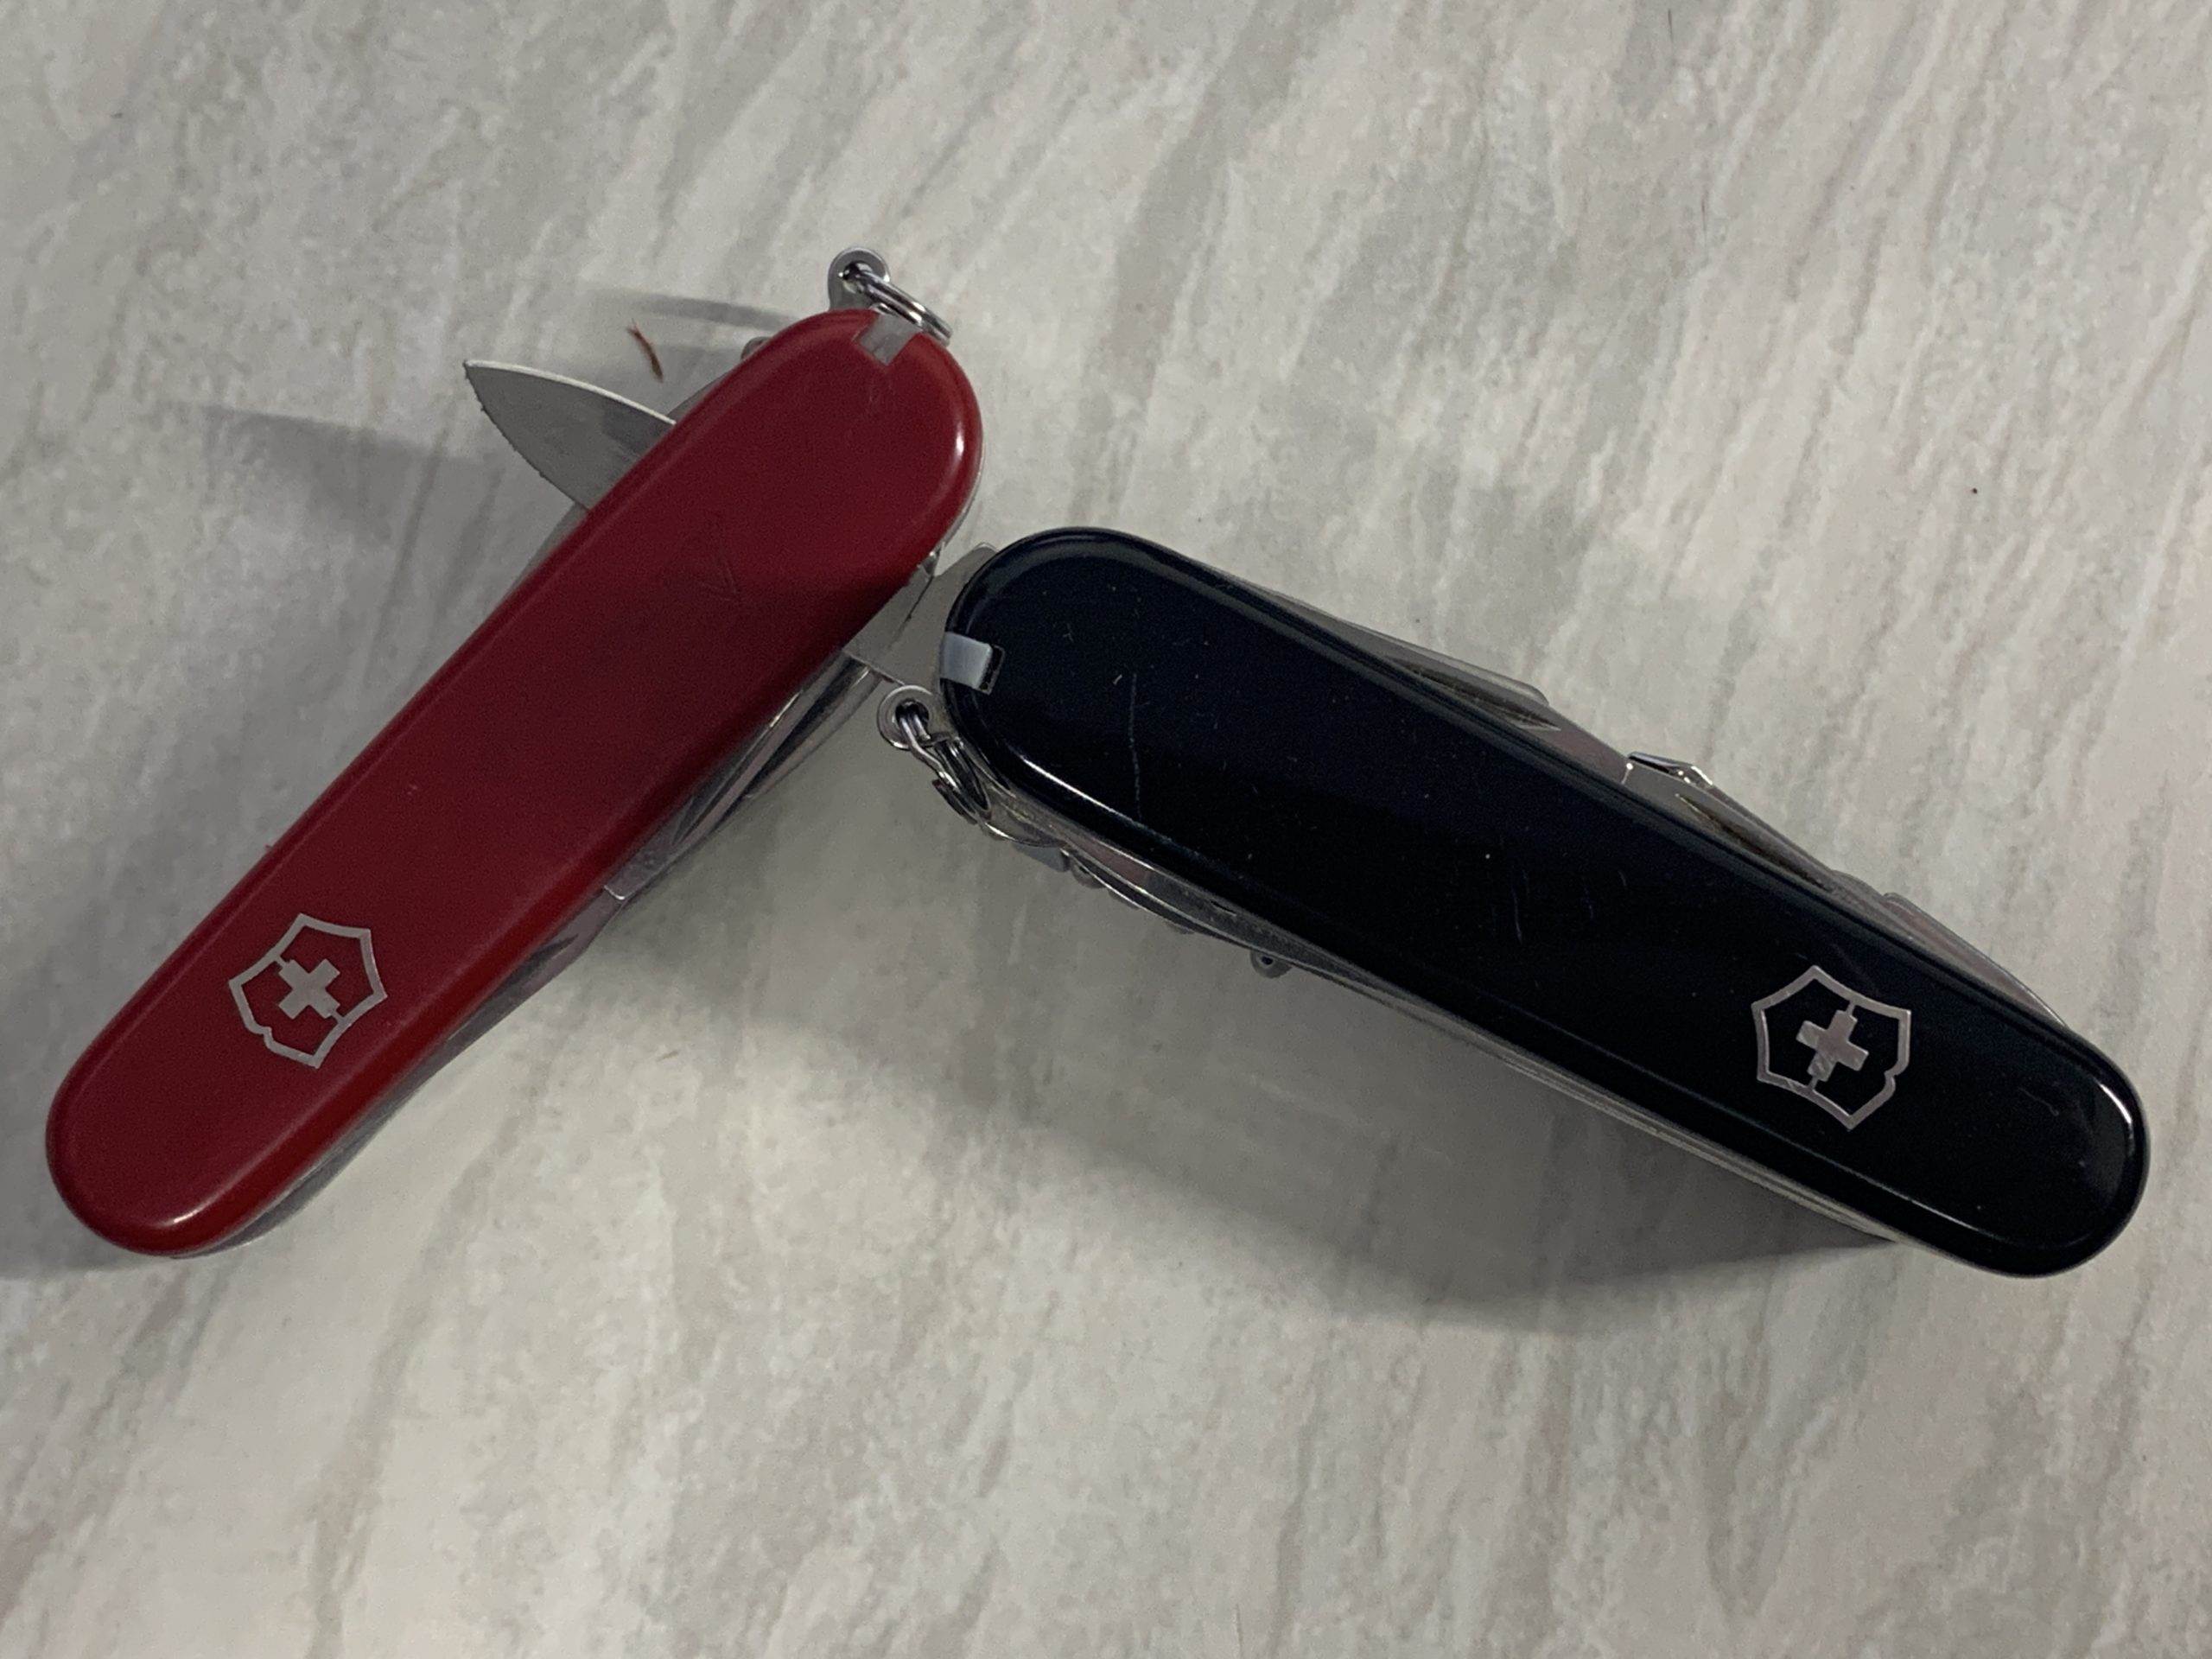
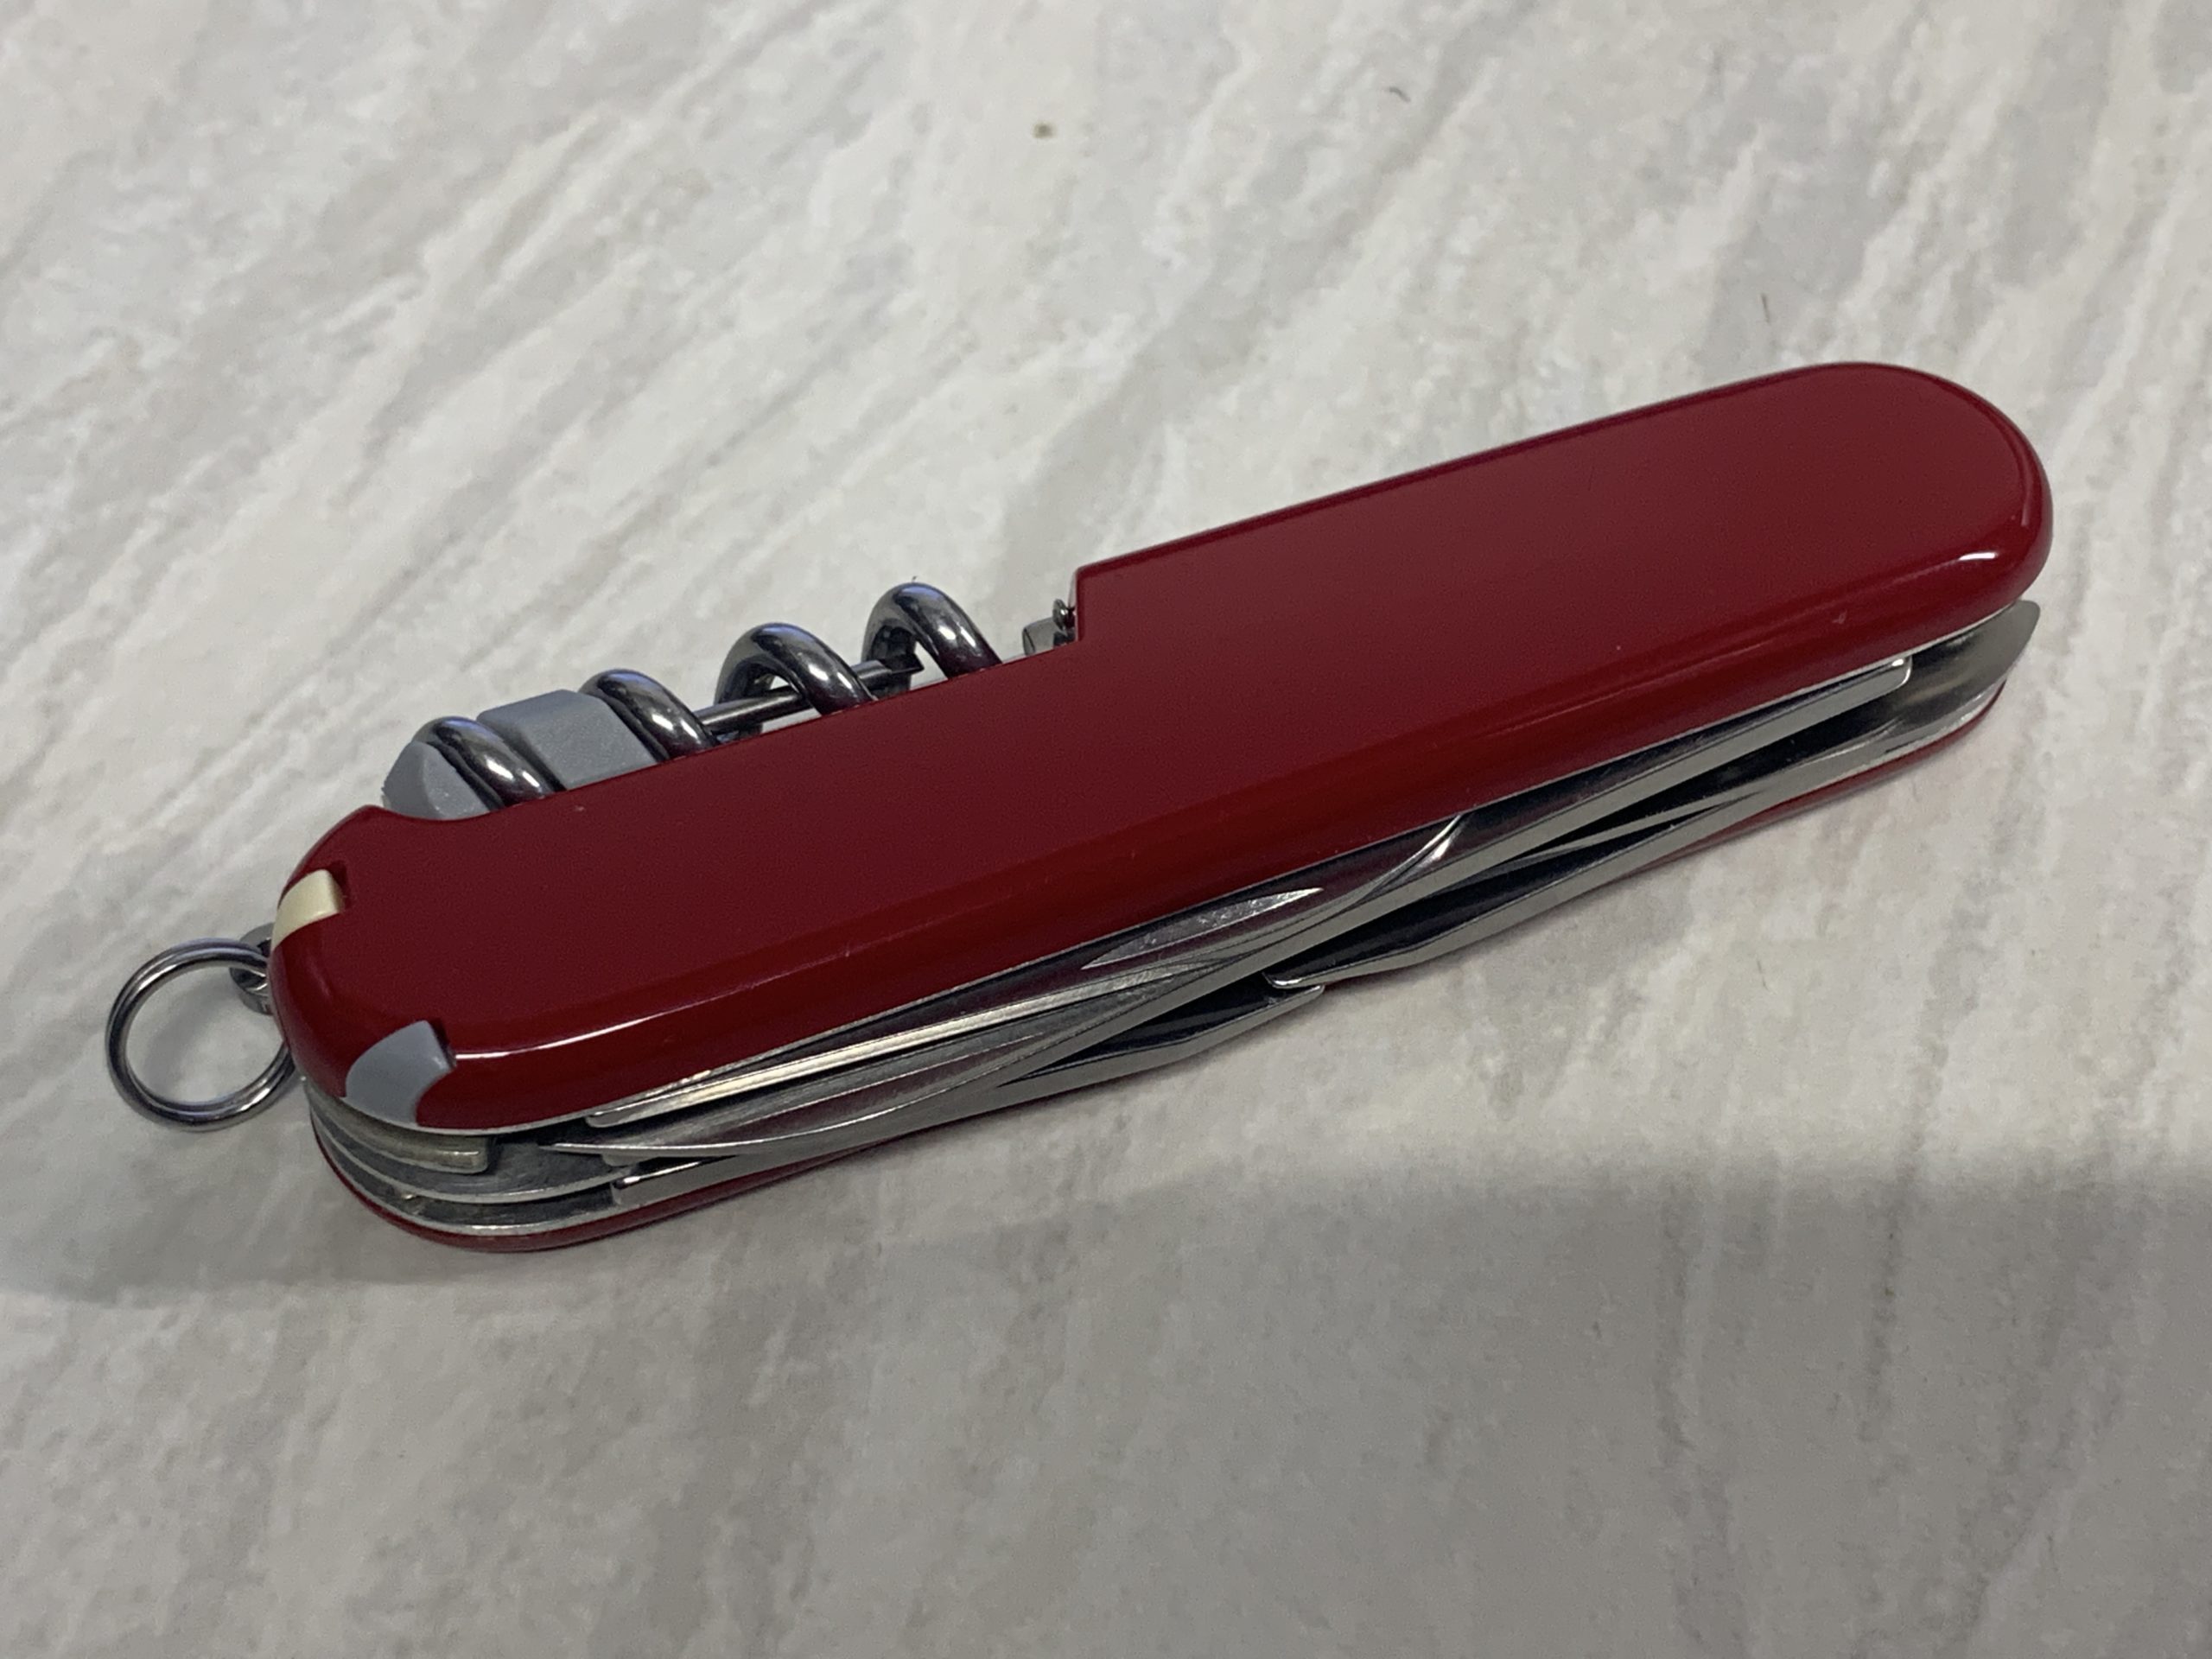
One of the scales on my Victorinox Camper Swiss Army knife had come loose so I bought some replacements from eBay and went for an upgrade. The new scales do not have the Camper logo but do have a slot for a pen and they came with a new set of tools, toothpick, tweezers, pin and pen. There was a choice of colours but after thinking about it I chose the classic red.
After watching a few YouTube videos I bought a desk clamp from Amazon to apply even pressure to fix the scales.
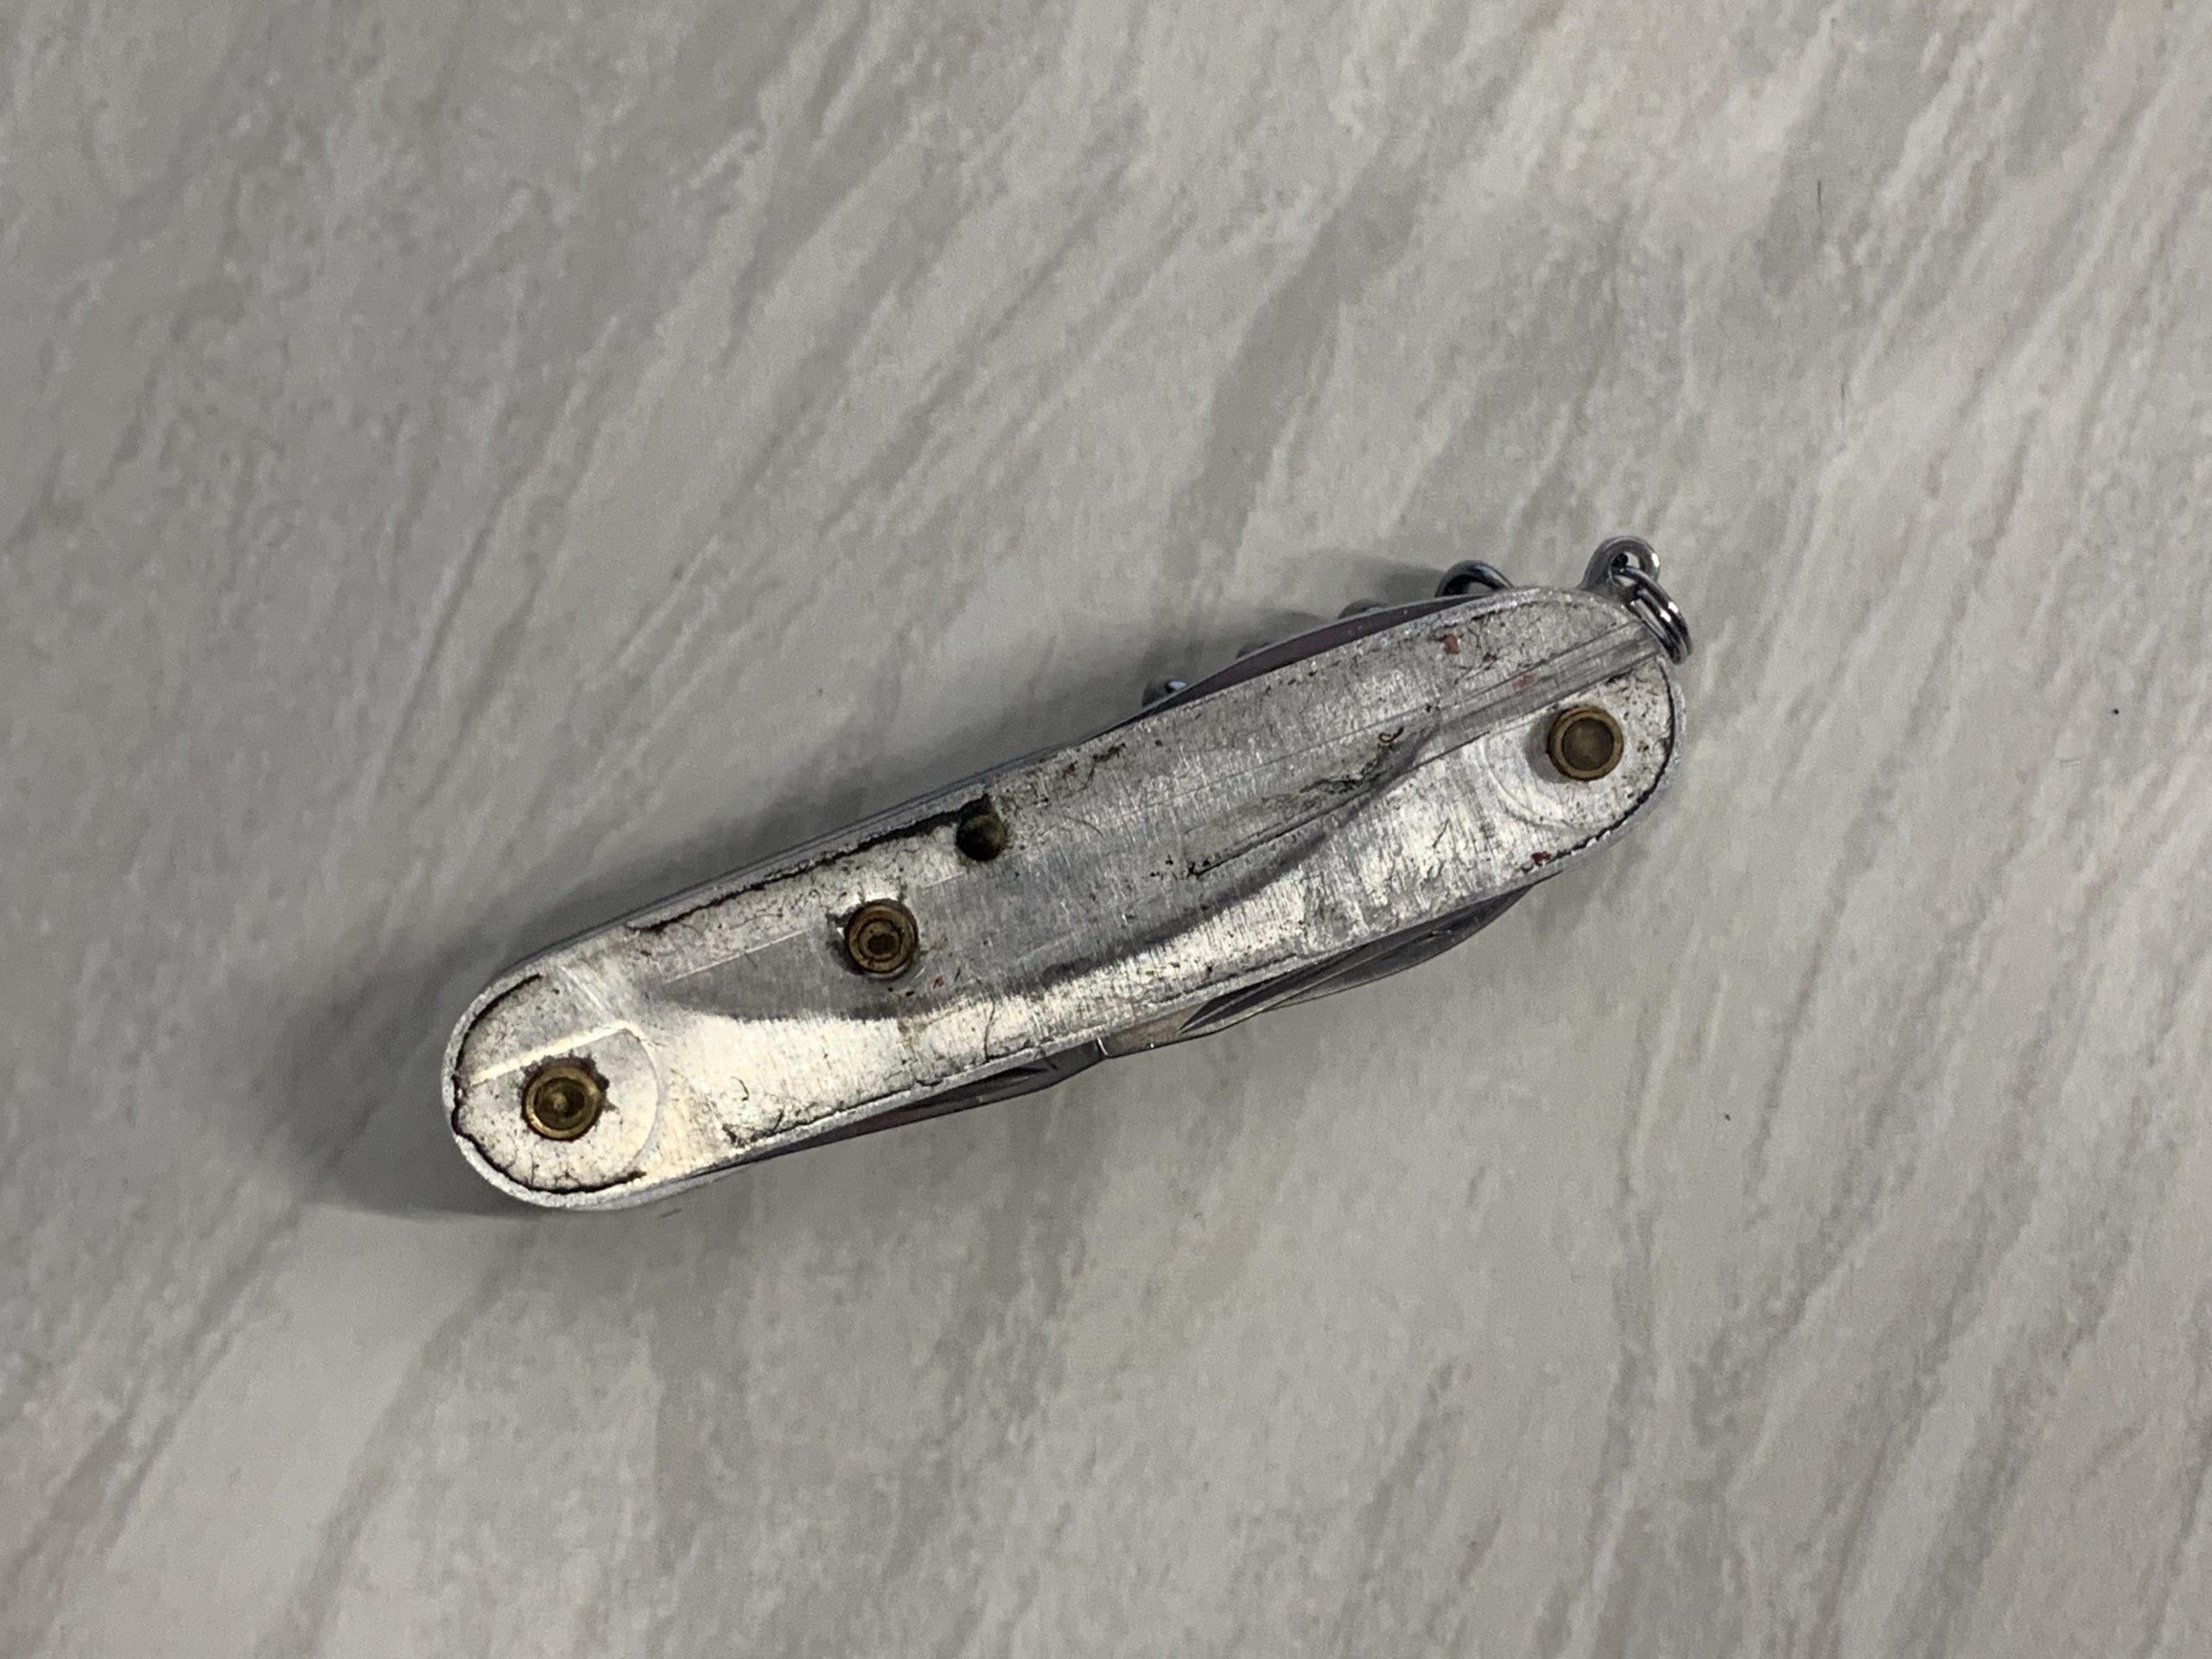
I removed the scale tools and the old scales easily popped off.
Removing the old scales using a Victorinox Swiss ChampNo scales before cleaning
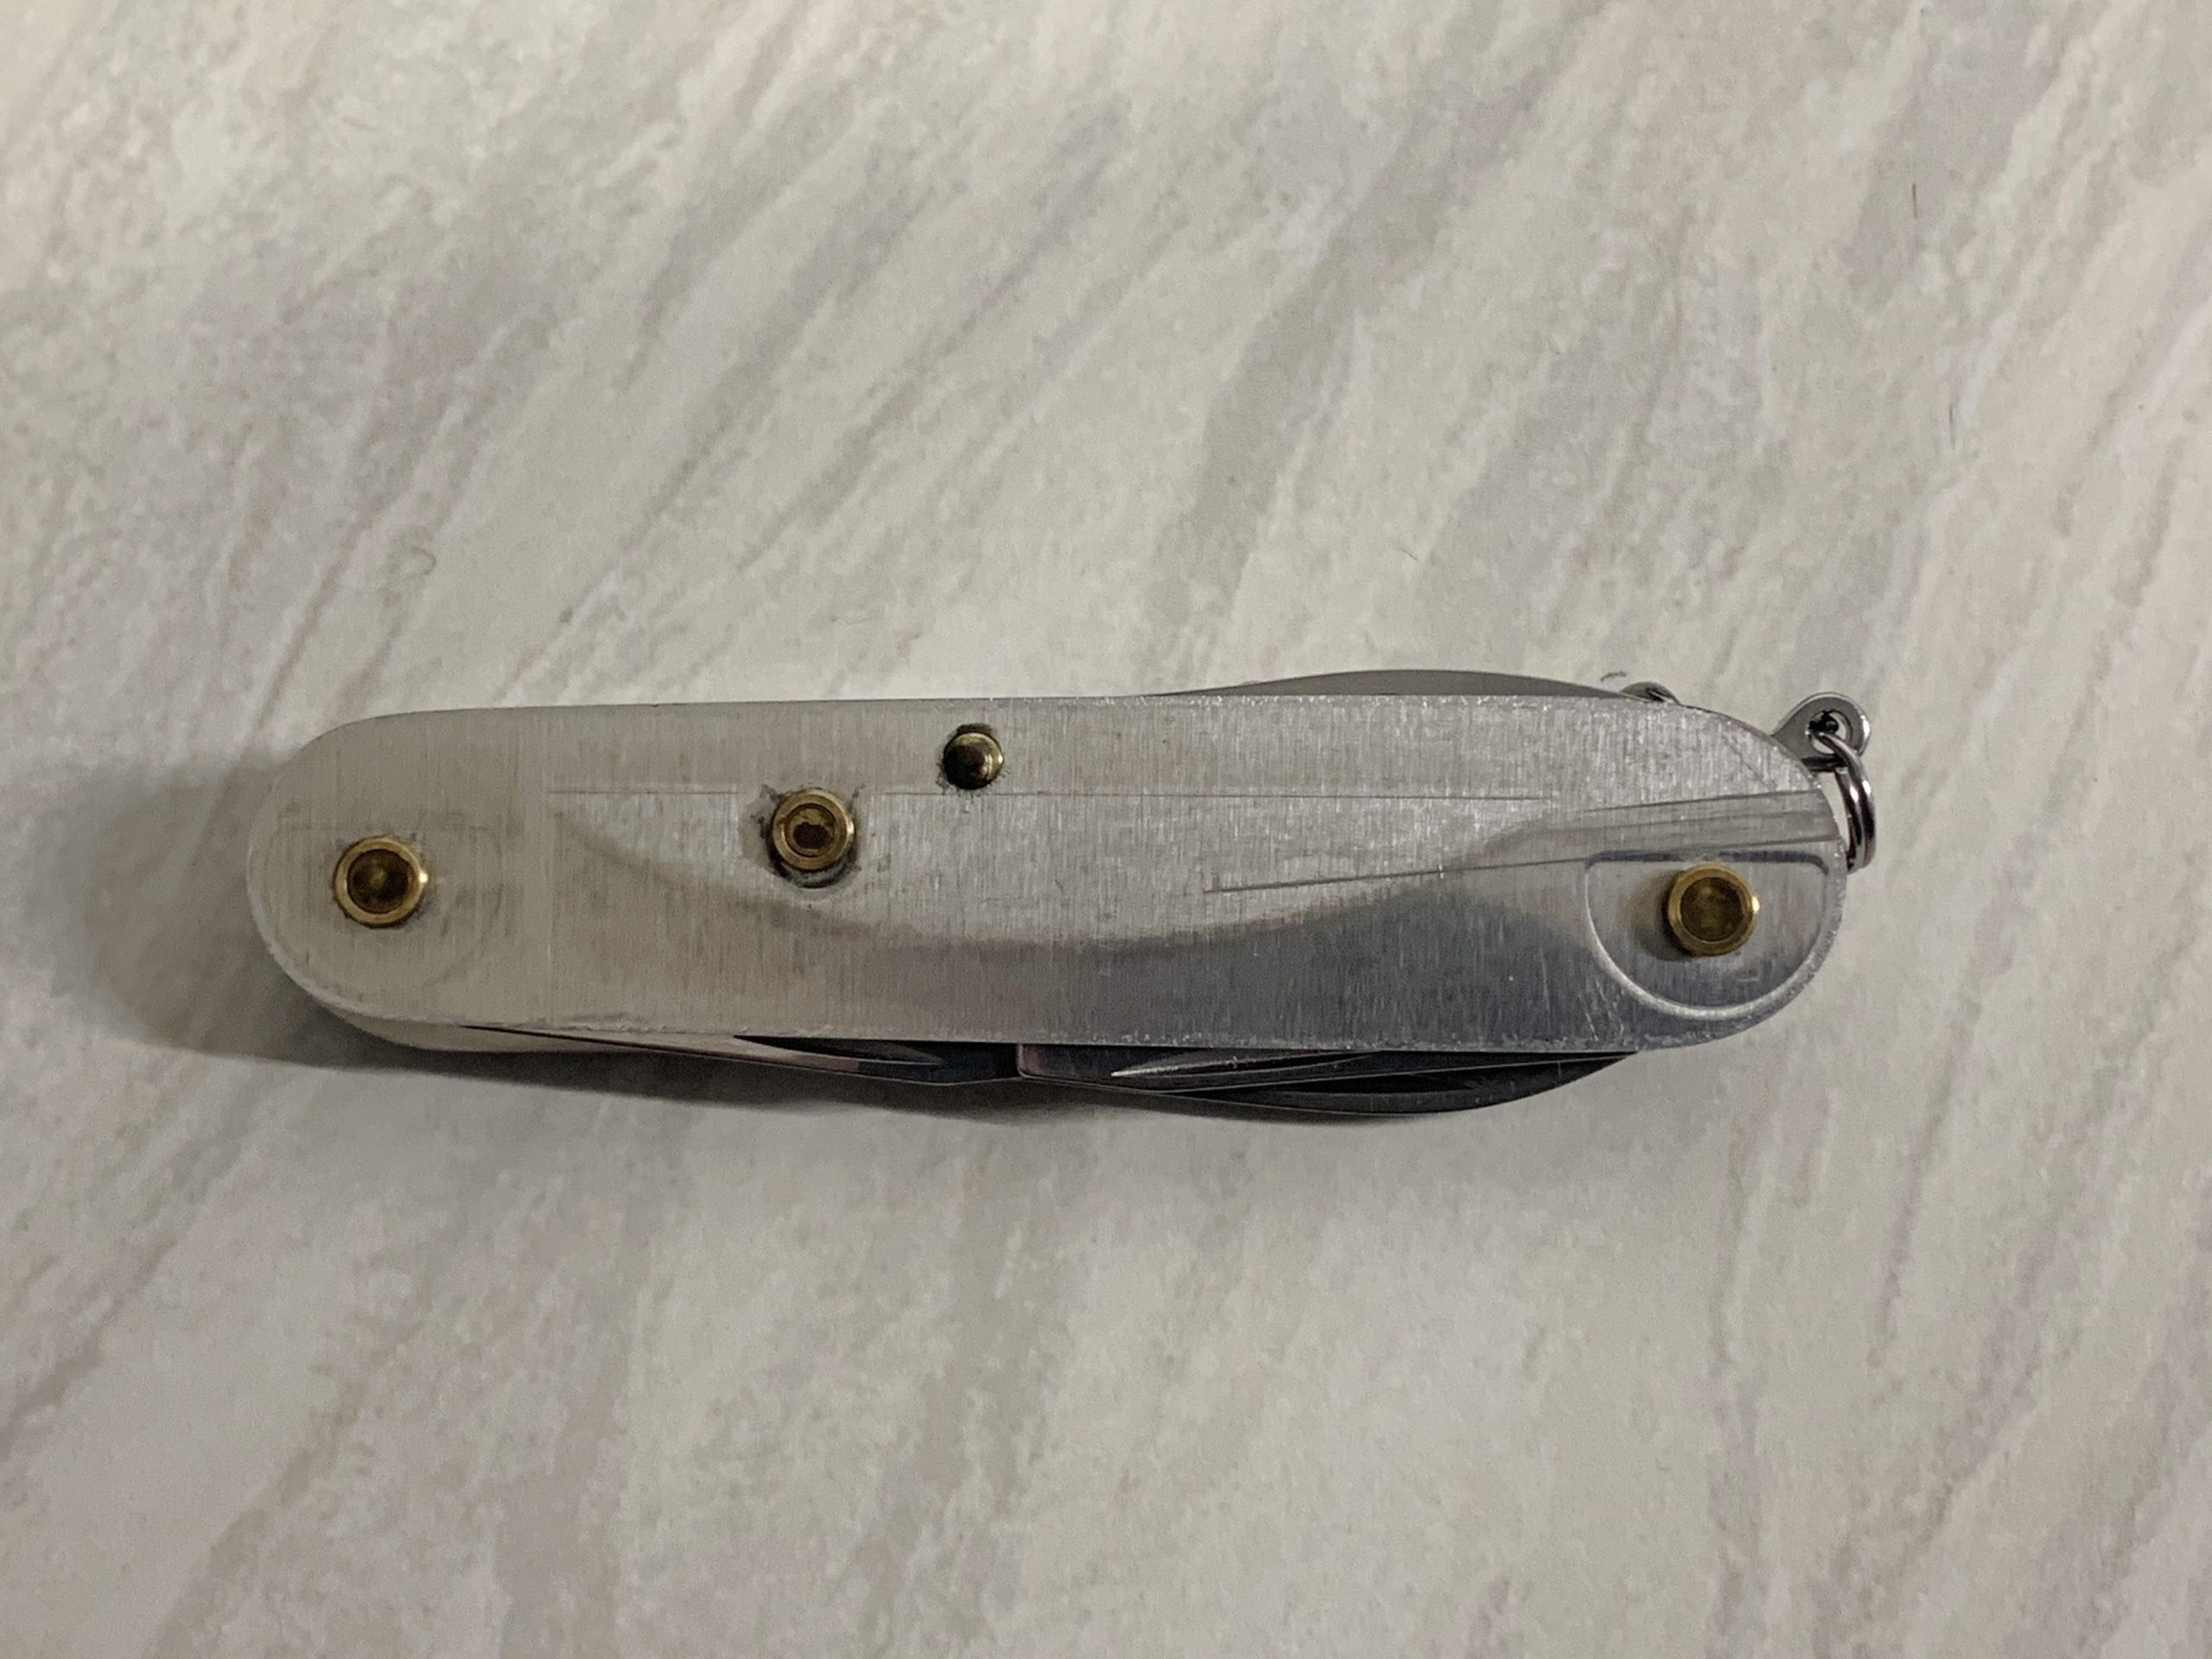
Once the scales were removed I took the opportunity to throughly clean the knife with soapy water and a washing up sponge and then oiled all the blade joints with some WD-40 applied with a cocktail stick so the knife was not soaked in oil. (I regularly use the large blade for cooking and I do not want excess WD-40 in my food.)
No scales, cleaned and oiled
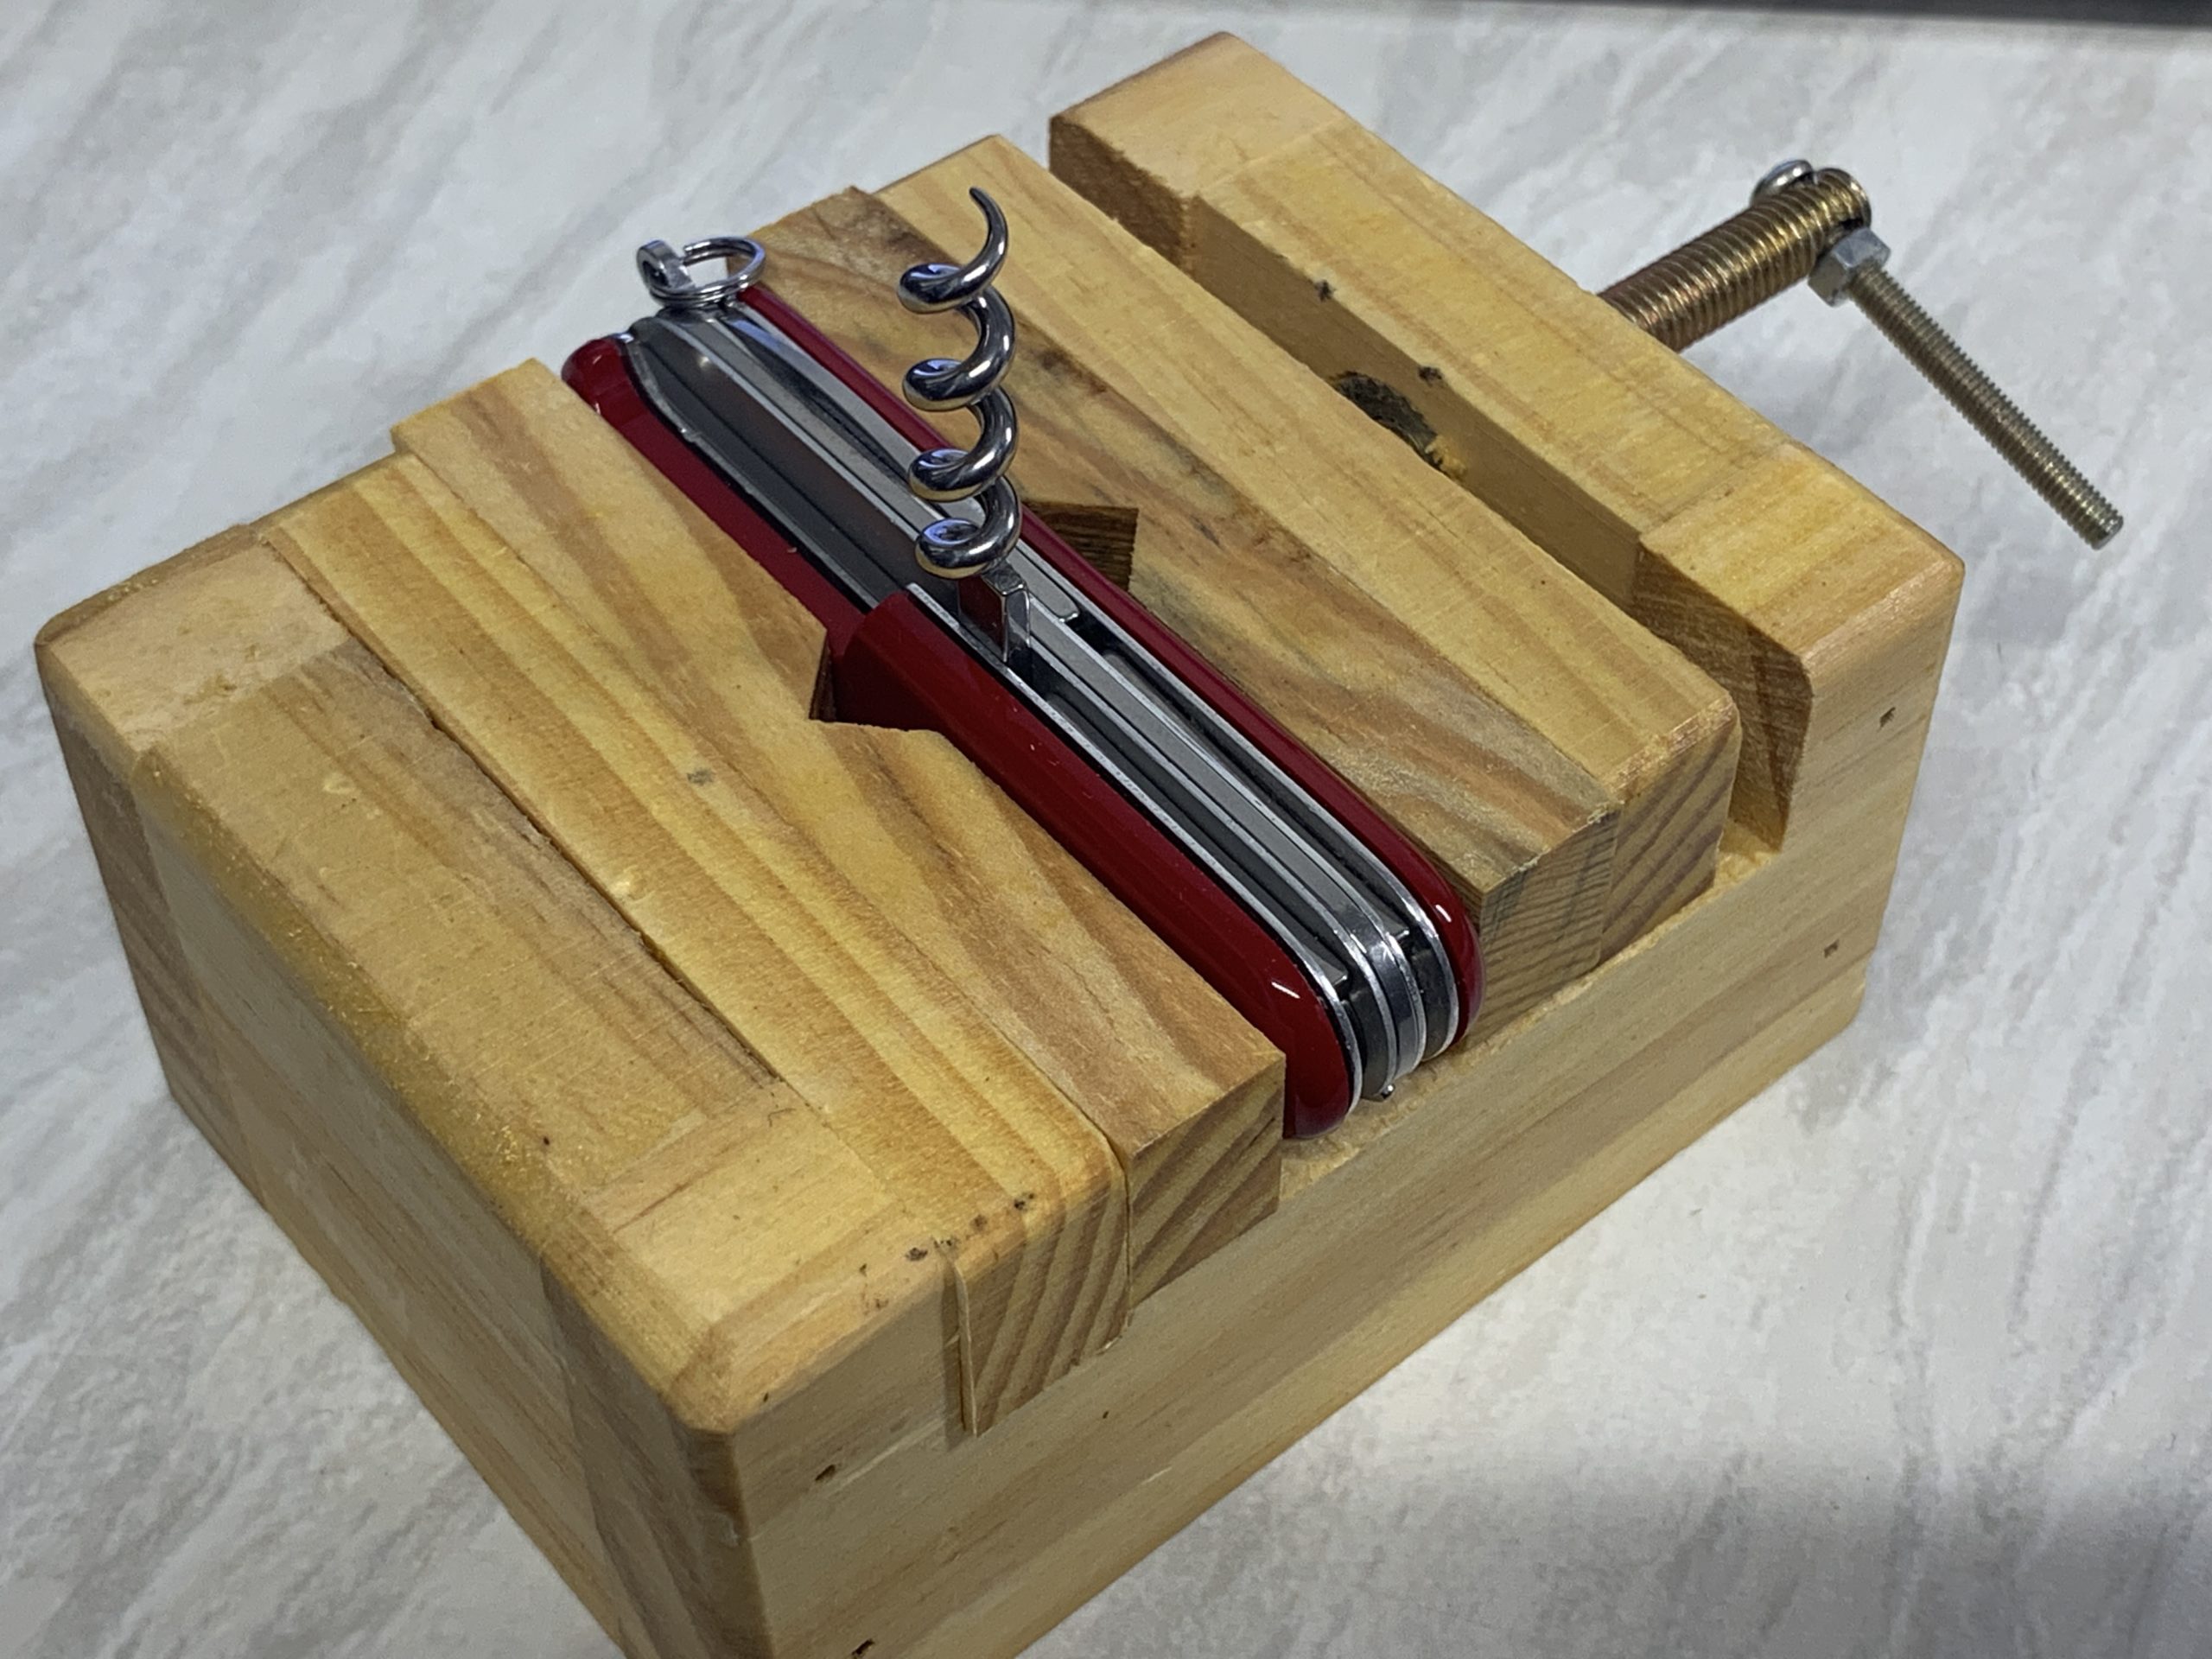
To help to fix the new scales I soaked them in hot water to soften them slightly. After a couple of minutes in the water I dried them with kitchen towel and then assembled the knife and scales in the wooden vice. Ensuring everything lined up under light pressure in the vice.
The vice worked perfectly – the pressure was applied evenly and both scales popped on securely. A bit of extra pressure closed all the gaps between the scales and the knife body.
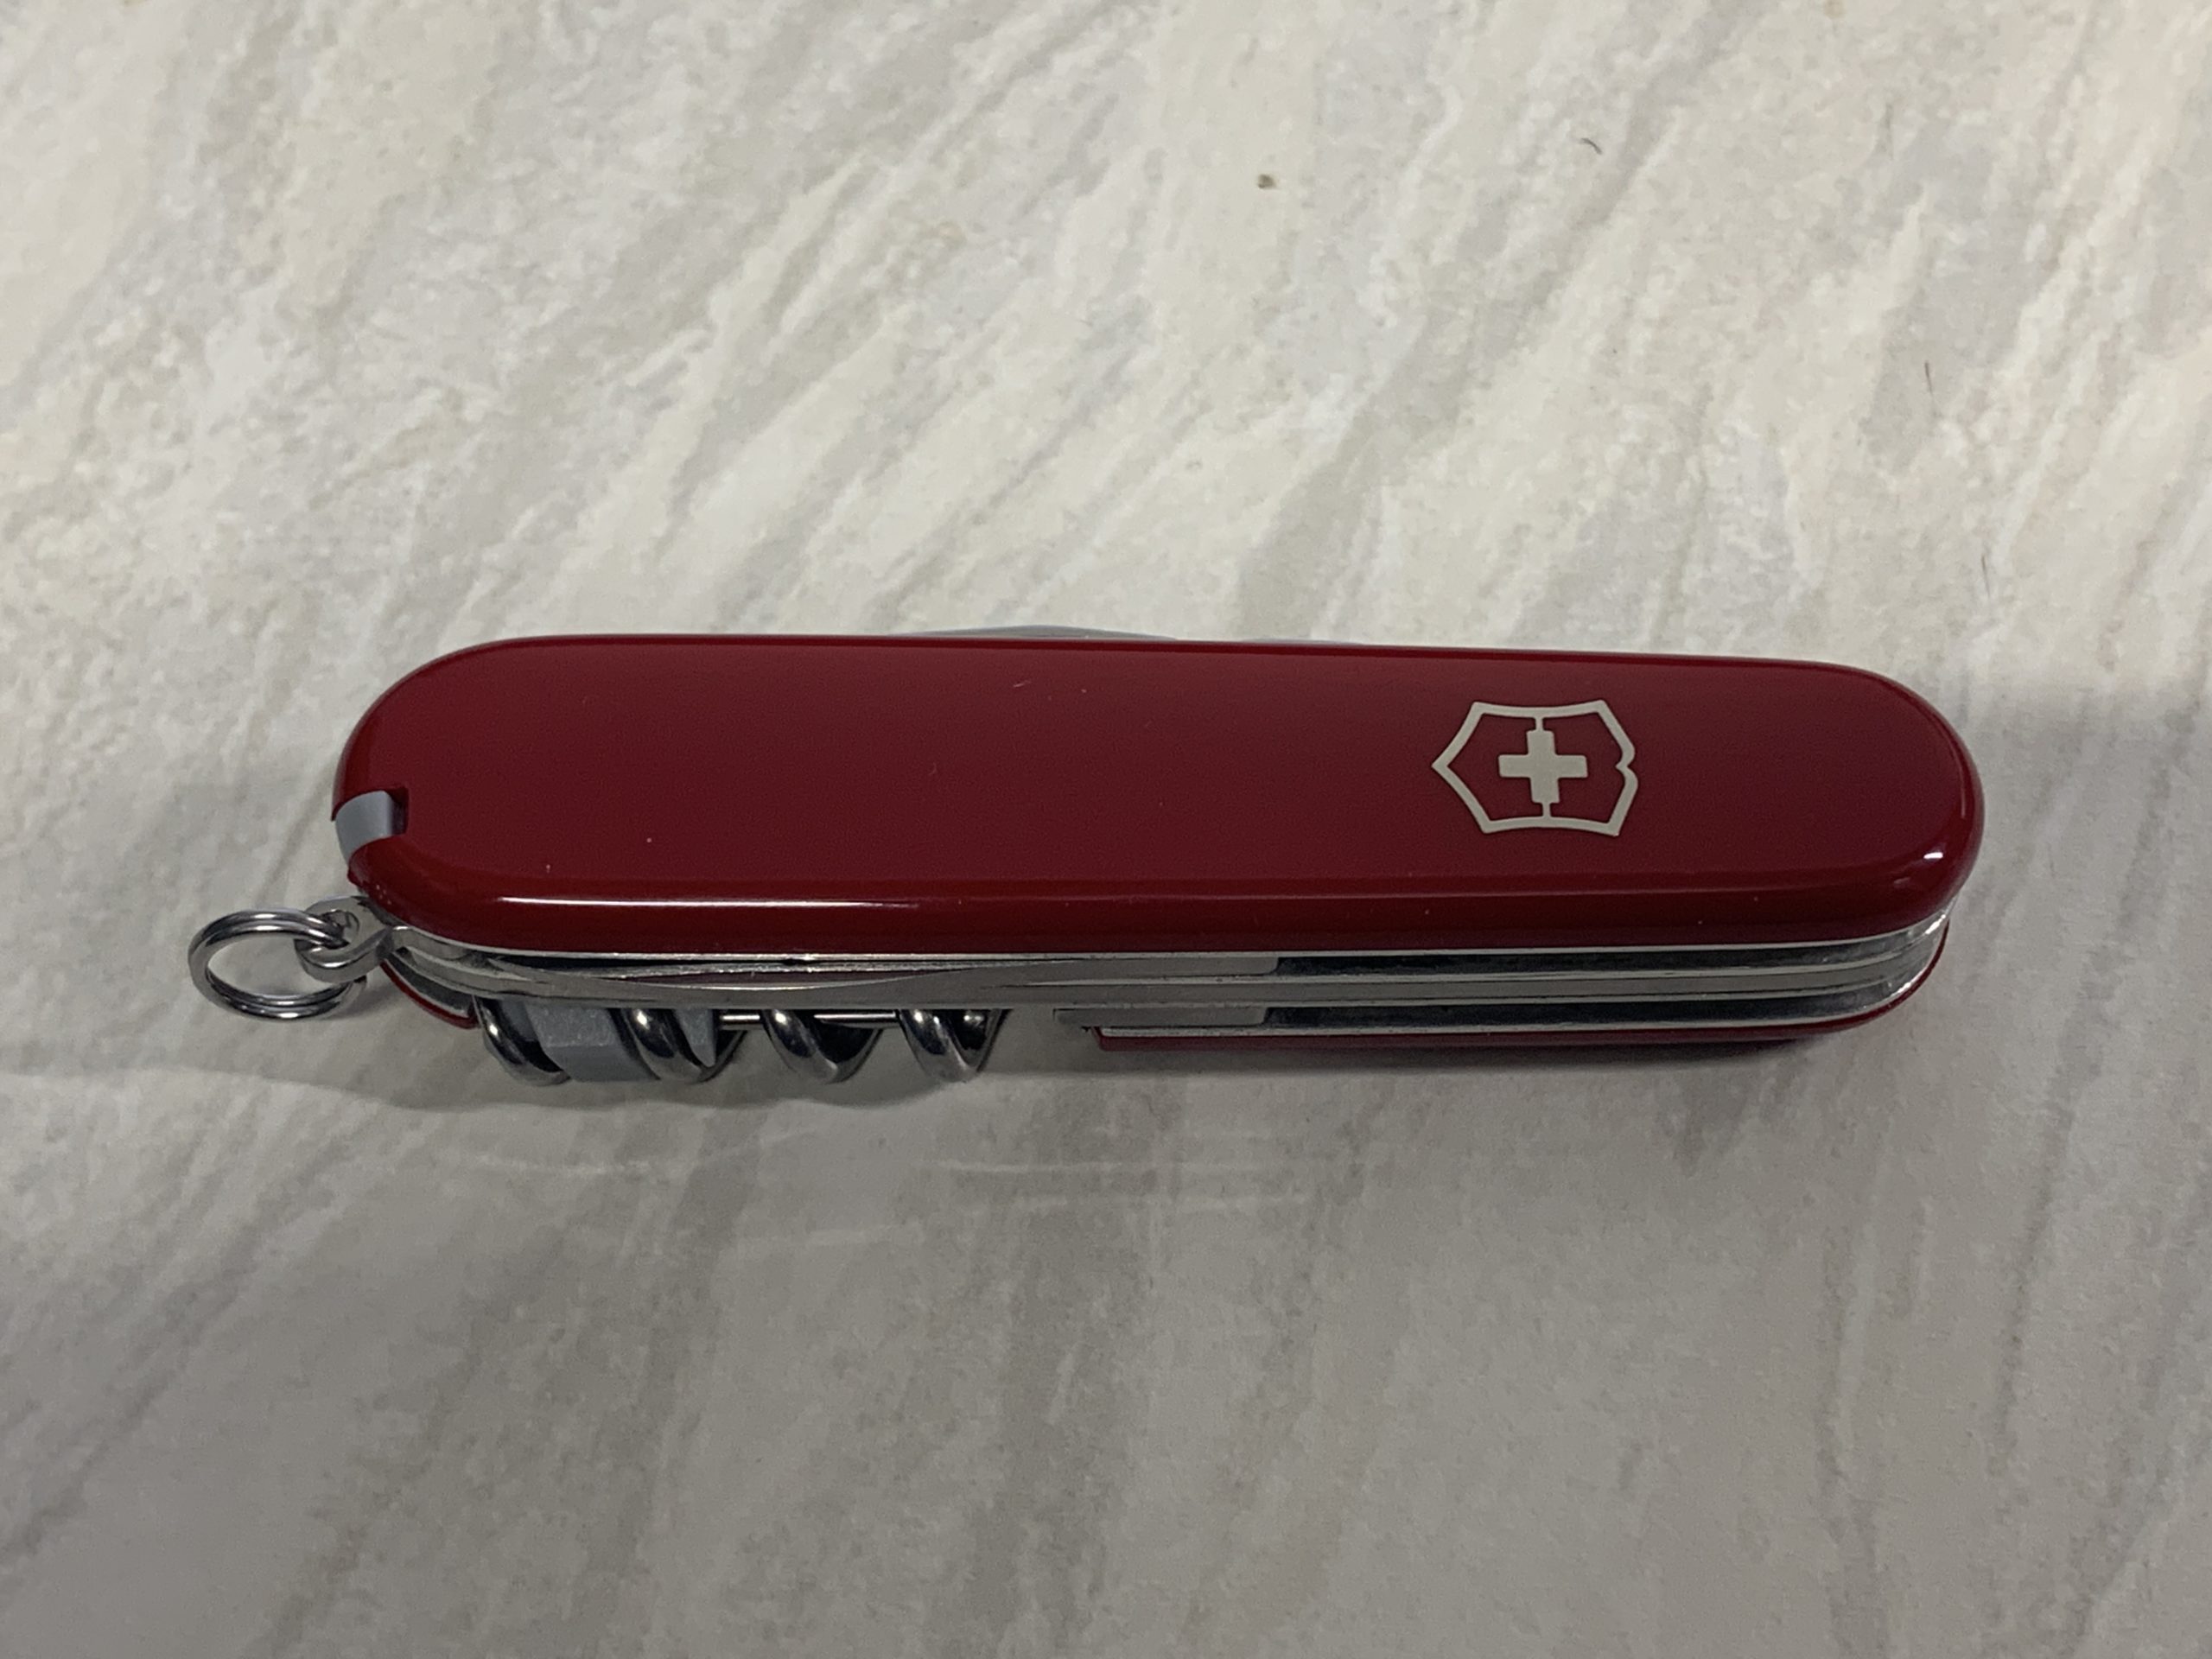
New scales
A quick check that the new scales were fitted correctly, a polish and fitting the removable tools, including a mini screwdriver in the corkscrew and the job was finished.
Upgraded Victorinox Camper knife with a pin, pen and screwdriver in the corkscrew
Top tip – use this type of vice – the wooden jaws do not damage the scales and the pressure is applied evenly when attaching the scales.
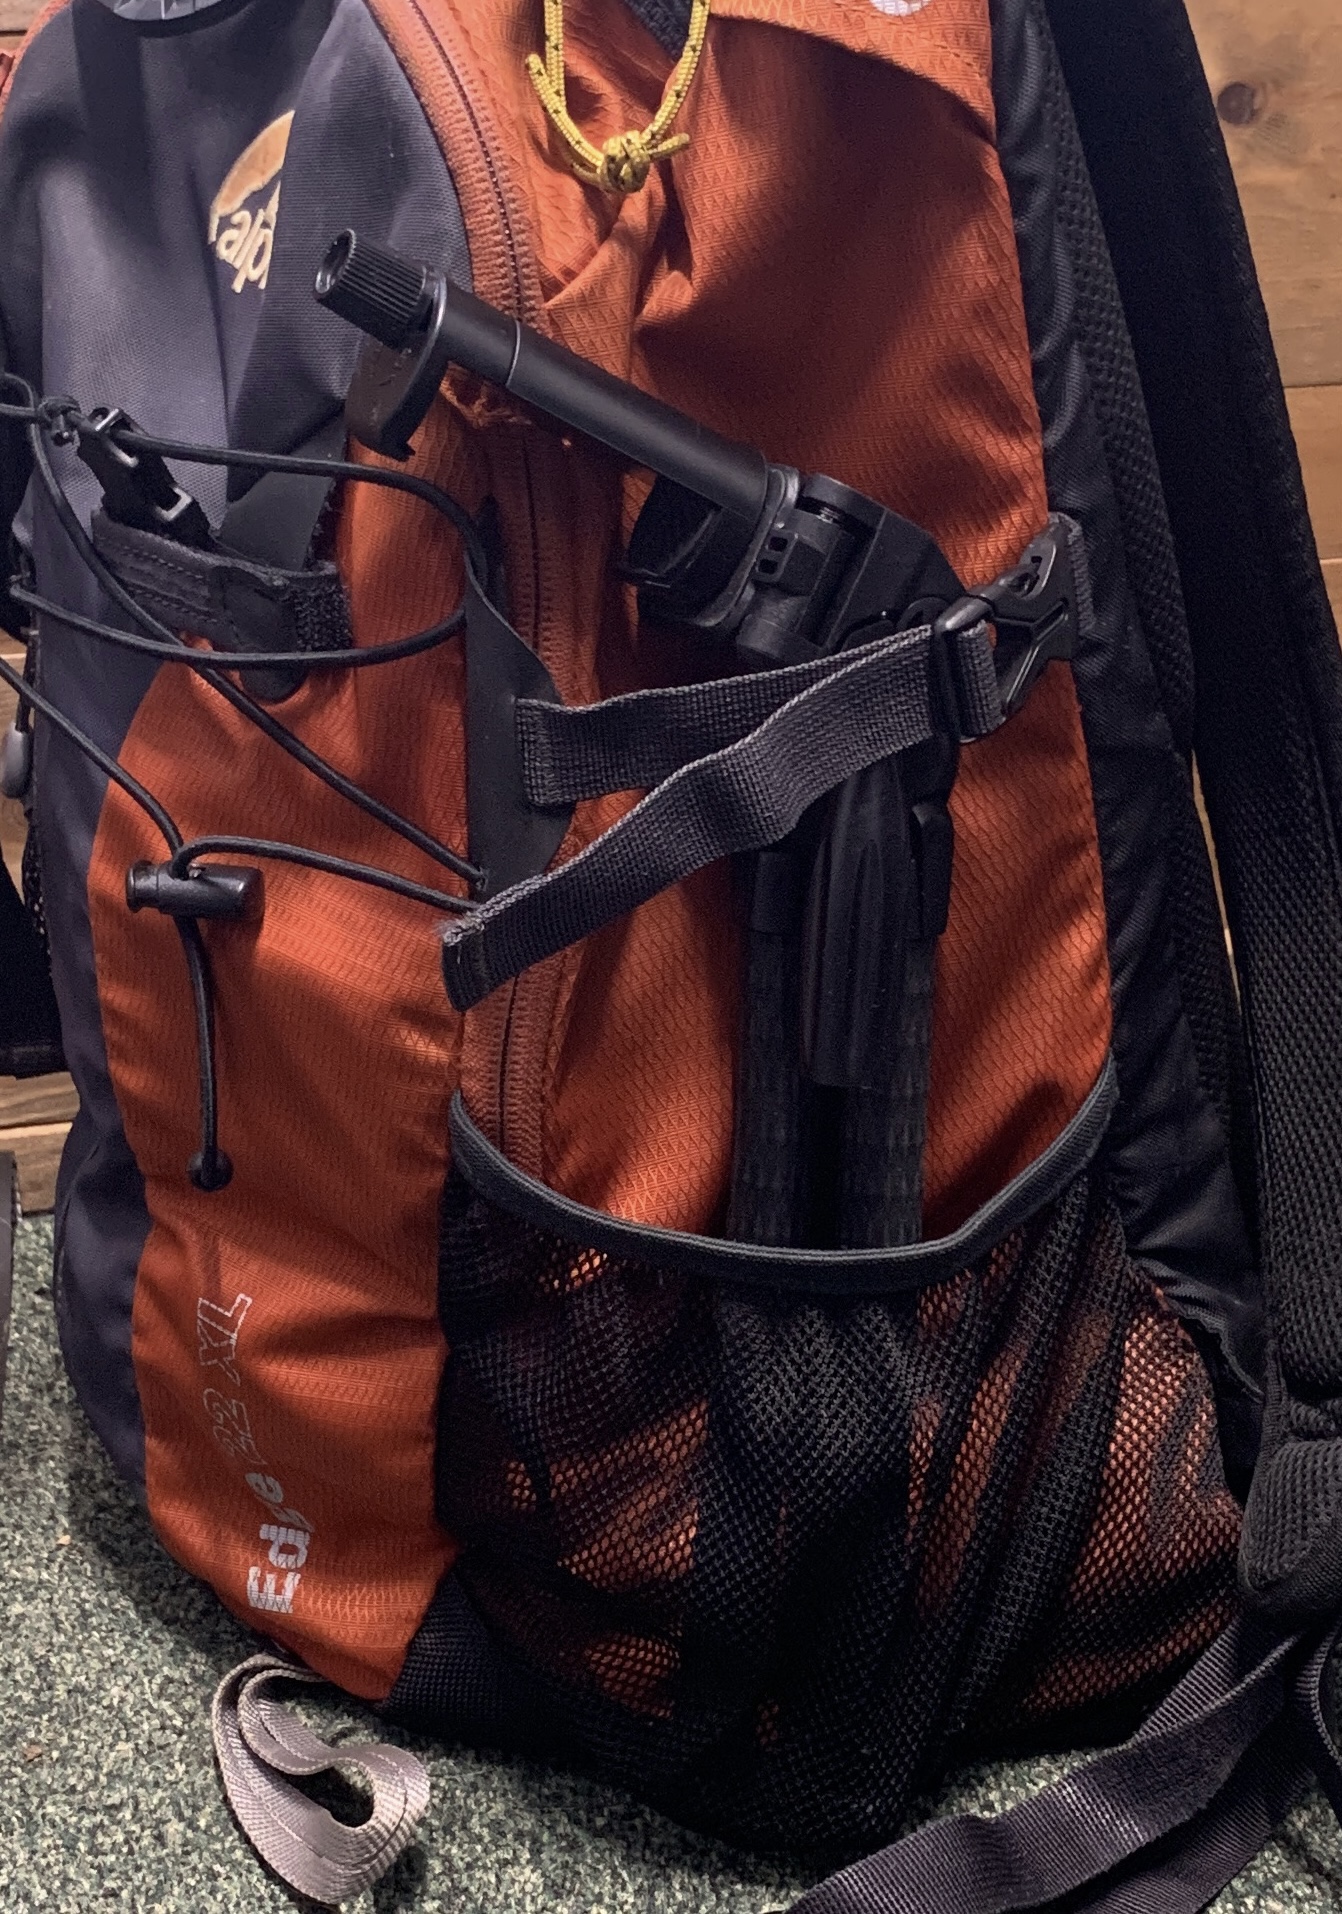
Now the MSc has been passed – I will be able to get out and walk more. I have bought a small, rugged tripod, that can be attached to my day pack – I want to get some long exposure exposure shots, to steady the camera when it is windy and May be even some video.
The legs of the tripod look like they will survive some mud and water. The smartphone mount that came with it is very simple in design so it too should survive outdoor use.
The tripod also came with a Bluetooth camera shutter release and fittings to mount a camera or Go-Pro.
The meeting this afternoon was cancelled so I took the opportunity to at last walk further than just round the village.
I bought this stove back in January but have not had an opportunity to use it. I keep it in a pack in the boot of the car, with the Sierra cup, some water and coffee, for days like today when I had not planned for a brew stop.
It worked OK but there were a lot of flames and it left more residue in the stove than I expected. But it was compact, easy to carry with three pots of fuel and a wind shield packed inside it and it boiled about 300ml of water on one fuel portion (in windy conditions). As a stand-by stove with well packed fuel for long term storage it is just what I was looking for.
This website uses cookies to improve your experience. We'll assume you're ok with this, but you can opt-out if you wish.AcceptRead More
Privacy Overview
This website uses cookies to improve your experience while you navigate through the website. Out of these, the cookies that are categorized as necessary are stored on your browser as they are essential for the working of basic functionalities of the website. We also use third-party cookies that help us analyze and understand how you use this website. These cookies will be stored in your browser only with your consent. You also have the option to opt-out of these cookies. But opting out of some of these cookies may affect your browsing experience.
Necessary cookies are absolutely essential for the website to function properly. This category only includes cookies that ensures basic functionalities and security features of the website. These cookies do not store any personal information.
Any cookies that may not be particularly necessary for the website to function and is used specifically to collect user personal data via analytics, ads, other embedded contents are termed as non-necessary cookies. It is mandatory to procure user consent prior to running these cookies on your website.